Porsche Repair: Safe DIY Guide for Enthusiasts
Learn safe, practical Porsche repair techniques with step-by-step guidance, tool checks, and maintenance tips. This Home Repair Guide tutorial helps homeowners diagnose common issues, source parts wisely, and know when to call a professional.

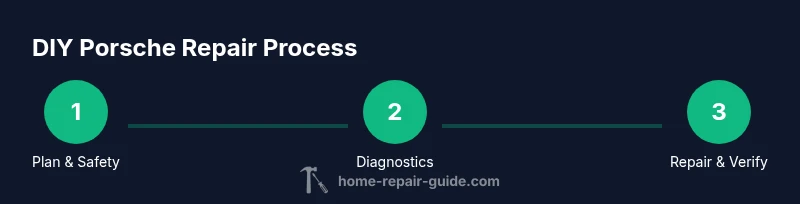
In this guide, you’ll learn practical Porsche repair steps you can perform safely at home, with emphasis on planning, essential safety, and when to call a professional. You’ll cover common tasks, diagnostic checks, tool selection, and maintenance routines that help keep your Porsche reliable and road-ready. The format follows a clear quick answer, a detailed body, and actionable steps.
Understanding Porsche repair: scope, safety, and planning
Porsche repair covers everything from routine maintenance to component replacement. For homeowners and hobbyists, the goal is safety, reliability, and learning. Start by defining the repair scope for your specific model year and trim, because modern Porsches use advanced electronics and unique fasteners. According to Home Repair Guide, starting with a clear scope and safety plan reduces risk and keeps costs predictable. Gather the model-specific service manual if possible, and verify any recalls or service campaigns before you begin. Establish a dedicated, well-lit workspace, a distraction-free environment, and a clean surface to lay out parts. Having a plan helps you sequence tasks, gather required tools, and minimize time under the car. Model-specific quirks—like torque specs, oil types, and sensor locations—are the difference between a successful repair and a frustrating delay.
- Focus on non-destructive tasks first to build confidence.
- Create checklists for safety, tools, and parts.
- Keep a repair diary for future reference and maintenance planning.
Tools and safety gear for Porsche repair
A successful Porsche repair starts with the right tools and proper PPE. Essential safety gear includes eye protection, cut-resistant gloves, and hearing protection if using power tools. A clean, organized workspace reduces the risk of slips or dropped parts. For tools, you’ll want a metric socket set with deep wells, a calibrated torque wrench, a floor jack with quality jack stands, wheel chocks, and an OBD-II scanner capable of reading Porsche codes. Additional items include an oil drain pan, a funnel, oil filter wrench, and a torque-angle gauge for fastener accuracy. Use a magnetic tray to keep small parts from rolling away. For model-specific tasks like brake work or cooling-system service, double-check the service manual to confirm required fasteners and torque values. Pro tip: label fasteners by location to avoid reassembly mistakes.
- Always wear PPE and secure the car properly with wheel chocks and stands.
- Use the correct torque specs and follow the service manual for reassembly.
- Keep spare rags and solvent for spills; never mix used oil with cleaners.
Common Porsche maintenance tasks you can tackle at home
Homeowners and enthusiasts can perform several non-critical tasks that save time and cost when done carefully. Routine oil and filter changes, air and cabin filter replacements, brake-pad inspection, and tire rotation are feasible with the right tools and a clean, level surface. Check the owner's manual for service intervals and the correct viscosity and oil specification for your model. For some tasks, especially those involving braking systems, cooling circuits, or air suspension, evaluate whether your mechanical experience matches the complexity and risk; if not, consult a professional. When performing maintenance, document the parts you replaced and the service date to track wear trends. Remember that Porsche engines and transmissions have tight tolerances; even minor mistakes can affect performance. Use OEM- or quality aftermarket parts that meet or exceed factory specifications where possible, and never compromise on critical safety components.
- Oil change frequency depends on model and usage; derive a schedule from the manual.
- Inspect hoses, clamps, and clamps for signs of wear; replace if firm or cracked.
- Record your maintenance to monitor future wear patterns and performance.
Step-by-step diagnostic approach
Diagnostic work requires a methodical approach to identify the root cause of a concern. Start by describing the issue and gathering vehicle history, then use an OBD-II scanner compatible with high-end European cars to read fault codes. Cross-reference codes with Porsche service information to narrow down probable causes. Visually inspect obvious fault areas such as ignition components, fuel lines, sensors, and wiring harnesses. If you have access to the Porsche technician mode, you can retrieve more detailed data from the CAN bus system. When a diagnostic code points to a specific area, verify by test driving with caution to reproduce the symptom safely. If codes persist after basic checks, consult service manuals or a professional; persistent codes may indicate an underlying issue that requires specialized tools or calibration.
- Avoid guessing; use codes and symptoms to guide your checks.
- Confirm intermittent codes with repeated tests before replacing parts.
- Document diagnostic steps and outcomes for future reference.
Step-by-step repair workflow (example tasks)
Below are two common at-home tasks that can be tackled with care: (1) oil and filter change and (2) brake pad inspection. These tasks are described in a practical, non-technical manner to help you plan safely. For each task, work in a clean, organized space and ensure the vehicle is securely raised with proper support. Always consult your model’s service manual for torque specs and part numbers before beginning.
Oil and filter change workflow: (1) Warm up the engine briefly, (2) position the drain pan under the oil sump, (3) loosen the drain plug and allow oil to drain, (4) replace the oil filter with a new one, (5) reinstall the drain plug, (6) add new oil to the recommended level, and (7) check for leaks and run the engine to full operating temperature before rechecking oil level.
Brake pad inspection workflow: (1) remove the wheel, (2) inspect pad thickness and rotor surface, (3) clean contact surfaces and apply anti-squeal compound if appropriate, (4) reinstall components, (5) bed-in new pads following the manual if replacing them, and (6) test drive slowly to confirm proper braking performance.
Estimated total time: 2-6 hours depending on model and experience.
How to source quality parts and avoid scams
Sourcing quality parts is essential for Porsche repair. Start with OEM or OE-equivalent parts from reputable suppliers; verify the part number against your manual and your VIN code. Avoid unusually low prices from unknown vendors, and check product reviews and return policies. When buying used parts, inspect wear indicators and confirm compatibility with your exact model year and trim. Consider using a local Porsche specialist for hard-to-find items or for critical components like brake rotors, calipers, and electronic control units. Keep receipts and track part serial numbers for warranty claims. If in doubt, verify compatibility with a professional or a trusted online forum where owners share verified part numbers.
- Prefer OEM or high-quality aftermarket parts with clear warranty terms.
- Check compatibility using VIN and service documentation before purchasing.
- Avoid gray-market sellers or suspiciously low prices.
When to know you should stop and call a professional
DIY repairs for a Porsche can save money and build confidence, but there are clear safety boundaries. If you are dealing with brake hydraulics, air suspension, powertrain electronics, high-voltage systems, or structural components, professional expertise is strongly advised. If you notice unusual noises, fluid leaks that persist after an attempted fix, loss of pedal feel, or the engine running inconsistently after maintenance, pause and seek professional help. Electrical diagnostics often require specialized tools and calibration procedures that go beyond typical home-shop capabilities. Remember that attempting complex repairs without proper training can lead to more costly failures or safety risks. When in doubt, err on the side of caution and contact an authorized Porsche service center or a qualified independent shop.
- Do not bypass safety steps or ignore unusual symptoms.
- If high-voltage or structural components are involved, seek a pro immediately.
- Use professional forums and official manuals to confirm safety procedures.
Maintenance routines to extend Porsche life
Regular maintenance is the best defense against expensive repairs. Create a maintenance calendar that aligns with Porsche factory recommendations, including fluid changes, filters, belt inspections, software updates, and battery health checks. Seasonal checks—especially coolant, battery, and tire condition—help prevent failures in extreme temperatures. For performance models, scheduled maintenance may involve more frequent inspections of the intake system, cooling system, and ignition components. Keeping detailed logs of service dates, mileages, and observed symptoms will help you detect patterns early. A well-documented approach improves resale value and ensures that your Porsche remains reliable for years to come.
- Maintain records of every service and replacement part.
- Follow factory intervals for fluids and filters.
- Monitor tire pressure, tread depth, and brake wear regularly.
Authority sources for Porsche repair and safety guidelines
For safety standards and repair guidance, consult trusted sources:
- https://www.nhtsa.gov — Vehicle safety information and general repair safety practices.
- https://www.consumerreports.org — Independent testing and maintenance guidance for vehicles.
- https://www.caranddriver.com — In-depth car maintenance tips and repair articles from a major publication.
Always cross-reference official service manuals from Porsche for model-specific procedures and torque values.
Troubleshooting quick-start cheat sheet
- If a fault code appears, document it and cross-check with the model’s service information before replacing parts.
- Check for obvious fuel, ignition, or electrical issues first; many symptoms stem from simple connections.
- Don't force-fit parts or bypass safety systems; if in doubt, consult a professional.
Quick reference: what to do next if you’re stuck
- Re-check torque specs and hand-tighten fasteners to the factory values.
- Re-run a diagnostic scan after any repair to confirm codes are cleared or update accordingly.
- Schedule a professional inspection if symptoms persist or if you’re unsure about any step.
Tools & Materials
- Metric socket set (deep-well)(Include 6- to 14-mm sizes; have extensions as needed for access.)
- Torque wrench(Calibrated; check tolerance per manual.)
- Floor jack and jack stands(Use support stands rated for the vehicle weight.)
- Wheel chocks(Place ahead of and behind wheels to prevent movement.)
- OBD-II scanner (Porsche-capable)(Read codes and monitor live data.)
- Oil drain pan and funnel(Spill prevention and clean refilling.)
- Oil filter wrench and replacement oil filter(Use OEM or equivalent brand.)
- Correct grade oil(Follow model-specific viscosity and spec.)
- Brake caliper grease and anti-squeal compound(Optional for reassembly; verify compatibility.)
- Shop towels and cleaners(Keep surfaces clean during work.)
- Porsche service manual or OEM guide(Torque specs and procedures by model.)
- Gloves ( mechanic and nitrile)(Extra grip and protection.)
Steps
Estimated time: 2-6 hours
- 1
Prepare workspace and safety gear
Set up a clean, level workspace with good lighting. Put on PPE, secure the vehicle with wheel chocks and jack stands, and gather all tools required for the planned tasks.
Tip: Label parts and fasteners by location to simplify reassembly. - 2
Connect diagnostic tools and review codes
Turn on the ignition to read fault codes with an OBD-II scanner. Note any active or pending codes and compare with the Porsche service database.
Tip: Clear codes only after fixing the root issue to avoid masking problems. - 3
Inspect critical systems visually
Check brakes, tires, suspension components, hoses, belts, and electrical connectors for wear or leaks before any disassembly.
Tip: Document wear patterns with photos for future reference. - 4
Address simple, non-safety-critical tasks
Tackle tasks like air-filter replacement, cabin-filter replacement, or cleaning and lubricating accessible latches. Re-check torque specs after loosening and re-tightening components.
Tip: Avoid working on hot components; allow cooling before touching. - 5
Perform a controlled part replacement
If replacing a part such as an oil filter or brake pad, follow the service manual for bolt sequences and torque values. Clean mating surfaces and verify new parts are secured.
Tip: Do not reuse old gaskets unless the manual permits it. - 6
Test, observe, and document results
Lower the vehicle, perform a cautious road test, and monitor for leaks, noises, or warning lights. Re-run diagnostics to confirm the issue is resolved.
Tip: Take a short, controlled test drive to validate repairs before returning to normal use. - 7
Finalize and plan future maintenance
Record what was done, parts used, and any persistent symptoms. Schedule the next service interval according to the owner’s manual.
Tip: Keep an updated repair diary for long-term maintenance planning.
FAQ
Is it safe to perform Porsche repair at home?
Yes, for non-safety-critical tasks and with the proper tools, references, and safety precautions. Avoid high-risk work like brake hydraulics or high-voltage systems without professional training.
Yes, DIY can be safe for basic maintenance if you follow safety guidelines, use the right tools, and know your limits. For risky systems, consult a professional.
What basic tools are essential for Porsche DIY repair?
A solid metric socket set, a calibrated torque wrench, a floor jack with stands, wheel chocks, an OBD-II scanner, an oil drain pan, and appropriate filters and fluids are essential for most at-home tasks.
Key tools include a socket set, torque wrench, jack and stands, wheel chocks, and an OBD scanner.
When should I avoid DIY and hire a pro?
If the work involves braking hydraulics, high-voltage systems, transmission, airbags, or structural components, it’s safer and more cost-effective to consult a Porsche-certified technician.
If it involves brakes, electrical high-voltage, or structural parts, seek a professional.
Can I use generic parts for Porsche repairs?
OEM or OE-equivalent parts are preferred for fit, reliability, and safety. Generic parts may not meet Porsche specifications and could cause performance issues.
Stick with OEM or OE-equivalent parts when possible.
How often should I inspect brakes on a Porsche?
Inspect brakes at every major service or every 6-12 months, whichever comes first. Replace worn pads and rotors per manufacturer guidance.
Inspect brakes at least twice a year and replace worn pads and rotors as recommended.
What are signs of transmission issues I should watch for?
Unusual slipping, hard shifts, unusual noises, or warning codes related to the transmission warrant a professional assessment. Avoid driving if performance is unpredictable.
Watch for slipping, hard shifts, or warning codes; seek a professional if they appear.
Watch Video
Key Takeaways
- Plan before you start and define a safe scope.
- Use proper tools and PPE for every task.
- Follow model-specific specifications for torque and fluids.
- Document maintenance for long-term reliability.
- Know when to DIY and when to call a professional.