Repair for Volkswagen: A Practical DIY Guide
Learn a practical, step-by-step approach to diagnose and repair common Volkswagen issues. This Home Repair Guide tutorial covers tools, safety, sourcing parts, and cost-saving DIY tips for homeowners and renters tackling repair for volkswagen in 2026.

By following a structured, safety-first approach to repair for volkswagen, you can diagnose and perform common repairs with confidence. Start with a clear issue report, gather the right tools and parts, disconnect power when required, and test thoroughly after repair. This guide emphasizes practical, cost-conscious DIY fixes and when to seek a professional.
Understanding the Volkswagen repair landscape
Repairing a Volkswagen isn’t just about swapping out parts; it’s about understanding how the car’s systems interact, from the engine and drivetrain to braking, electrical, and emissions controls. The repair for volkswagen mindset blends solid diagnostic habits with good parts knowledge and a respect for the vehicle’s engineering. According to Home Repair Guide, a deliberate, methodical approach reduces risk and saves money over time. Whether you own a compact Golf, a reliable Jetta, or a rugged Tiguan, the core principles stay the same: identify symptoms, verify with data, and plan a safe repair path. Readers who treat VW maintenance as a continuum—from routine wear items to more complex electronics—build durable skills that pay off with fewer unplanned breakdowns. In 2026, competent DIYers can handle a broad set of repairs by staying organized and using the right torque specs, connectors, and safety gear. Remember, repair for volkswagen often hinges on clean connections, correct torque, and accurate part fit, not brute force.
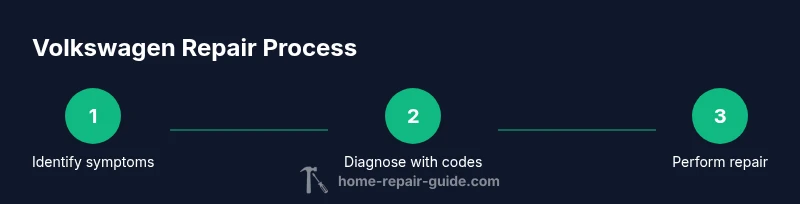
Diagnosing issues: from symptoms to codes
Symptoms are the first breadcrumb toward a repair for volkswagen. Listen for unusual noises, notice decreased performance, check for warning lights, and record when problems occur. A reliable data-driven approach uses an OBD-II scanner to pull codes, which helps narrow the possibilities. In the realm of Volkswagen repairs, many issues stem from electrical sensors, vacuum leaks, worn belts, or failed actuators. When you see a code, cross-reference it with your VW model’s service manual and reliable repair guides to identify the likely failed component. Remember that codes indicate a symptom, not always the root cause, so plan a stepwise verification. The Home Repair Guide analysis shows that combining symptom notes with codes often points you toward the correct repair path without unnecessary parts purchases. Gather context: drive conditions, climate, maintenance history, and recent work to inform your repair strategy. This disciplined approach makes the repair for volkswagen process more predictable and less stressful.
Essential tools, safety, and workspace setup
A well-equipped space makes a repair for volkswagen safer and faster. Start with a solid workbench, good lighting, jack stands, wheel chocks, and a clean parts tray to keep fasteners organized. An OBD-II scanner, multimeter, and a basic socket set cover most diagnostic and repair needs, while a torque wrench ensures fasteners meet VW specifications. Safety gear—gloves, eye protection, and a fire extinguisher—reduces risk when dealing with fuel systems or electrical work. Create a plan: disconnect the battery when working on electronics, maintain a clean, dry workspace, and label every connector. If you’re unsure about a procedure, consult the vehicle’s service manual before applying force or abandoning safety protocols. A careful setup is essential for a successful repair for volkswagen, especially when you’re tackling brake, suspension, or cooling-system tasks.
Common VW failures by model family
Volkswagen models share underlying platforms and design philosophies, but failure modes vary by family. The early-mass-market engines commonly show timing-belt wear in older models, while newer turbocharged engines may exhibit intercooler or boost-control issues. Electrical reliability often centers on sensor packs, connectors, and relay banks. Brake wear and ABS sensor faults are frequent across many VW lines, as are cooling-system leaks in some coolant-hose assemblies. Diesel models bring their own complexity, including exhaust sensor and particulate filter concerns. When diagnosing, tie symptoms to likely systems and consult model-specific guides. The repair for volkswagen concept thrives on mapping symptoms to subsystems (engine, transmission, electrical) and using targeted tests to confirm or refute each possibility. Always check service bulletins and recall notices when available, as VW has issued updates that affect common failure points.
Step-by-step approach to a basic repair (example: brake pad replacement)
A brake pad replacement is a common repair for volkswagen that appears frequently in DIY guides. Start by safely lifting the vehicle and securing it with stands, then locate the caliper and wheel speed sensors as needed. Remove the caliper bolts, suspend the caliper without stressing the brake hose, and replace worn pads with new ones, using a caliper tool if required. Reinstall the caliper and rotor, then torque fasteners to the manufacturer’s specification. Finally, test the braking system at low speed in a safe area and bed-in the new pads according to VW guidance. For many VW models, a slight re-bleed or ABS light reset may be necessary after brake work, so have a scan tool ready and follow the model’s service bulletin. This practical brake repair demonstrates the careful sequence and torque discipline that makes a repair for volkswagen reliable and repeatable.
Sourcing parts and estimating costs for VW repairs
When planning a repair for volkswagen, parts sourcing matters as much as the diagnostic steps. Start with OEM or equivalent aftermarket parts from reputable retailers to ensure fit and longevity. Compare price ranges across vendors and consider bundled kits that include seals, gaskets, and hardware if you’re performing a multi-part repair. Labor costs vary by model and shop rate, but DIY repairs on common VW items can substantially reduce expense when you have the right tools and time. Always verify part compatibility with your exact model year and trim level, because a mismatch can trigger additional problems or warranty concerns. If you’re uncertain, consult the VW service manual or a trusted repair guide before purchasing parts. Remember to keep receipts and document replacements for future maintenance planning and warranty considerations.
Maintenance habits to prevent future VW repairs
Preventive maintenance dramatically reduces the need for costly repair for volkswagen. Adhere to VW-recommended maintenance intervals for fluids, filters, belts, and hoses. Regularly inspect hoses for cracks, check brake fluid levels, and monitor tire wear to prevent alignment issues that can escalate into suspension repairs. Clean electrical connectors during routine service to avoid corrosion and intermittent faults. Keep track of service dates, mileage, and any sensor warnings so you can spot trends early. A simple, consistent maintenance schedule helps you keep a VW road-ready and minimizes unexpected trips to the shop. Home Repair Guide emphasizes steady, proactive care as the foundation of reliable Volkswagen ownership.
When to call a professional and warranty considerations
Some VW repairs require specialized diagnostic equipment, hydraulic lifts, or calibrated torque that may be beyond the scope of a DIY project. If you encounter unfamiliar error codes, suspect a turbo or high-pressure fuel system problem, or face transmission concerns, consider consulting a certified technician. VW warranties and extended service plans may require service by an authorized shop to preserve coverage. Keep in mind that certain repairs, like timing-belt replacements on some engines, involve significant safety risks when done incorrectly. In these cases, a professional assessment protects you from injury and helps ensure the repair for volkswagen is performed to factory standards. The Home Repair Guide recommendation is to triage the issue, attempt safe, low-risk tasks, and escalate when the risk of damage or personal injury is high.
Tools & Materials
- Socket set (metric)(Include deep sockets for tight spaces)
- Torque wrench(Crucial for wheel lugs, caliper bolts, and engine fasteners)
- Jack stands and wheel chocks(Never rely on a jack alone)
- OBD-II scanner(For reading VW-specific codes)
- Flat and Phillips screwdrivers(Various fasteners and hose clamps)
- Pliers (needle-nose and locking)(Disconnecting fittings and clamps)
- Allen/hex wrenches(Some VW components use hex bolts)
- Electrical contact cleaner(Improves connector reliability)
- Brake caliper tool or C-clamp(Compress caliper pistons without damage)
- Brake fluid tester or hydrometer(Check moisture content if bleeding brakes)
- Shop rags and sealant(Keep area clean and avoid contamination)
- Safety gear (gloves, eye protection)(Protect hands and eyes during all repairs)
Steps
Estimated time: Total time: 1-3 hours depending on task complexity and experience
- 1
Identify issue and plan
Begin with clear symptoms and any codes. Document observations, reproduce if possible, and decide whether a DIY repair is practical or if professional help is safer. Plan the task with a checklist of parts and tools.
Tip: Write down the symptom timeline and any recent work to avoid misdiagnosis. - 2
Safety prep and workspace setup
Park on a level surface, engage parking brake, and place wheel chocks. Disconnect the battery if you’ll work near electrical components. Gather all tools and parts in a clean, organized area.
Tip: Always use jack stands; never rely on a jack alone to support a vehicle. - 3
Gather parts and verify compatibility
Double-check VW model-year compatibility for any replacement parts. If possible, obtain a parts diagram from the service manual to ensure you’re replacing the correct pieces and to locate fasteners precisely.
Tip: Compare part numbers and check for updated service bulletins before purchasing. - 4
Remove old component safely
Loosen fasteners in the proper sequence, keep track of hardware, and place removed components in labeled trays. Avoid forcing connectors or hoses and document any wiring routing for later reassembly.
Tip: Take photos during removal to aid reassembly. - 5
Install new component and secure
Position the new part, reconnect connectors, and tighten fasteners to the manufacturer’s torque specs. Recheck all connections and ensure clearances meet service manual guidelines.
Tip: Use a torque wrench set to the spec; overtightening can damage parts. - 6
Test, calibrate, and verify
Reconnect the battery, run a diagnostic scan, and perform a controlled test drive. Watch for warning lights and verify proper operation. Rest the computer if required by the VW system and clear codes after successful repair.
Tip: Follow the vehicle’s break-in procedure if applicable and re-check torque after a short drive.
FAQ
What maintenance can I do myself on a Volkswagen?
Many routine tasks—oil changes, brake pad inspection, filter replacements, and simple sensor checks—can be done at home with basic tools. Always consult the VW service manual and follow safety guidelines. For complex systems like turbo or transmissions, consider professional service.
You can handle many routine tasks at home, like oil and brake pad checks, but for complex systems, a shop visit is safer.
When should I take my VW to a mechanic?
If diagnostic codes point to critical subsystems, if you notice persistent warning lights, or if the repair involves high-pressure systems, active safety components, or complex electronics, seek a professional. A pro can confirm root causes and ensure proper bolt torque and calibration.
Seek a professional if codes point to critical systems or if you’re unsure about safety.
Are VW parts for repairs expensive?
Parts costs vary by model and part type, but you can expect a range depending on OEM versus aftermarket options. Always factor in a potential discount on bundles and consider a reputable parts supplier to balance cost and reliability.
Prices vary; compare OEM and aftermarket parts to balance cost and reliability.
What safety precautions should I follow?
Wear protective gear, secure the vehicle, and work in a ventilated area. Disconnect the battery when dealing with electrical components, and never work under a raised vehicle without solid support. Keep a fire extinguisher nearby in case of fuel-related work.
Always wear safety gear, secure the car, and work in a ventilated space.
Can an OBD-II scanner diagnose all VW issues?
An OBD-II scanner helps identify many emissions and sensor-related issues, but it won’t diagnose every mechanical fault. Use it in conjunction with symptom observation, service manuals, and diagnostic tests for a complete picture.
OBD-II helps many faults but isn’t a catch-all; combine with tests and manuals.
Watch Video
Key Takeaways
- Plan before you begin the repair for volkswagen.
- Use the right tool set and follow torque specs.
- Prioritize safety and document every step.
- Know when to call a pro to preserve safety and warranty.