European Car Auto Repair: A Practical DIY Guide
A practical, step-by-step guide to European car auto repair for homeowners and DIY enthusiasts. Learn safe DIY basics, parts compatibility, maintenance schedules, and when to hire a pro.

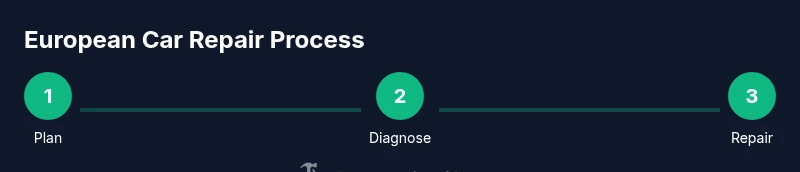
This guide helps you understand how to perform common European car auto repairs safely, including maintenance, diagnosis, and basic part replacement. You’ll learn model-specific tips, recommended tools, and when professional service is advised. By following these steps, homeowners and renters can extend vehicle life while avoiding costly mistakes. This adds more: The quick answer highlights the essentials, while the full article covers brands, safety, and troubleshooting.
What makes European car auto repair unique
European vehicles have distinct design philosophies that influence how they age and how you should service them. Compared with some mass-market imports, many European models emphasize precision engineering, torque-limiting electrical systems, and collaborative parts ecosystems with dealer networks. This means that DIY repairs must be deliberate, organized, and consistent with the vehicle’s service history. According to Home Repair Guide, taking a structured approach helps prevent common mistakes when working on engines, suspensions, or electronics. The goal is to keep the car performing safely while avoiding costly missteps. In practice, you’ll notice several patterns: a heavier emphasis on torque specs and sensor calibrations, more frequent timing cover access on certain brands, and smaller, modular service intervals for complex systems. By understanding these principles, homeowners and renters gain confidence to tackle simple tasks, verify own work, and know when to seek professional help. The rest of this guide outlines a practical path from preparation to completion, with brand-focused tips and safety reminders.
Key systems and components in European vehicles
European cars often feature tightly integrated turbocharged engines, advanced fuel delivery, and sophisticated braking electronics. You’ll encounter components such as direct-injected engines, variable valve timing, and electronic parking brakes that require precise torque values and calibration procedures. Understanding how these systems interact helps you diagnose issues without triggering cascading codes. Expect frequent sensor-driven checks, routine fluid replacements, and attention to chassis suspension geometry. When you work on European models, prioritize data from the service manual, your VIN, and any dealer advisories. This section helps you map out which subsystems are most likely to need attention at different mileage intervals and why a careful approach saves time and money.
Sourcing parts and choosing quality replacements
Parts sourcing for European cars hinges on balancing OEM reliability with cost considerations. OEM parts ensure compatibility and longevity, but reputable aftermarket parts can offer substantial savings without compromising safety. Always verify compatibility by cross-referencing the VIN, part number, and your vehicle’s year, make, and model. Keep a record of supplier warranties and batch codes for critical items like brake components, belts, and electronics modules. For homeowners, the goal is to choose parts with clear documentation and a reputable return policy. If you are unsure about a part’s origin, consult the service manual or a trusted mechanic before purchasing. This approach helps you avoid common misfires such as improper fit or subpar electronic connectors that can create more problems than they solve.
Maintenance schedules by brand and region
Maintenance intervals for European cars vary by brand and engine type, but a disciplined approach remains universal: monitor fluids, belts, filters, and brakes regularly, and perform inspections during seasonal changes. Oil and filter changes are a baseline, while brake fluid, coolant, and transmission fluid require scheduled replacement to prevent corrosion and degraded performance. Environmental conditions—extreme cold, heat, or driving in urban stop-and-go traffic—often accelerate wear on cooling systems, turbo components, and electrical connectors. Create a simple calendar that tracks service dates, mileage, and observed wear. The goal is proactive maintenance rather than reactive repairs. By aligning your plan with the vehicle’s service manual and regional driving patterns, you’ll extend dependable operation even on high-mileage European models.
Diagnostic approaches and safe testing techniques
Diagnostics for European vehicles leverage OBD-II data, live sensor streams, and, when needed, bench tests of individual components. Start with a thorough visual inspection, check for oil leaks, worn belts, frayed wiring, and damaged connectors. Use an OBD-II scan tool to pull trouble codes and view live data; compare readings to the manufacturer’s specifications. When testing electrical systems, disconnect power before handling high-current circuits, and never rely on guessing about voltage drops. Document fault codes, reset counts, and any calibration changes after repairs. If a fault persists after a repair, recheck torque values, sensor alignment, and harness routing to ensure the root cause is addressed. This methodical approach minimizes misdiagnosis and helps you learn from each troubleshooting cycle.
Tools and shop setup for European car repairs
Before you begin, assemble a focused tools list and a clean, well-lit workspace. Essential tools include a torque wrench with metric and SAE scales, a comprehensive metric wrench set, a set of screwdrivers, an insulated multimeter, an OBD-II scanner, jacks and jack stands, bright work lights, protective gloves, and safety glasses. A clean magnetized tray keeps fasteners organized. Establish a dedicated area with a work surface at comfortable height, good ventilation, and a fire extinguisher within reach. Label tool storage by task (engine, electrical, braking) to speed up future repairs and reduce the chance of cross-contamination. Finally, keep a repair log that notes part numbers, torque specs, and any calibration changes for future reference.
DIY maintenance tasks you can safely tackle at home
Not every European car repair is a DIY project, but several routine maintenance tasks are approachable with basic tools. Air-filter replacement, windshield-wiper blade changes, and cabin air filter swaps are straightforward and provide immediate benefits. Inspect belts for glazing or cracking and replace worn belts promptly. Check fluid levels (oil, coolant, brake fluid) and top up as needed, following the recommended viscosities and types from the service manual. If you encounter a stubborn bolt, rusted fastener, or tricky electrical connector, pause and consult the manual or a professional. Recording your steps and outcomes helps you build confidence over time and reduces unnecessary trips to the shop.
When to call a professional and safe DIY limits
A professional is usually warranted for complex repairs such as engine timing work, turbocharger service, advanced electrical modules, and structural components. If the repair involves heavy lifting beyond your jack and stands, work around high-pressure systems, or requires specialized calibration tools, seek help. Always verify you can complete the fix within your skill set and available tools, and never bypass safety procedures to “save time.” Knowing your limits protects you, your vehicle, and others on the road.
Safety, legality, and environmental considerations
Always prioritize personal safety and environmental responsibility. Wear eye protection and gloves, secure the vehicle on stable stands, and dispose of old fluids and batteries at approved facilities. Legal considerations include emissions regulations, warranty implications, and the adherence to local recycling rules. Use approved containers for fluids and spill kit materials, and avoid mixing fluids or contaminating soil and water. By following these guidelines, you maintain a safer workspace and minimize environmental impact while performing European car auto repair.
AUTHORITY SOURCES
For further reading and verification, consult trusted sources:
- National Highway Traffic Safety Administration (NHTSA): https://www.nhtsa.gov
- European Commission consumer safety and vehicle maintenance guidance: https://ec.europa.eu/consumers
- SAE International technical resources and standards: https://www.sae.org
- Additional automotive safety and repair guidelines can be found on reputable industry sites and academic publications.
Tools & Materials
- Torque wrench(Metric and SAE scales; range suitable for fasteners 6-80 Nm)
- OBD-II scanner(Read live data and codes; supports European vehicle protocols)
- Set of metric wrenches(6-19 mm sizes; both shallow and deep sockets recommended)
- Screwdrivers (Phillips and flat)(Assorted blade widths; magnetic tips help hold screws)
- Floor jack and jack stands(Stable lifting; use wheel chocks when raised)
- Protective gear(Gloves, safety glasses, and non-slip footwear)
- Funnel, rags, and coolant/fluids as applicable(Only needed for fluid-related tasks)
Steps
Estimated time: Estimated total time: 2-3 hours
- 1
Prepare workspace
Clear a clean, well-lit area. Gather the tools and arrange parts in labeled bins. Verify you have the vehicle service manual or VIN-specific guidance before starting.
Tip: Set up a dedicated repair mat for parts to avoid losing small screws. - 2
Verify model specs and torque data
Consult the manufacturer manual for torque specs, sequence, and recommended lubricants. Note down critical values and ensure your tools match the required units.
Tip: Double-check torque patterns to prevent over- or under-tightening. - 3
Disconnect the battery safely
If working near electrical components, disconnect the negative terminal first, then the positive. Label cables and avoid contact with metal tools to prevent short circuits.
Tip: Use insulated tools and never touch both terminals at the same time. - 4
Lift and secure the vehicle
Use a floor jack to lift the car and place jack stands under the frame. Lower the car gently onto the stands, ensuring stability before crawling underneath.
Tip: Always chock the wheels that remain on the ground. - 5
Inspect components visually
Look for oil leaks, cracked hoses, frayed wiring, and worn belts. Document wear with photos for reference and replacement planning.
Tip: Take high-resolution photos at multiple angles before removing parts. - 6
Remove the target component
Carefully detach the component following the service manual’s removal sequence. Keep fasteners organized and note their original positions.
Tip: Keep track of tiny screws with a magnetic tray or labeled cups. - 7
Install the replacement and reconnect
Fit the new part, hand-tighten bolts to avoid cross-threading, then torque to spec. Reconnect electrical connectors and secure hoses without kinks.
Tip: Always test fit before final tightening to confirm alignment. - 8
Refill fluids and test systems
Top off required fluids to correct levels. If applicable, bleed the brake or cooling system following the manual to remove air pockets.
Tip: Cycle the system a few times and recheck levels after warming up. - 9
Document and test-drive
Record part numbers, torque specs, and any calibration data. Reassemble, power up the vehicle, and perform a cautious test-drive to verify operation.
Tip: Log the results and note any post-repair codes for future reference.
FAQ
What makes European car auto repair different from other regions?
European cars often use precision components, advanced electronics, and specific torque specs. Repairs may require more careful calibration and brand-specific service data. Always refer to the VIN-based manual for model-specific guidance.
European car repairs rely on precise specifications and calibration; consult the VIN-based manual for model-specific steps.
Can I perform maintenance tasks on a European car without dealership tools?
Yes, many routine tasks like filters, wipers, and fluid checks can be done with common tools. For complex systems (EFI, turbo, or ABS modules), use standard safety procedures and consider a professional if required.
You can handle many routine tasks with basic tools; reserve specialist work for professional shops when needed.
How do I verify part compatibility for European vehicles?
Always cross-check the VIN, OEM part numbers, and regional compatibility. When in doubt, ask the supplier for the exact cross-reference and verify gauges and connectors.
Cross-check VINs and part numbers; confirm connectors and gauges before ordering.
What safety gear is essential for DIY repairs?
Wear safety glasses, gloves, and non-slip footwear. Use a listener-equipped, fire-resistant mat for hot components and always disconnect the battery when working near electrical systems.
Wear proper safety gear and disconnect power when handling electrical components.
When should I seek professional help for a European car repair?
If you encounter unfamiliar electronic modules, timing belt work, or high-pressure systems, consult a certified technician. When uncertain, schedule a diagnostic visit before proceeding.
Call a professional for complex electronics or timing work; diagnose first if unsure.
Are there environmental considerations I should follow?
Always dispose of fluids and batteries at approved facilities and follow local recycling guidelines. Prevent spills and clean up promptly to protect soil and water.
Dispose of fluids responsibly and follow local recycling rules.
Watch Video
Key Takeaways
- Plan each repair with the manual and torque specs.
- Use proper safety gear and stands for all lifts.
- Know when to call a pro to avoid costly mistakes.
- Maintain a repair log for future maintenance.