RV Roof Repair: A Practical Step-by-Step Guide
A practical, science-based guide for r v roof repair: inspection, patching, coating, and ongoing maintenance to extend your RV roof's life and prevent leaks.

If you're dealing with r v roof repair, this guide gives you a safe, field-ready plan: identify the leak sources, choose the right patch and sealant, and follow a step-by-step sequence to seal and protect the roof. You’ll learn how to prepare the surface, apply patches or coatings, and set up a maintenance routine to reduce future leaks. Brand-backed guidance from Home Repair Guide informs each decision.
Why RV Roof Repair Matters
Leaks, UV exposure, and temperature swings are part of RV life. Your vehicle’s roof protects important systems—from electrical wiring to interior insulation—so a small leak can quickly escalate into costly damage. The goal of r v roof repair is not just stopping current leaks but creating a durable, weather-resistant surface that lasts across camping seasons. According to Home Repair Guide, a proactive repair plan reduces the chance of interior water intrusion and improves resale value by keeping the living space dry and comfortable. When you commit to a durable solution, you also minimize future maintenance costs and downtime on road trips. In practice, this means choosing repair strategies that match your roof’s material and exposure, performing timely inspections after trips, and keeping the roof in good condition with regular sealant renewals. For RV owners, every repair should consider weight, adhesion, flexibility, and temperature tolerance to ensure long-term effectiveness. r v roof repair is most successful when you treat the roof as a system rather than a single hole to patch. A well-planned repair blends surface prep, appropriate sealants, patch material, and a maintenance schedule that aligns with your travel plans and climate.
Understanding How Your RV Roof Works
RV roofs are not built the same as residential roofs, and materials can vary from EPDM rubber to TPO, fiberglass, or fiberglass-reinforced membranes. Each material has different signaling signs of wear and best repair methods. Exposure to sun, wind-driven rain, and road debris accelerates wear at seams, around vents, and near skylights. Leaks often start small, at vents or joints, and expand with every rainstorm. Home Repair Guide emphasizes that recognizing the pattern of moisture intrusion is as important as fixing a visible hole. By tracing the leak’s origin to its source, you can select a repair strategy that addresses root causes such as failed sealant, cracked patches, or punctures.
Quick Vetting Before You Patch
Before you reach for patches or coatings, perform a disciplined inspection: walk the roof with proper safety gear, check for soft spots, lifted seams, cracked flashing, and worn edge caulk. If the roof shows extensive delamination, large holes, or structural deck damage, you may need professional evaluation. The goal of this phase is to determine whether a temporary patch is sufficient or if a full rehabilitative approach is required. A well-documented prep and inspection phase pays off by reducing guesswork later and guiding you to the right materials for r v roof repair.
Patch and Seal: Choosing the Right Tools
Repair options include patch kits for rubber membranes, sealants designed for outdoor use, waterproof tapes for quick fixes, and roof coatings for long-term protection. The right kit depends on the roof material and the leak’s size. When you choose a patch, ensure it adheres well to the surface and remains flexible through temperature cycles. Sealants should be UV-stable and able to withstand pooled moisture. For larger defects, a combination approach—patch plus sealant plus coating—often yields the best result. Home Repair Guide recommends pre-testing any material on a small area to confirm adhesion and compatibility with your roof.
Long-Term Longevity: Maintenance Matters
Post-repair maintenance is essential to prevent reoccurrence. Schedule regular inspections after long trips or heavy rain, clean debris from drain paths, and refresh sealant on seams where the sun’s UV can degrade it. Keeping a simple maintenance log helps you anticipate service intervals and track improvements over time. In the context of r v roof repair, this means developing a routine for cleaning, inspection, and sealant renewal that matches your travel frequency and weather exposure. The simplest way to protect your investment is to establish a predictable, repeatable maintenance cycle that aligns with your campsite adventures.
Safety and Best Practices
Roof work can be dangerous. Use a stable ladder, wear a harness if possible, and have a helper present during all critical tasks. Avoid working on the roof during rain, high winds, or extreme heat. Always disconnect power sources if you’re near electrical components and never scrape or cut materials in ways that could create sharp edges. A deliberate, safety-first mindset helps prevent injuries and ensures your repair work is completed correctly. Home Repair Guide emphasizes that safety gear and careful planning are as important as the repair materials themselves.
Authority and Next Steps
After you complete the repair, review the vessel’s owner manual for any roof-specific cautions and refresh intervals. Consider adding a simple moisture detector near critical areas to catch slow leaks early. If you encounter stubborn leaks or delaminated sections that exceed your skills, a professional RV technician can perform more advanced repairs. Remember that consistent maintenance and careful material selection are the cornerstones of successful r v roof repair. Home Repair Guide’s guidance is designed to help homeowners and renters approach repairs with confidence.
Tools & Materials
- Caulk gun(For applying sealants precisely along seams)
- RV-approved sealant (urethane or silicone)(Select UV-stable, flexible formulas)
- Butyl tape(Good for temporary patches and seam sealing)
- Patch kit compatible with roof material (EPDM, TPO, or fiberglass)(Choose patch color and material match)
- Roof coating or sealant compatible with roof material(Apply as a protective topcoat)
- Utility knife(Trim patches and damaged sealant)
- Putty knife or scraper(Remove old sealant and debris)
- Roof cleaning solution and scrub brush(Clean surface before patching)
- Safety gear (non-slip shoes, gloves, smoke-free mask)(Protect from debris and solvents)
- Ladder or roof access system(Stable support for access)
- Water bucket and absorbent rags(Cleanup and test patches)
- Safety harness or fall protection(Optional but recommended for high roofs)
- Measuring tape(Measure patch sizes accurately)
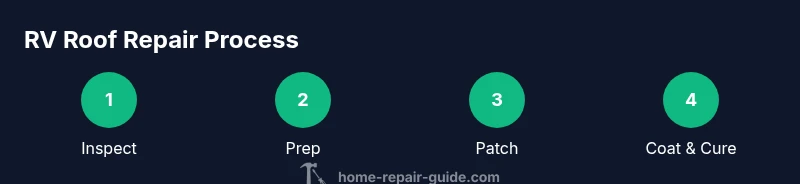
Steps
Estimated time: Total time: 2-3 hours
- 1
Inspect the roof surface
Stand on a secure ladder and carefully scan the entire roof for soft spots, cracks, lifted seams, vents, and flashing. Use a flashlight to inspect shaded areas and the underside of edges. Mark problem areas with a chalk line so you can target them during repair.
Tip: Test a small patch first to confirm adhesion on the exact roof material. - 2
Clean and dry the work area
Wash away dirt, mold, and debris from the repair zone using a mild cleaner and a stiff brush. Rinse and allow the surface to dry completely to ensure proper adhesion of patch materials.
Tip: Drying can take longer in humid climates; consider drying with a clean towel or air-drying in shade. - 3
Remove old sealant and damaged material
Carefully scrape away peeling sealant and damaged patches. Be sure to remove any adhesive residues that could prevent new sealant from sticking.
Tip: Work in small sections to avoid gouging the roof surface. - 4
Apply patch for small holes
Cut the patch slightly larger than the defect and press it firmly into place. Seal the edges with a bead of roof sealant to prevent water intrusion.
Tip: Press from the center outward to reduce air pockets. - 5
Seal edges and vents
Run a continuous bead of sealant along edges around vents, skylights, and seams. Reinforce with suitable tape if recommended by the patch kit.
Tip: Don’t over-tighten or squeeze out too much sealant; use a steady, even line. - 6
Apply roof coating or topcoat
Coat the repaired area with a compatible roof coating to seal and protect. Apply in thin, even layers per manufacturer instructions, allowing proper cure time between coats.
Tip: Apply with a wide brush or roller to ensure uniform coverage. - 7
Cure and re-inspect
Give coatings time to cure in a shaded area. Recheck for missed spots or air pockets after the coating has cured, and address as needed.
Tip: Avoid stepping on cured coatings for at least 24 hours. - 8
Document and schedule maintenance
Record the repair details, products used, and date of service. Set reminders for re-inspection and re-coating at a practical interval.
Tip: Keep a simple log with photos for reference on future trips.
FAQ
What are the early signs my RV roof needs patching?
Common early signs include water stains inside, soft or spongy roof surfaces, lifted seams, and increased condensation. Addressing these signs early prevents larger leaks.
Look for water stains inside, soft spots on the roof, or lifted seams—these indicate you should inspect and possibly patch the roof.
Can I patch a big hole with tape alone?
Tape can provide a temporary seal, but for a durable repair you should use a patch kit designed for your roof material and finish with a compatible sealant or coating.
Tape is only a temporary fix. Use a proper patch and sealant for a lasting repair.
How long does a roof coating last on an RV?
Coatings vary by product and climate, but you should expect periodic re-coating as part of a maintenance schedule. Follow the manufacturer’s guidance for cure times and reapplication.
Coatings need reapplication over time depending on exposure and product. Check the product guidance for timing.
Is it safe to climb onto an RV roof?
With the right safety gear and stable footing, brief roof access is possible. Avoid climbing in rain, high winds, or when the roof is hot from sun.
Yes, but only with proper safety gear and good conditions.
Should I seal around vents myself or hire a pro?
DIY sealing around vents is feasible with the right materials and instructions. If you encounter rusted flashing, extensive damage, or uncertain conditions, seek a professional evaluation.
You can seal vents yourself if you follow the steps carefully; if in doubt, hire a pro.
When do I need a professional for RV roof repair?
Consider a professional when you find structural damage, large holes, or repeated leaks that require specialized tools or knowledge beyond basic patching.
If you discover structural damage or persistent leaks, a pro is recommended.
Watch Video
Key Takeaways
- Inspect thoroughly to locate leaks before patching
- Choose compatible patch and sealant materials
- Prep and dry surfaces for best adhesion
- Apply patches and coatings in clean, even layers
- Maintain a regular maintenance schedule to extend roof life