Chimney Chimney Repair: A Complete How-To Guide
A practical, safety-forward guide to diagnosing and repairing chimney chimney issues. Learn from step-by-step instructions, essential tools, maintenance tips, and when to call a pro.

Learn how to tackle common chimney chimney repair tasks safely. This guide covers exterior crown cracks, brick mortar damage, flue access, and cap or flashing replacements. With a focused plan and the right tools, you can manage small repairs and decide when to call a pro to protect your home and chimney lifespan.
Understanding Chimney Chimney Repair: What It Covers
According to Home Repair Guide, chimney chimney repair encompasses fixes that protect safety, structure, and efficiency. The phrase covers a spectrum from superficial cosmetic touch-ups to major masonry and flashing work. Most homeowners encounter two persistent problems: water intrusion and restricted venting. Left unchecked, these issues increase the risk of mold, structural damage, and dangerous back-drafts.
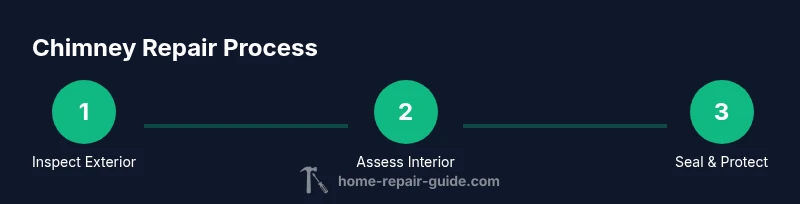
In a typical home, the chimney interacts with the roof and attic, so repairs often involve exterior masonry, the crown, flashing at the roof-line, the flue liner (where accessible), and the cap or damper hardware. Exterior brick cracks and missing mortar invite water and freeze-thaw damage; crown cracks enable water infiltration down the sides; flashing leaks at the intersection of chimney and roof are a leading source of attic staining. Inside the chimney, a failing flue liner or creosote buildup narrows the passage and elevates fire risk. Distinguishing cosmetic fixes from structural repairs is essential: minor tuckpointing may restore appearance, while masonry rebuilds or liner replacements require more time and expense. A practical decision tree helps homeowners triage: start with a visual exterior inspection, then assess interior accessibility, and finally decide if you should seal, replace, or call a pro.
Before you begin any repair, check the weather, ladder setup, and access to the roof. If you observe signs of movement, large cracks, or hazardous materials, do not attempt a DIY fix; arrange a professional assessment promptly.
Planning Your Chimney Chimney Repair: Safety, Permits, and Scope
Successful chimney chimney repair starts with clear planning. Begin by evaluating roof integrity, attic access, and the surrounding area to prevent collateral damage. Use a roof-rated ladder, secure it, and have a helper on the ground. Wear safety gear: gloves, eye protection, and a hard hat. Confirm local permits or HOA rules; many jurisdictions require permits for masonry work or modifications to venting systems. If working on a gas or wood-burning system, shut off fuel supply and allow the area to cool. Map the scope of work: exterior masonry repairs (cracks, mortar deterioration, spalling), crown and parapet integrity, flashing at the roof interface, and interior components such as the flue liner or damper. Decide whether you can handle minor patching and sealing, or if scaffolding and professional brickwork or liner replacement will be needed. Solicit multiple quotes for major repairs and compare warranties, materials, and timelines. Plan for weather delays; curing mortar or sealants requires dry conditions. Finally, set up a maintenance schedule and consider installing a proper chimney cap and flashing during the first repair cycle to reduce future leaks.
Safety Protocols and When to Call a Pro
Safety is non-negotiable in chimney chimney repair. Work from a stable position on firm ground; avoid slopes, wind gusts, or wet surfaces. Wear non-slip footwear, gloves, eye protection, and a dust mask when removing old mortar or creosote. A fall-arrest system is wise when you must work near the edge of a roof. If you are unsure about your ability to access the chimney safely, hire a professional roofer or mason. Key red flags that require a pro: large structural cracks, bulging bricks, active water intrusion, damaged flashing, or a compromised chimney cap. For gas appliances, have a licensed technician inspect venting after any repair. If hazardous materials or lead paint are suspected on an older chimney, minimize exposure and consult a pro before disturbing coatings.
Diagnosing Common Problems and DIY Triage
Chimneys reveal a range of issues: visible exterior cracks, spalling bricks, efflorescence, missing mortar, creosote buildup, and damp smells in the attic. Hairline cracks can often be treated with masonry crack filler after proper cleaning and drying. Deeper cracks or spacing problems suggest structural work or partial rebuilding. Crown damage may appear as a sunken, cracked surface at the top; it often requires resurfacing or replacement. Leaking flashing at the roof line is a frequent source of attic staining and should be resealed or replaced. Inside the stack, a degraded flue liner increases fire risk and should be evaluated by a pro. Creosote buildup varies with usage; minor deposits can be cleaned by a certified chimney sweep, while heavy buildup requires thorough cleaning. Use a safety buddy when inspecting at height and avoid tampering with damper mechanisms.
A Simple DIY Repair Path You Can Start This Weekend
Begin with safe cleaning and selective sealing. Remove loose mortar and debris from cracks with a masonry chisel and brush, then vacuum. Install masonry crack filler in hairline cracks; smooth and allow curing per product instructions. Apply a breathable water-repellent sealant to exterior brick to reduce moisture uptake. For crown cracks, apply a cold-applied crown sealant following the manufacturer's instructions; larger crown issues may require professional resurfacing. Inspect the flashing at the roof line; reseal minor leaks with roof sealant and ensure the flashing is correctly integrated with the roof. If a cap is missing or corroded, replace it to prevent rain and animal intrusion. After finishing, monitor for dampness after rain and recheck in a month. If you encounter dampness, or if any repair seems beyond your scope, stop and call a pro.
Maintenance and Long-Term Upkeep to Extend Lifespan
Regular inspection is the best defense against leaks and fire hazards. Schedule an annual exterior check of brick, mortar joints, crown, flashing, and cap; look for cracking after cold snaps and check for attic moisture or staining. Clean the flue area and remove creosote as needed, ideally via a certified chimney sweep every season or two depending on usage. Reapply breathable water-repellent sealant after repairs to reduce moisture absorption while preserving brick porosity. Keep surrounding roof areas clear of debris and ensure branches don’t touch or rest on the chimney. Based on Home Repair Guide analysis, consistent maintenance reduces emergency repairs and extends chimney life. Maintain a simple log of weather-related repairs, replacements, and observations to help you budget for future work.
When to Replace vs Repair and Getting Professional Help
Repairing a chimney may be enough for minor issues, but extensive damage often calls for replacement or major rebuilding. Large cracked bricks, sagging masonry, a severely damaged crown, or a compromised flue liner are indicators that replacement may be warranted. Costs vary by scope and region and can include masonry work, liner replacement, and flashing upgrades; plan for a longer project and a higher upfront investment. The Home Repair Guide team recommends starting with a professional assessment to determine whether repair or replacement offers the best long-term value. Obtain multiple quotes, verify licenses, and ensure the work aligns with local codes and safety standards. If you pursue repairs, hire a mason or roofer experienced with chimney systems and request a written plan detailing materials, waterproofing approach, and a realistic timeline. After completion, maintain your system with a proper cap, sealed flashing, and annual inspections to protect your investment.
Tools & Materials
- Roof-rated ladder(Extends to reach the chimney with a stable base)
- Safety harness and fall-arrest gear(Use a secondary anchor point for roof work)
- Hard hat, gloves, eye protection, and dust mask(Protect from debris and dust)
- Masonry chisel and hammer(For removing damaged mortar and bricks)
- Masonry brush and vacuum(Clean dust and debris before sealing)
- Masonry crack filler or epoxy mortar(For hairline to moderate cracks)
- Mortar mix and trowel(For tuckpointing larger gaps)
- Cold-applied crown sealant(Seal crown to prevent water intrusion)
- Chimney cap and flashing kit(Protects from weather and animals; ensure roof compatibility)
- Roofing sealant/caulk(For flashing seams and joints)
- Water-repellent masonry sealant(Breathable sealant to reduce moisture uptake)
- Work clothes and rope or tie-off accessories(General safety and organization)
Steps
Estimated time: 4-6 hours
- 1
Inspect exterior for visible damage
Conduct a rooftop or ground-level survey of brick, mortar joints, crown, cap, and flashing. Note cracks, loose bricks, efflorescence, or water staining. Photograph changes to track progress over time.
Tip: Wear a harness if you must lean over edges; three-point contact at all times. - 2
Check interior access and flue condition
If accessible, inspect the flue liner and damper area for cracks, corrosion, or obstructions. Do not force dampers or liners if you lack experience. Record findings for comparison later.
Tip: Never work on an open flue; ensure area is well-ventilated and free of fumes. - 3
Clear debris and prepare surfaces
Remove loose mortar, leaves, and creosote. Use a stiff brush and vacuum to create a clean, dry surface for sealing and patching.
Tip: Creosote is a fire hazard; schedule professional cleaning if buildup is heavy. - 4
Seal cracks and crown as needed
Fill hairline cracks with appropriate masonry crack filler; for crown cracks, apply a cold-applied sealant following product directions. Avoid overfilling joints and allow curing time.
Tip: Follow manufacturer's cure times to prevent premature cracking. - 5
Address flashing and cap installation
Inspect and reseal flashing; replace damaged sections and ensure a proper water barrier with roof-grade sealant. Install or replace the chimney cap to prevent water entry and animal intrusion.
Tip: Ensure flashing integrates with roofing material and skylights if present. - 6
Final waterproofing and inspection
Apply breathable masonry sealant if needed and perform a final inspection after rain or heavy wind to confirm leaks are resolved.
Tip: Keep a repair log and recheck annually.
FAQ
What does 'chimney chimney repair' cover?
Chimney chimney repair covers exterior masonry fixes, crown and flashing, interior flue checks, and cap replacement. Its goal is to stop leaks, prevent structural damage, and maintain safe venting.
Chimney chimney repair covers masonry, flashing, and cap fixes to stop leaks and keep venting safe.
Can I perform chimney chimney repair myself?
For minor cosmetic issues, DIY is feasible. Major structural work should be handled by a licensed mason or roofer to ensure safety and code compliance.
DIY is possible for small fixes, but major work should be done by a pro.
How often should I inspect my chimney?
Aim for an exterior and interior inspection once a year, and conduct a check after severe weather or events that could affect the structure.
Annual checks are best, with extra inspections after storms.
What are typical costs for chimney chimney repair?
Costs vary with scope. Minor repairs may cost hundreds, while major masonry or liner work can run into thousands depending on the extent.
Costs vary widely, from hundreds to thousands, based on scope.
Can repairs fix water leaks without replacing the chimney?
Many leaks are resolved with flashing, crown sealing, and masonry repairs. Deep damage or failing liners may require replacement.
Leaks can often be fixed without replacement, but deeper damage may need it.
When should I replace vs repair and how to pick a pro?
If cracks are extensive or the crown and liner are severely damaged, replacement may be best. Get multiple quotes and verify licenses and safety compliance.
For major damage, replacement is often better; get several quotes.
What maintenance helps prevent future leaks?
Annual inspections, prompt sealing of cracks, cleaning of the flue, and keeping cap and flashing in good condition prevent most leaks.
Regular checks and proper sealing prevent leaks.
Watch Video
Key Takeaways
- Plan before you start to avoid rework.
- Prioritize safety and know when to call a pro.
- Seal cracks and protect the crown to stop leaks.
- Maintenance reduces long-term repair costs.