Repair Irrigation System: A Step-by-Step Guide to Fix
Learn how to diagnose and repair an irrigation system with practical steps, safety tips, and proven methods to fix leaks, clogs, and faulty valves safely.

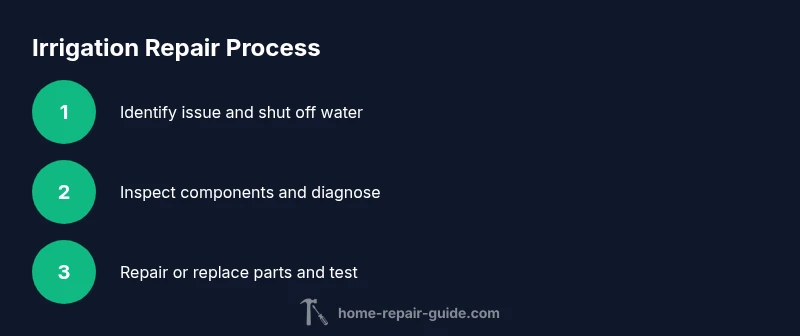
By following this guide, you will diagnose and repair a typical irrigation system, focusing on leaks, clogs, and faulty valves. You’ll work from a safety shutdown to a tested restart, using common tools and practical steps to restore even water distribution. This includes checking the controller, inspecting sprinkler heads, testing pressure, and repairing leaks in pipes or fittings.
Understanding why repairs matter
A well-maintained irrigation system saves water, reduces bills, and keeps your lawn and garden thriving. When components fail, water can be wasted and plant health can suffer. For homeowners and renters, repairing irrigation issues promptly minimizes downstream problems like soil erosion, algae growth, and uneven moisture. The Home Repair Guide team emphasizes proactive diagnosis and a methodical repair approach to extend system life. By investing time in a thorough assessment, you’ll identify root causes, prevent recurring leaks, and plan durable fixes that hold up across seasons. Common benefits include improved water efficiency, better zone balance, and fewer emergency repairs during peak watering weeks.
Practical mindset for repairs
Approach repairs with a calm, plan-first mindset. Start by confirming you have access to main water shut-off and a map of zones. Document findings with notes or photos to guide reassembly. A methodical workflow reduces frustration and helps you reuse components when possible, which keeps costs reasonable over time.
Common irrigation problems at a glance
Irrigation systems can fail in several predictable ways. Leaks in lateral lines or fittings cause damp patches and wasted water. Sprinkler heads may misalign, wear out, or clog, producing uneven spray patterns. Controllers can drift out of sync with actual watering needs due to software settings, battery depletion, or rain sensor malfunctions. Debris in filters or heads can reduce flow, while buried pipes can crack from frost or ground shifts. Understanding these patterns helps you triage issues faster and choose the right repair path. Regular inspection highlights tell-tale signs early, enabling quick, affordable fixes before bigger problems emerge.
Quick diagnostic mindset
Start with a zone-by-zone check to isolate trouble areas. Look for wet patches, soggy lawns, or unusually dry areas. Check for high water bills or longer-than-expected runtimes. Use a marker to map zones and record head types, then proceed to inspect heads, valves, and mainlines in that region. This structured approach makes it easier to source the root cause and plan the repair.
How to diagnose leaks, blockages, and valve failures
Diagnosis begins with a careful physical survey and a quick functional test. Inspect hoses and pipe joints for visible cracks, corrosion, or loose fittings. Operate zones one at a time to observe water flow and identify leaks, head misalignment, or dead spots. For suspected buried leaks, perform a surface inspection first and consider tracing the mainline with a listening device or moisture meter if available. Valve failures present as valves that won’t fully close, stay slightly open, or make a buzzing sound when energized. Clean or replace solenoids and inspect wiring for wear or corrosion. If you detect a leak in the mainline, isolate sections with valves and perform targeted testing to narrow the location.
Practical testing steps
- Shut off water and relieve pressure before touching pipes.
- Mark suspected segments and test each zone independently.
- Temporarily cap off lines to see how flow changes when isolating areas.
- Use soapy water at joints to reveal slow leaks by bubbling. This helps identify hidden problems without excavation.
When to call a pro
If you uncover underground leaks, complex valve issues, or you’re uncertain about electrical components, professionals can precisely locate issues with specialized tools and ensure code-compliant repairs.
Safety and planning before you start
Safety comes first when repairing an irrigation system. Begin by turning off the main water supply and, if applicable, disconnecting power to the controller to avoid accidental activation. Wear eye protection and gloves to guard against sharp edges, buried wiring, and soil debris. Create a simple plan: map zones, list suspected failing components, and decide whether the fix is a simple head replacement or a more involved piping repair. Review local frost dates, as frozen pipes can worsen damage if work is attempted during cold periods. Finally, consider weather conditions—avoid repairs after heavy rain to prevent mud and trips in trenches. Planning reduces risk and supports durable outcomes.
Stepwise safety routine
- Identify and label all zones and lines before touching anything.
- Shut off water and power where applicable; verify zero pressure before starting.
- Wear protective gear and keep a clean workspace to avoid slips.
- Prepare a simple repair plan with step-by-step actions and a fallback option in case a component fails.
Step-by-step repair workflow overview
This section outlines a high-level workflow that maps to the detailed steps in the dedicated STEP-BY-STEP block. It’s designed to give you the full picture of how a repair progresses from assessment to test run. You’ll start with a quick system audit, confirm the areas to work in, and collect all necessary parts. Then you’ll address leaks, valve or head issues, and piping connections, followed by a pressure test and a controlled re-activation of zones. Finally, you’ll verify uniform coverage and refine spray patterns for even irrigation across your landscape. Use this overview to stay oriented as you perform the practical repairs in the steps that follow.
Tools & Materials
- Main water shut-off valve key or wrench(Shut off supply before working; locate near irrigation manifold)
- Teflon tape(Seal threaded pipe joints to prevent leaks)
- Replacement sprinkler heads(Keep spares for worn nozzles or cracked heads)
- Solenoid valve tester or multimeter(Check electrical continuity if leaks relate to valves)
- Compression or slip-fit repair couplings(To mend cracked lateral lines)
- Pipe repair clamps or epoxy(Temporary/permanent fixes for small leaks)
- Shovel or trenching tool(Digging for buried lines in a pinch)
- Marker flags or spray paint(Label zones and pipes for easy reassembly)
Steps
Estimated time: 60-120 minutes
- 1
Identify layout and shut off water
Locate the irrigation controller and the main supply. Create a zone map and note typical run times. Shut off the water at the main valve before touching any pipes or heads.
Tip: Label each zone with durable tags for reference. - 2
Inspect for obvious leaks and moisture
Walk the system to spot damp patches, standing water, or mineral buildup at joints. Photograph issues before disassembly so you can compare later.
Tip: Document wet areas to track onset and progression. - 3
Check controller settings and battery
Review watering schedules, cycle options, and rain delay settings. Replace batteries if needed and ensure the controller clock is correct.
Tip: A misconfigured controller can mimic valve issues. - 4
Test and service valves
Inspect valve bodies and solenoids for corrosion or debris. Clean and test valve operation manually if possible.
Tip: Stuck valves often cause uneven watering zones. - 5
Inspect sprinkler heads and pop-ups
Check for cracked nozzles, misalignment, or mineral buildup. Flush heads if necessary and replace damaged ones.
Tip: Gently clean nozzles; harsh tools can crack threads. - 6
Repair damaged piping or fittings
If cracks or leaks are found, replace the affected section with appropriate piping and fittings. Use sealant or epoxy as recommended for the pipe type.
Tip: Match pipe size and material; improper fittings create new leaks. - 7
Pressure test the system
Turn the water back on slowly and observe pressure across zones. Look for any new leaks and verify that all zones pressurize evenly.
Tip: A slow, controlled re-pressurization helps detect hidden leaks. - 8
Test run and recalibrate
Run all zones and verify uniform coverage. Adjust sprinkler heads for proper arc and radius, and ensure rain sensor operation. Record changes for future maintenance.
Tip: Keep a maintenance log for seasonal checks.
FAQ
What are the most common signs an irrigation system needs repair?
Look for wet spots, unusually soggy patches, water pooling, high water bills, or zones that run longer than expected. These indicate leaks, clogs, or valve issues.
Common signs include pooling water, soggy patches, and unusually high water bills, which usually mean leaks or valve problems.
Can I fix leaks myself, or should I hire a professional?
Many leaks and sprinkler head issues can be repaired by homeowners with basic tools. More complex underground leaks or electrical valve problems may require a licensed irrigation technician.
Many repairs are doable at home, but underground leaks or faulty valves may need a professional.
How do I locate a faulty sprinkler head?
Inspect each head for cracks, clogging, or misalignment. If one area is consistently wet, test by capping other zones to isolate the issue.
Check each head for cracks or clogging; isolate zones to pinpoint the faulty head.
What is the best way to test irrigation system pressure?
Use a pressure gauge on the mainline or test a valve with a manometer. Compare readings to manufacturer specs and look for drops indicating leaks.
Test pressure by inserting a gauge on the mainline and compare to normal specs.
How often should I service an irrigation system?
Perform a thorough inspection at least once per season, and do a quick head-to-head check monthly during peak watering months.
Do a seasonal check and a monthly head-to-head inspection during busy watering seasons.
Watch Video
Key Takeaways
- Shut off water before starting repairs
- Diagnose zones to identify leaks and clogs
- Test pressures and run all zones
- Document changes for future maintenance
- Regular checks prevent future leaks