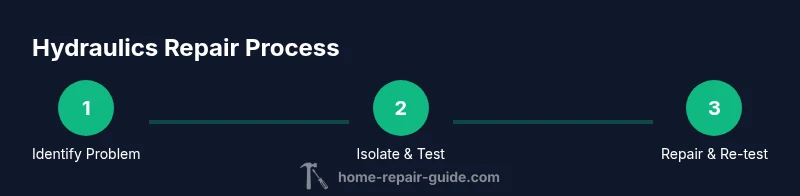
Hydraulics Repair Service: A Practical DIY Guide for Homeowners
Learn practical hydraulics repair service for common home systems with a step-by-step approach, essential tools, and safety tips for faucets, pipes, and irrigation.

What hydraulics repair service covers
According to Home Repair Guide, hydraulics repair service for homes focuses on problems with water flow, pressure, seals, and valve operation in fixtures, appliances, and irrigation systems. This guide explains the core areas professionals inspect: leak detection, corrosion, worn seals, and joint integrity. Understanding these domains helps homeowners decide when a DIY fix is feasible and when to call a pro. The Home Repair Guide team found that many leaks originate at simple seals or worn O-rings, which can be replaced quickly with the right parts and precautions. In other cases, issues involve the main shutoff valve or pressure regulator, which require more careful handling and specialized tools. By recognizing these zones, you can triage problems, estimate scope, and choose an approach that protects your plumbing, prevents water waste, and preserves property value. Always start with a clear plan and respect local codes, especially when working near electrical outlets or gas lines.
Common hydraulic systems in homes
Most residential hydraulics revolve around fixtures and appliances that use water pressure to function. Typical systems include kitchen and bathroom sinks, toilets, washing machines, dishwashers, irrigation zones, and water heaters. Faucets wear out O-rings and cartridge seals; supply lines corrode; toilets develop flapper or fill-valve issues; irrigation valves can stick or fail to seal. Recognizing these components helps you set expectations for repairs and whether parts can be swapped in a single visit. The Home Repair Guide analysis shows that fixing worn seals or loose fittings often yields immediate, reliable improvements, while deeper problems with main pressure regulators or multi-zone irrigation controllers may require professional attention. This awareness also supports smarter triage and planning before you shop for parts or call a service pro.
Safety and planning before you start
Safety is the cornerstone of hydraulics work in a home setting. Begin by turning off the affected water supply and, where feasible, shut off the main valve to the house. Wear safety glasses and gloves to guard against hot water sprays and sharp edges. Ventilate work areas if you must open fixtures located behind walls or under cabinets, and keep a bucket and towels ready for any unexpected drips. Check for electrical hazards near wet areas, and never work on live electrical outlets or wiring when moisture is present. Having a clear plan with a list of parts helps you stay organized and reduces the risk of over-tightening joints, which can cause new leaks. The Home Repair Guide team recommends documenting your steps to replicate success later and to quickly spot if a repair worsened nearby connections.
Diagnostics: reading pressure and leaks
Diagnosing hydraulics problems combines observation with simple tests. Look for visible leaks, dampness, or mineral deposits around joints and fittings. If you have a pressure regulator or gauge, note abnormal readings or fluctuations during normal use. A soap-solution test on joints can reveal slow leaks not visible to the naked eye. For hidden leaks behind walls, listen for air sounds or consistent dampness after the system restarts. In all cases, isolate the area, test after minor fixes, and recheck multiple times under normal operating conditions. The approach should be incremental: fix the easiest seal first, then reassess if pressure remains high or if leaks persist. Home Repair Guide analysis indicates that systematic testing reduces wasted time and minimizes unnecessary disassembly.
Replacement parts you may need
Common repairs involve replacing seals, O-rings, and cartridges, which are the most cost-effective fixes for many leaks and flow issues. Keep a small assortment of sizes on hand and verify compatibility with your fixture model. Use manufacturer-recommended parts when possible, and avoid generic substitutes that don’t seal correctly. For threaded connections, apply Teflon tape or pipe dope as appropriate and avoid over-torquing, which can strip threads or crack fittings. If a cartridge valve is seized or worn, a cartridge kit specific to the valve brand can restore performance without replacing the entire fixture. When in doubt, collect the old parts for comparison and consult local codes.
How to approach repair tasks: a risk-based plan
Begin with the lowest-risk fixes and escalate only as needed. Prioritize steps that restore basic function—like fixing a leaky supply line or a dripping faucet—before tackling more complex tasks such as pressure regulator recalibration or irrigation-valve replacement. Allocate time for testing and cleanup, since residual leaks may emerge after reassembly. If you encounter gas lines, electrical connections, or concealed pipes, stop and seek professional help. A structured workflow reduces the chance of creating secondary leaks, and a documented, step-by-step approach helps communicate what was done when you call a pro later. The Home Repair Guide team emphasizes staying within your skill zone and knowing when to pause for safety and compliance.
Authority sources
- OSHA - Safety and health guidelines for hand tools and plumbing work: https://www.osha.gov
- EPA WaterSense - Water efficiency and leak detection guidelines: https://www.epa.gov/watersense
- University Extension (example): https://extension.umn.edu/water-heating
Conclusion
Successful hydraulics repair service hinges on safety, planning, and a disciplined diagnostic approach. This guide provides a clear, practical framework to triage issues, replace worn components, and verify results with repeatable testing. The Home Repair Guide team recommends following the step-by-step processes outlined here and consulting a licensed professional for high-risk situations or complex installations.