Plumbing and Repair: A Homeowner's Step-by-Step Guide
Practical, step-by-step guidance on plumbing and repair for homeowners. Learn diagnostics, essential tools, safe practices, and durable fixes to prevent leaks, clogs, and water damage.

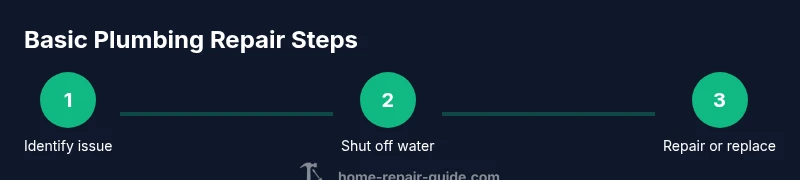
With this guide, you can tackle common plumbing and repair tasks safely and effectively. Start by identifying the problem, shutting off the water, and selecting the right tools. Follow proven, step-by-step methods to fix leaks, clear clogs, or replace worn parts without guessing. This approach minimizes mess and prevents further damage.
What is Plumbing and Repair? A Practical Overview
According to Home Repair Guide, plumbing and repair form the backbone of responsible home maintenance. This guide explains how everyday homeowners approach plumbing tasks, from diagnosing leaks to replacing worn parts. By understanding basic principles—water flow, trap seals, and venting—you can prevent water damage and extend the life of fixtures. The term plumbing and repair covers a broad spectrum of tasks, but the goal remains the same: safer, cleaner water and reliable drains. We'll break down common scenarios and provide practical, approachable steps that don't require professional tools or advanced training. Throughout, we emphasize safety and proper technique to minimize risk.
Common Problems and Quick Diagnostics
Many household issues stem from wear, improper use, or aging systems. Leaks often show as damp cabinets, mineral deposits, or a steady drip from a fixture. Clogs can cause slow drainage or backflow, while running toilets waste water and raise bills. Low water pressure suggests clogged aerators, pipe sediment, or valve problems. In many cases, a simple inspection—checking shut-off valves, testing fixtures, and listening for sounds—can pinpoint the likely culprit. This section outlines typical symptoms, likely causes, and initial fixes you can perform safely. By connecting symptoms to probable sources, you can approach repairs in a structured, cost-conscious way while practicing essential safety measures.
Essential Tools and Materials for Home Plumbing
A compact, reliable toolkit supports most repair tasks. You’ll want an adjustable wrench, a screwdriver set, pliers, a bucket, towels, and plumber’s tape for sealing threaded connections. Keep replacement washers, O-rings, and thread sealant on hand for wear and tear on faucets and supply lines. A flashlight helps inspect tight spaces, while a shop rag keeps the area clean and dry. For corroded or aged components, consider pipe joint compound or a rust remover where appropriate. This list covers basics; you may add specialty parts as you gain experience with different fixture types. Always choose parts compatible with your system and local codes.
Step-by-Step: Leaky Faucet Repair (Overview)
Leaky faucets are a common and easily fixable problem when the issue relates to worn washers or seals. The following steps outline a practical approach to stop dripping and restore full function. This overview gives you the framework; the detailed, step-by-step instructions are provided in the dedicated STEP-BY-STEP block.
Maintenance and Safety Practices
Prevention is better than cure in plumbing and repair. Regularly inspect fixtures for damp spots, tighten connections only when needed, and replace worn components before a leak becomes a flood. Always shut off the main or local valves before starting any work and drain remaining water into a bucket to avoid splashes. Use protective gloves and eye protection when working under sinks or near copper or PVC piping. Document your repairs and keep spare parts accessible for quick future fixes.
Troubleshooting Quick Guide
If a repair doesn’t stop the issue, reassess the cause: confirm you worked on the correct fixture, re-check shut-off valves, and inspect associated pipes for secondary leaks. Verify water supply to avoid air pockets and re-test after a cooldown period. When in doubt, consult the detailed STEP-BY-STEP guide and consider a professional assessment for concealed or complex problems.
Tools & Materials
- adjustable wrench(6-12 inch range preferred)
- screwdriver set(Phillips and flat-head)
- pliers(Any gripping pliers)
- bucket(To catch water during repairs)
- towels/rags(Keep area dry)
- plumber's tape (Teflon tape)(Wrap threads for seal)
- replacement washers and O-rings(Have a small assortment on hand)
- thread sealant/pipe joint compound(For threaded connections)
- flashlight(Inspect tight spaces)
Steps
Estimated time: 30-60 minutes
- 1
Prepare and assess the faucet
Identify the faucet type (compression, cartridge, ball, or ceramic disk) and prepare the workspace. This helps you select the correct repair approach and parts, reducing trial-and-error. Clear the area and lay towels to catch any drips.
Tip: Take a photo of the knob/handle setup before disassembly to reference during reassembly. - 2
Shut off the water supply
Close the nearby shut-off valves under the sink or the main water supply. Open the faucet to relieve pressure and drain remaining water into a bucket. This prevents renewed leaks during disassembly.
Tip: If you can't locate valves, consider temporarily shutting off the main supply and proceeding with caution. - 3
Remove the handle and access internals
Use the appropriate screwdriver to remove the handle and bonnet, exposing the stem or cartridge. Keep small parts in a labeled container to avoid misplacing them.
Tip: Note the orientation of parts as you remove them to ensure correct reassembly. - 4
Inspect and replace worn components
Check washers, O-rings, and seals for wear or cracking. Replace with correctly sized parts. If the fixture uses a cartridge, note the model or take the cartridge to hardware store for compatibility.
Tip: Apply plumber's tape to threaded connections before reassembly for a tight seal. - 5
Reassemble and restore water
Reassemble the faucet in the reverse order. Slowly turn the water back on and check for leaks at all joints. Tighten gradually if drips persist, avoiding overtightening.
Tip: Run water for a few minutes at a time to ensure good seating of new parts. - 6
Test, monitor, and clean up
Monitor the faucet for a sustained drip over several minutes. Wipe away excess moisture and store tools. If leaks return, recheck seals and consider replacing the cartridge or consulting instructions for your faucet model.
Tip: Document the repair and note any parts that may require future replacement.
FAQ
What is the most common DIY plumbing repair homeowners can safely perform?
Leaky faucets and clogged drains are the most common DIY plumbing tasks. With the right tools and basic safety, you can replace washers or clear minor clogs without professional help.
Leaky faucets and small clogs are usually DIY-friendly with basic tools and safety.
When should I call a licensed plumber?
Call a licensed plumber for complex issues such as corroded pipes, unknown leaks, gas lines, or significant water damage. If the repair requires cutting into walls or involves main supply lines, professional service is advised.
If pipes are behind walls or you’re unsure about safety, contact a licensed plumber.
What basic tools should every homeowner have for plumbing repairs?
A wrench, screwdriver set, pliers, Teflon tape, a bucket, towels, and spare washers or O-rings cover most DIY repairs. Add a flashlight for better visibility in tight spaces.
Keep a basic toolkit with wrenches, screwdrivers, and Teflon tape.
How can I prevent leaks from recurring after a repair?
Perform regular inspections, replace worn parts promptly, and avoid overtightening connections. Keep a maintenance schedule and note any fixtures that show signs of wear.
Regular checks and prompt part replacement help prevent future leaks.
Is DIY plumbing risky for beginners?
DIY plumbing is generally safe for simple tasks, but complex jobs can create bigger problems if done incorrectly. Always turn off water, wear protective gear, and know your limits.
DIY is great for small fixes, but know when to stop and call a pro.
How long should a running toilet fix take?
A basic running toilet can often be fixed in under an hour by inspecting the flapper and fill valve. If the problem persists after replacement, seek guidance or professional help.
Most running toilets can be fixed quickly, but persistent issues may require a pro.
Watch Video
Key Takeaways
- Identify the issue and shut off water before starting.
- Gather essential tools and parts ahead of time.
- Replace worn washers and seals to stop most leaks.
- Reassemble carefully and test thoroughly.
- Know when to seek professional help for complex tasks.