Repair Irrigation Valve: A Practical Step-by-Step Guide
Learn how to diagnose, repair, and maintain a faulty irrigation valve with a safe, practical approach. This guide covers common failures, tool prep, a clear step-by-step workflow, and maintenance tips to prevent future leaks and wasted water.

Repair irrigation valve involves diagnosing leaks or sticking solenoids, safely shutting off water, and replacing worn diaphragms or the solenoid as needed. Follow a step-by-step procedure to test and re-pressurize the system.
What an irrigation valve does and common failure modes
Irrigation valves are the gatekeepers of your irrigation system. They control which zones receive water and when, typically using a small electric signal to open or close a hydraulic path. Common failure modes include a valve that leaks at the body, a solenoid that won’t click, or a diaphragm that loses flexibility. Understanding these symptoms helps you decide whether a repair or replacement is warranted. In many homes, the valve sits inside a concrete or plastic box in the landscape, and a quick inspection can reveal stuck parts or mineral buildup that interferes with operation.
Diagnosing issues: symptoms and quick checks
Start by isolating the irrigation lines from the main supply to prevent water waste during diagnosis. Look for visible leaks around the valve body, a dripping sprinkler head, or zones that stay on after the timer ends. Inspect the solenoid coil for a tight fit and listen for a click when energizing the valve; a missing click or a weak response often points to an electrical issue or a damaged diaphragm. If you have a multimeter, check the solenoid resistance against the valve’s specified range; out-of-range readings indicate a faulty solenoid.
Safety and precautions before you start
Before touching any valve components, shut off the irrigation main supply and relieve pressure by opening a downstream sprinkler head. Wear eye protection and gloves to guard against sudden sprays of water or sharp edges in the valve box. If your system uses electrical power near damp soil, disconnect power at the controller and check for exposed wires. Keep children and pets away from the work area and avoid working in wet conditions to reduce the risk of shock or slips.
Choosing how to fix: repair vs replacement vs professional help
Repairing a valve can be cost-effective for minor diaphragm wear or a sticking solenoid, but aged or corroded valves often warrant replacement. If the valve body is cracked, the diaphragm shows visible tears, or the solenoid cannot be reliably tested, replacement is usually the best long-term option. For drip systems or in tight spaces, a compact solenoid valve or a weatherproof model might fit better and reduce future maintenance. When in doubt, consult the valve’s manual or contact a licensed plumber for guidance.
Maintenance tips to extend valve life
Regular maintenance saves water and reduces breakdowns. Clean the valve box periodically to remove dirt and debris, inspect the diaphragm for cracks, and replace worn seals promptly. Consider installing a basic water filter upstream to limit mineral buildup, and ensure the valve box lid seals properly to keep out sediment. Document a maintenance schedule and note model numbers for easy replacements in the future.
Tools & Materials
- Shut-off valve key or adjustable wrench(to isolate irrigation supply)
- Screwdrivers (flathead and Phillips)(for removing valve cover screws)
- Pliers (needle-nose)(grip small parts and diaphragms)
- Wrench set(loosen fittings and connectors)
- Replacement diaphragm or solenoid(carry a compatible spare)
- Teflon tape(seal threaded connections)
- Bucket and towels(catch and clean up water)
- Multimeter (optional)(check solenoid resistance)
- dielectric grease (optional)(protect seals)
- Valve manual or model info(reference during repair)
Steps
Estimated time: 60-120 minutes
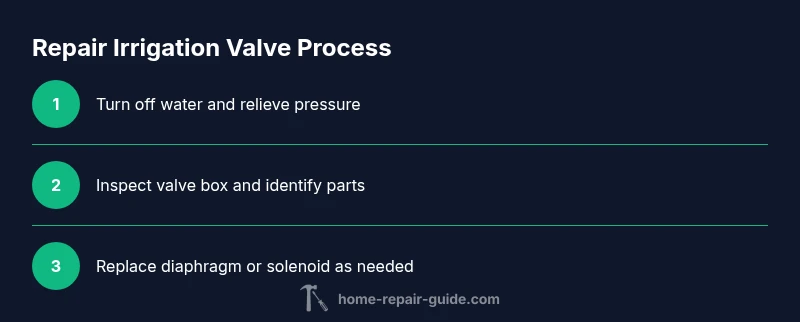
- 1
Shut off water and relieve pressure
Locate the irrigation main shut-off and close it. Open a downstream sprinkler head to relieve pressure and avoid a spray when you begin. This step protects you and makes subsequent tasks predictable.
Tip: Have towels ready; water may still be in the lines. - 2
Access the valve box and identify components
Remove the valve box lid and visually identify the valve body, solenoid, and diaphragm area. Note model information and take a quick photo before disassembly to aid reassembly.
Tip: Label wires or take a couple of photos to ensure correct reconnection. - 3
Test the solenoid for operation
With the power disconnected, energize the solenoid and listen for a clear click. If there is no click or the valve remains stuck, the solenoid may be faulty or the coil burned out.
Tip: Use a multimeter to check resistance if you have one. - 4
Inspect or replace the diaphragm
Disassemble carefully and inspect the diaphragm for tears, cracks, or stiffening. If any defect is present, replace the diaphragm with a compatible unit and re-seat it evenly.
Tip: Handle the diaphragm gently and avoid twisting the valve seats. - 5
Reassemble with proper connections
Reassemble the valve, apply Teflon tape to threaded connections, and use a light coat of grease on seals if recommended by the manufacturer. Tighten fittings without overtightening to avoid distortion.
Tip: Double-check seals and ensure there are no cross-threaded parts. - 6
Test the system and cycle zones
Turn water back on gradually, observe each zone for leaks, and run the programmable timer to confirm correct operation. If leaks persist, consider replacing the valve or seeking professional help.
Tip: Document results and reset timer schedules as needed.
FAQ
What does an irrigation valve do and what zones does it control?
An irrigation valve controls water flow to specific zones in your yard. It opens and closes in response to signals from the controller, allowing precise watering patterns. If a valve sticks or leaks, the affected zone may be overwatered or never water at all.
An irrigation valve controls water flow to zones and responds to the controller. If it sticks or leaks, you may overwater or under-water that area.
Why is water leaking from the valve box?
Leaks in the valve box are usually caused by a worn diaphragm, cracked seal, or loose fittings. Inspect for cracks and ensure all connections are tight. If the box fills with water continuously, replace seals or the valve as needed.
Leaks often come from worn seals or loose fittings. Check seals and tighten or replace parts as needed.
Can I repair a damaged diaphragm myself?
Yes, replacing a diaphragm is a common DIY repair if you have the right size. Make sure to turn off power and water first, remove the valve cover, and install a compatible diaphragm. If the valve is old or corroded, replacement may be more reliable.
You can replace the diaphragm if you have the right size and shut off power and water first.
When should I replace a valve rather than repairing it?
If the valve body is cracked, corroded, or the diaphragm and solenoid continue to fail after repairs, replacement is usually the better long-term option. Replacement also simplifies future maintenance and reduces the risk of recurring leaks.
Replace the valve if the body is cracked or failures keep coming back after repairs.
Do I need a professional for the electrical part?
Electrical checks can be hazardous, especially near damp soil. If you are not comfortable testing the solenoid or wiring, hire a licensed professional to avoid shocks or incorrect wiring.
If you're not comfortable with electrical checks, get a professional to handle it.
How long does a typical irrigation valve repair take?
A straightforward diaphragm or solenoid replacement can take about 60-90 minutes for a single valve. More complex issues or multiple zones may require longer or a professional assessment.
Most repairs take about an hour or two depending on complexity.
Watch Video
Key Takeaways
- Shut off water before touching valve components.
- Inspect diaphragms and solenoids for wear or damage.
- Test system after repair to confirm proper function.
- Choose repair or replacement based on valve age and damage.