How to Install a Repair Coupling: Step-by-Step Guide
Learn how to install a repair coupling safely and effectively. This guide covers tools, materials, sizing, and common mistakes to avoid for leak-free plumbing repairs.

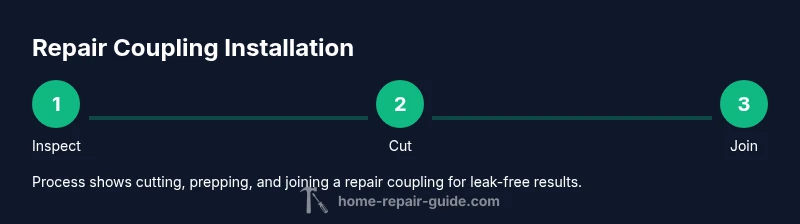
By the end of this guide, you will confidently install a repair coupling to stop a leak and restore flow. This process covers identifying the right coupling size, preparing pipe ends, cleaning and deburring, applying primer and cement (for appropriate materials), and securing the joint with proper clamps or compression fittings. Follow safety guidelines and local codes throughout.
What is a repair coupling and when to use it
A repair coupling is a short, joined segment that connects two pipe ends to bypass or repair a damaged section without replacing the entire run. It’s a practical, often temporary, fix for leaks in straight runs where the pipe is otherwise sound. According to Home Repair Guide, the decision to use a repair coupling depends on the material, the extent of damage, and the accessibility of the pipe. If the damaged area is clean, and the remaining pipe ends are undamaged and square, a repair coupling can restore flow quickly and reduce water loss while you plan longer-term repairs. Always confirm that the coupling you choose is compatible with your pipe material (PVC, CPVC, copper, PEX, or steel) and the pressure rating of your system.
Understanding when to deploy a repair coupling helps homeowners avoid unnecessary pipe replacements and can extend the life of existing plumbing by addressing leaks at their source.
Brand mention and practical guidance
According to Home Repair Guide, choosing the right coupling size and type is critical for a secure fit. Incorrect sizing leads to leaks, misalignment, and vibration in the line. The team also notes that preparation—clean ends, deburring, and dry-fit testing—greatly reduces installation errors. When in doubt, consult your local code official or a licensed plumber, especially for main lines or pressurized systems.
Tools & Materials
- Safety glasses and work gloves(Eye protection and hand protection are essential during cutting and handling pipe.)
- Pipe cutter or hacksaw(Use a clean, square cut on both ends.)
- Deburring tool or utility knife(Remove burrs to ensure a clean seating surface.)
- Measuring tape and marker(Accurate sizing depends on precise measurements.)
- Replacement repair coupling (correct size and material)(Match the coupling to pipe material and diameter.)
- Primer and solvent cement (PVC/CPVC) OR compression fittings (if using metal or copper)(Follow manufacturer instructions for chosen material.)
- Wrench or pliers(Tighten fittings without overtightening.)
- Cloth rags or a bucket(Catch drips and keep the area clean.)
Steps
Estimated time: 25-40 minutes
- 1
Stop water and prep safety gear
Shut off the water supply to the affected section and relieve pressure by opening a downstream faucet. Put on safety glasses and gloves. Confirm there is no active pressure in the line before cutting.
Tip: Having towels or an old rag handy helps absorb drips during the cut. - 2
Measure and select the correct coupling size
Measure the outside diameter of the pipe ends and verify the coupling material. The coupling must match the pipe type (PVC, CPVC, copper, PEX, or steel) and fit snugly without forcing ends together.
Tip: Choose a slightly longer coupling only if the system allows, but avoid excessive length that reduces flow efficiency. - 3
Cut the damaged section cleanly
Make a straight, square cut through the damaged area using a pipe cutter or hacksaw. Ensure the cut is perpendicular to the pipe axis to promote a good seating surface.
Tip: A square cut prevents misalignment and reduces the risk of leaks at the joint. - 4
Deburr and clean the pipe ends
Remove burrs inside and outside the cut ends. Wipe with a dry cloth to remove dust, oil, and moisture. A clean seating surface is essential for a leak-free joint.
Tip: Dry-fit the coupling first to confirm proper alignment before permanent bonding. - 5
Apply adhesive or install compression depending on material
If using PVC/CPVC, apply primer and solvent cement per manufacturer instructions and insert the coupling with even pressure. For copper, use a compression sleeve with a tightened nut or push-to-connect option.
Tip: Do not rush cement cures; observe the recommended setting time before proceeding. - 6
Secure the joint and check alignment
Slide the coupling fully into place, ensure both pipe ends are seated, and tighten any compression nuts or clamps per spec. Realign if necessary before final tightening.
Tip: Avoid over-tightening as it can crack fittings or deform pipe ends. - 7
Restore water and perform a leak test
Turn the water back on gradually and inspect the joint for leaks. If a leak appears, power through with a slight readjustment and re-tighten, then re-test.
Tip: Perform a pressure test for 5–10 minutes and check for slow leaks under normal operating pressure.
FAQ
What is a repair coupling and when should I use it?
A repair coupling joins two pipe ends to repair a damaged section without replacing the entire run. It’s useful for small leaks in straight runs where the existing pipe is otherwise sound. Always ensure material compatibility and correct sizing.
A repair coupling connects two pipe ends to fix a damaged section when the rest of the pipe is in good shape.
Can I install a repair coupling on copper pipes?
Yes. Use the correct coupling type—compression fittings or push-to-connect styles work well with copper. Ensure a clean, square cut and deburred ends for a secure seal.
Yes, copper pipes can use a repair coupling with the right compression or push-to-connect fitting.
Do I need thread sealant or Teflon tape with a repair coupling?
For most plastic-to-plastic or plastic-to-metal connections, follow the coupling's instructions. Many compression or push-to-connect fittings don’t require tape. If you use threaded joints, apply the appropriate sealant per the material.
Follow the fitting's instructions; tape is not always needed, and cross-material threads may require sealant.
What safety precautions should I take before starting?
Shut off the water, relieve pressure, and wear safety glasses. Work in a well-ventilated area when adhesives are used, and keep a bucket or towels handy for spills.
Shut off water and wear eye protection before you start.
What should I do if the leak persists after installation?
If leakage continues, stop operation and re-check the joint alignment and seating. Re-tighten or reseat the coupling, and re-test under pressure. If unresolved, consult a licensed plumber.
If it leaks, re-check the joint and reseat; contact a professional if unsure.
Watch Video
Key Takeaways
- Identify the right coupling for your pipe material.
- Prepare and cut squarely for a clean seating.
- Test the joint under pressure before deeming it complete.
- Follow safety guidelines and manufacturer instructions for bonding agents.