How to Install PVC Repair Coupling
Learn how to install a PVC repair coupling safely and correctly. This educational guide covers sizing, tools, safety, step-by-step installation, testing, and maintenance to prevent leaks in potable water and drainage pipes.

This guide shows you how to install a PVC repair coupling to fix a leaking or damaged pipe. You will learn the correct sizing, required tools, and essential safety steps. By following these steps, you can ensure a clean, leak-free seal and restore flow quickly. This article uses practical, homeowner-friendly language and safety reminders from Home Repair Guide.
Why PVC repair coupling installation matters
When you learn how to install repair coupling pvc, you gain a reliable method to restore flow without replacing long stretches of pipe. A correctly installed repair coupling creates a strong, leak-free seal that can last for years when installed on sound pipe and with proper materials. According to Home Repair Guide, a focused, patient approach reduces headaches later by avoiding under-sized or poorly seated joints. The team suggests starting with clear pipe sizing, measuring, and dry-fitting before any cement is applied. In many homes, a seemingly small crack or pinhole around a joint becomes a much bigger leak if not addressed with the right sleeve, connector, and adhesive. By taking the time to align the pieces and verify fit, you minimize the chance of siphoning air into the line or creating a strangled flow path. This is a practical skill for homeowners and renters who want durable repairs without costly professional service. In this article, we cover the tool set, step-by-step technique, common mistakes to avoid, and how to test the repair after installation. A well-executed repair coupling on PVC pipe can save money, reduce downtime, and protect surrounding areas from water damage.
Understanding the repair coupling anatomy and when to use it
A repair coupling is a simple sleeve with compression or solvent-welded ends that slides over damaged pipe to create a new, continuous bore. It's most effective for small cracks, pinholes, or sections where a straight replacement would be disruptive. The decision to use a repair coupling should consider pipe material, age, and whether the crack is static (not growing) or dynamic. Based on the Home Repair Guide analysis (2026), these fittings work best on clean, smooth pipe with no deep gouges. For drainage or vent lines, ensure the coupling is rated for the correct pressure and temperature range. If the pipe is severely corroded or has multiple weak spots, a longer repair sleeve or a full replacement might be required. Matching the pipe diameter is essential; measure outside diameter (OD) and verify the coupling size before purchasing. Keeping a spare set of couplings in your toolbox is a smart precaution for future repairs. In summary, use a repair coupling when you find small, localized damage on sound PVC pipe and you have proper preparation and compatible cement.
Safety considerations before you start
PVC cement and primer contain solvents that should be used with adequate ventilation. Work in a well-ventilated area and wear gloves to protect skin. Read the product labels and follow the manufacturer’s curing times; set aside enough time for each bonding step. Turn off the water supply and drain the line to a point where you can perform the cut without pressure. Do not rush; a dry fit will reveal alignment issues before you apply cement. If you have children or pets nearby, contain the workspace to prevent accidental exposure. Finally, keep a fire-safe distance from open flames and avoid hot-work activities near the area; solvent cement fumes can be flammable. This block integrates general safety guidance commonly recommended by Home Repair Guide and other trusted sources.
Preparation and planning for a reliable repair
Before cutting, map out the path of the repair and determine the exact length of pipe that needs replacing. Turn off the water and place towels or a bucket to catch residual moisture. Inspect both ends of the pipe for burrs and scale; smooth rough edges with emery cloth. Choose the correct repair coupling size by measuring the pipe outer diameter. Dry-fit the assembly to verify fit and alignment. If the joint is offset or if the pipe has a bend near the joint, consider whether a flexible coupling or a different repair approach is needed. Gather all tools and materials in a central location so you can complete the repair in one session. Finally, plan a leak-tight test after assembly, such as a pressure or water test, to confirm the repair is sound.
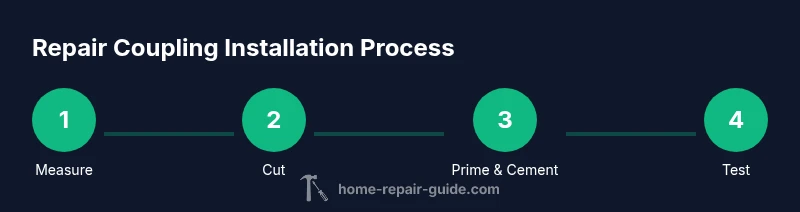
Step-by-step overview and best practices
The following steps provide a clear, repeatable sequence to install a PVC repair coupling. Start with a precise cut and clean ends, then dry-fit, prime, cement, and test. The method emphasizes alignment, proper surface preparation, and the timing of cementing. Always verify compatibility with your pipe schedule and ensure you have the correct sleeve size. A typical repair follows a predictable pattern: cut, deburr, dry-fit, prime, cement, seat, wipe excess, cure, and test. Following the recommended curing times from the cement manufacturer will maximize joint integrity.
Common mistakes and how to avoid them
Common mistakes include cutting inaccurately, skipping the dry-fit step, and not cleaning the pipe ends thoroughly. Poor alignment can lead to leaks or restricted flow. Do not rush the priming and cementing process—improper bonding is a leading cause of failure. Ensure you use the right cement for the type and diameter of PVC and avoid reusing damaged sections. Excess adhesive on the exterior can clog joints or create slippage. Lastly, never apply cement to a wet surface; moisture can compromise bond strength.
Testing and long-term reliability
After the repair, test the joint under normal operating conditions. Open the water supply slowly and observe the joint for several minutes; look for drips or sweating that indicates a weak bond. If leakage is detected, depressurize the line and re-check the rough edges, re-prime, and re-cement as needed. A properly installed PVC repair coupling should hold pressure and maintain a clean bore during typical household use. Over the long term, periodic inspection helps identify wear around joints before a leak develops and keeps your plumbing system reliable. This section reflects guidance from the Home Repair Guide team on practical maintenance and safety.
Maintenance tips and when to call a pro
Keep repair couplings ready for future small repairs and seasonal checks. If you notice repeated leaks at a single joint, consider replacing the affected section rather than repeatedly repairing the same spot. For complex piping layouts, or if you encounter heat, chemical exposure, or advanced material types, consult a licensed professional. Homeowners should always follow local codes and best practices for potable water lines and drainage systems, and never hesitate to seek professional assistance for high-risk repairs.
Tools & Materials
- PVC pipe cutter or fine-toothed handsaw(Cuts cleanly; use on 1/2'' to 2'' pipes as applicable)
- PVC primer(Purple color helps verify cleaning; apply to both pipe ends and inside of the coupling)
- PVC cement (solvent cement)(Use a cement compatible with schedule 40 PVC; apply to wetted surfaces within seconds of priming)
- Repair coupling (slip-on type)(Size to pipe OD; have a spare size on hand for unexpected mismatches)
- Measuring tape(Accurate OD measurement; record before buying fittings)
- Permanent marker(Mark cut lines and orientation clearly)
- Emery cloth or sandpaper (120–220 grit)(Smooth burrs and rough edges after cutting)
- Gloves and eye protection(Safety first when handling primer and cement)
- Rags/paper towels(Wipe excess cement and clean work area)
Steps
Estimated time: 45-60 minutes (installation) + curing time per cement manufacturer
- 1
Turn off water and drain line
Shut off the main water supply and open a faucet downstream to relieve pressure. This ensures you won’t cut pressurized pipe and helps you work safely. Keeping the area dry reduces cement mishaps and ensures a cleaner joint.
Tip: Relieve pressure gradually to avoid spray jets; have a bucket ready for residual water. - 2
Cut out the damaged section
Measure the damaged area and mark a straight cut. Use a clean, square cut and avoid jagged edges. A precise cut makes deburring easier and improves the seal.
Tip: Cut slightly longer than the repair sleeve to allow trimming if needed. - 3
Deburr and clean the cut ends
Remove burrs with emery cloth and wipe the ends with a dry rag. Clean surfaces ensure primer adheres properly and that cement can bond evenly.
Tip: Dry surfaces only; moisture can weaken the bond. - 4
Dry-fit the repair coupling
Place the sleeve over the pipe to check for fit and alignment before applying primers or cement. Adjust as needed until the joint sits squarely on both ends.
Tip: A good dry-fit avoids forced seating and leaks. - 5
Apply primer to ends and inside of coupling
Coat the pipe ends and the internal surface of the coupling with primer. Let it dry briefly per label instructions. Primer prepares the plastic for cement bonding and improves adhesion.
Tip: Do not over-apply; a thin coat is enough. - 6
Apply cement to ends and inside of coupling
Apply a thin, even layer of cement to the primed areas. Quick, even application prevents pooling and weak bonding at the joint.
Tip: Work efficiently; cement tacks fast to PVC. - 7
Seat the pipe into the coupling
Push the pipe ends into the coupling until fully seated. Give a gentle twist to ensure a full bond but avoid forcing the joint.
Tip: Hold the joint for 20–30 seconds to set the bond. - 8
Wipe excess cement and allow curing
Wipe away any cement you see outside the joint. Allow the joint to cure according to cement manufacturer guidelines before introducing water.
Tip: Check labels for cure time; cooling fluids can help maintain position. - 9
Test for leaks
Turn the water back on slowly and inspect the repaired section under normal pressure. Look for drips or damp spots for several minutes. If leaks appear, depressurize and re-apply primer and cement as needed.
Tip: If leaks persist, replace the sleeve or consult a professional.
FAQ
Do I need primer for PVC repair coupling?
Yes. Primer cleans and prepares the PVC surface to improve cement adhesion and joint strength.
Yes. Primer prepares the PVC so the cement bonds properly.
Can I reuse an existing coupling?
Typically not if the coupling is cracked or deformed. Inspect for signs of wear and replace as needed.
Usually you should replace a damaged coupling rather than reuse it.
What size coupling do I need?
Match the coupling to the pipe outside diameter (OD). Measure OD with a tape and select the size accordingly.
Measure the pipe diameter and pick a coupling that fits that size.
Is PVC cement safe for potable water lines?
PVC cement is commonly used for potable water lines when used as directed and with proper ventilation.
Yes, when used per the product instructions and with ventilation.
How long does curing take?
Curing times depend on the cement; always follow the manufacturer’s label for waiting periods before testing.
Follow the cement’s curing time as shown on the label.
What should I do if the joint leaks after installation?
Shut off water, re-check alignment, re-prime and re-cement as needed, then retest.
If it leaks, re-check everything and re-cement.
Watch Video
Key Takeaways
- Confirm correct coupling size before purchase
- Prime and cement with clean, dry surfaces
- Seat pipe fully and test for leaks before finishing
- Follow curing times to ensure long-term integrity