Propane Heater Repair: Safe Step-by-Step Guide for Homeowners
Learn how to diagnose and safely repair propane heater issues with a practical, homeowner-friendly approach. This guide covers safety prep, common symptoms, a structured diagnostic process, and when to call a pro.

Propane heater repair means diagnosing and safely fixing common failures in propane-fired heaters, from burners and igniters to regulators and venting. Before you start, shut off the gas and power, ensure good ventilation, and follow local codes. This guide provides safe, step-by-step checks you can perform as a homeowner. Know when to stop and call a pro.
Understanding propane heater basics
Propane heaters operate by burning propane gas to produce heat, which is dispersed through a heat exchanger. Key components include the burner assembly, ignition system, thermocouple or flame sensor, pressure regulator, gas valve, and venting. Proper combustion produces a blue flame and balanced exhaust; a yellow or orange flame or excessive soot indicates incomplete combustion and a potential safety risk. Understanding these parts helps you spot symptoms early and prevents dangerous conditions such as gas leaks or carbon monoxide production. Home Repair Guide emphasizes safe, informed care because gas appliances pose unique hazards when mishandled.
Safety prerequisites before attempting any repair
Safety is non-negotiable when working with propane. Always shut off the gas at the tank or supply valve, then disconnect power to the unit if it relies on electricity. Ventilate the area well, especially if you’re testing indoors. Use a carbon monoxide detector, and keep a soap solution ready to test for leaks rather than using an open flame. If you smell gas strongly, evacuate immediately and contact emergency services. This approach minimizes risk while you inspect for obvious issues like loose connections, damaged hoses, or blocked vents.
Diagnosing common symptoms and what they mean
Different symptoms require different checks. A heater that won’t ignite may have a faulty igniter or a clogged burner; a flickering or yellow flame may indicate poor combustion or a dirty burner; frequent cycling or no heat at all can point to a safety switch or thermostat problem. Smelling propane or seeing soot are red flags that require immediate attention. Keep a log of observed symptoms, times, and any recent changes to the system to help narrow down root causes when you consult manuals or a professional.
Tools, workspace, and preparation for repair
Set up a clean, dry workspace with adequate lighting. Gather a gas-safe shut-off tool, adjustable wrench, screwdrivers, needle-nose pliers, a multimeter (optional but helpful for electrical checks), a soap bottle for leak testing, safety glasses, work gloves, a flashlight, and a CO detector. Have the unit manual on hand, and ensure you know the model number to source the correct parts. Label fasteners as you remove panels to simplify reassembly. This preparation reduces frustration and increases safety during the repair process.
Routine checks to prevent future problems
Even without a full repair, you can reduce risk by performing periodic checks: inspect venting for obstructions, clean the burner and flame sensor, ensure the flame is blue, and verify that the gas connections are snug. Test the igniter and safety switches periodically, especially before the cold season. Replace or service worn components using parts specified by the manufacturer. Regular maintenance can extend the life of your propane heater and improve efficiency.
When to call a licensed technician
If you encounter persistent ignition issues, gas odors, inconsistent flame, or failed safety tests, stop and contact a licensed technician. Gas work is hazardous and often requires specialized tools and knowledge of local codes. If you’re uncomfortable with any step, prioritize safety and seek professional service rather than risking a hazardous situation. Home Repair Guide supports proactive, safe decisions that protect your home and family.
Venting, CO risk, and code considerations
Venting integrity is essential for safe operation. Inspect flue pipes for leaks, corrosion, or obstructions, and ensure the vent termination is clear of debris. Carbon monoxide is colorless and odorless, so reliable detectors are vital and must be tested monthly. Familiarize yourself with local codes and permit requirements, and never bypass safety features or use temporary fixes. Proper venting and compliance reduce risk and ensure reliable heat during cold months.
Tools & Materials
- Gas shut-off wrench or key(To close propane supply safely at tank valve or line)
- Adjustable wrench(For fittings and socket adjustments)
- Phillips and flat-head screwdrivers(Access panels and connectors)
- Needle-nose pliers(Grip small components and remove clips)
- Multimeter (optional)(Electrical checks on ignition or control circuits)
- Gas leak detector solution or soap water(Test joints and connections for leaks)
- Flashlight(Illuminates dark areas and panels)
- Safety goggles(Protect eyes from debris and gas exposure)
- Work gloves(Protect hands during disassembly)
- Carbon monoxide detector(Place near heater and test regularly)
- Owner's manual or service manual(Manufacturer steps and safety notes)
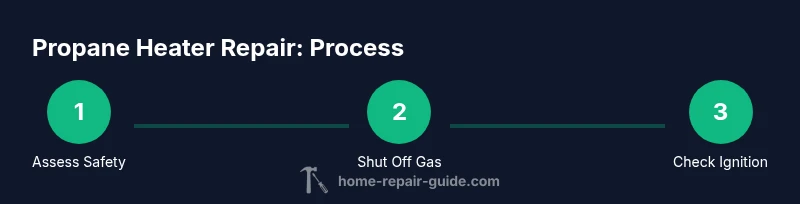
Steps
Estimated time: 60-120 minutes
- 1
Identify problem and prep workspace
Survey observed symptoms and verify that the area is safe for inspection. Read the manual for model-specific cautions. Gather tools and clear the area before touching any components.
Tip: Document symptoms with timestamps to help diagnose later. - 2
Shut off gas and power to the unit
Close the propane supply valve and disconnect electrical power if applicable. Do not operate the heater while any valve is open or if you detect a gas odor. This prevents accidental ignition during inspection.
Tip: Use the gas shut-off wrench or key to ensure the valve is fully closed. - 3
Open access panels and inspect burner components
Remove panels to access the burner, igniter, and flame sensor. Look for soot buildup, loose connections, or obvious damage. Clean gently with a soft brush and ensure connectors are snug.
Tip: Do not use metal tools on coated surfaces; use a nylon brush instead. - 4
Check ignition system and flame sensor
Inspect the igniter for cracks or wear and test the flame sensor for proper operation. A fouled sensor or cracked igniter can prevent reliable ignition. If needed, clean the sensor with a soft cloth.
Tip: Disconnect power before touching electrical components; avoid touching hot surfaces. - 5
Test gas leaks and connections
Apply soap solution to joints and hoses while the system is pressurized. Watch for bubble formation indicating a leak. Tighten fittings or replace damaged hoses as required, and re-test after adjustments.
Tip: Never test leaks with a flame; this is dangerous and may cause ignition. - 6
Inspect venting and combustion products
Check the vent for obstructions and ensure exhaust is clear. A blocked vent can cause backdrafting and CO buildup. If you see corrosion or heavy rust, consider replacement.
Tip: Ensure the vent run is secured and free of debris before reassembly. - 7
Replace worn or damaged parts
If ignition components, sensors, or seals show wear, replace with manufacturer-approved parts. Avoid improvising parts; mismatches can create safety hazards. Always follow torque specs where provided.
Tip: Keep track of part numbers to source exact replacements. - 8
Reassemble and perform a controlled restart
Reinstall panels, reconnect power, and reopen the gas supply slowly. Monitor burner flame color (blue is ideal) and listen for abnormal noises. If flame is unstable, power cycles, or gas odors appear, power down and call a professional.
Tip: Stand back during ignition and be ready to shut off gas if something seems off. - 9
Assess ongoing risks and know when to call a pro
If issues persist after basic checks or you’re uncertain about any step, contact a licensed technician. Gas work requires expertise and adherence to codes to ensure long-term safety.
Tip: Safety first: never bypass shut-offs or venting safety features.
FAQ
Is it safe to repair a propane heater yourself?
DIY repairs can be safe for basic inspections and leak testing when you follow safety protocols and stay within your skill level. Gas work has risks, so stop if you encounter unfamiliar components or smells of gas. When in doubt, contact a licensed technician.
DIY can be safe for simple checks if you follow safety rules; otherwise, call a professional.
What are common signs my propane heater needs repair?
Watch for ignition failure, a consistently yellow flame, unusual noises, soot buildup, or gas smells. These signs suggest problems in the burner, igniter, venting, or seals that warrant closer inspection.
Ignition failures and unusual flames are common repair signals.
Can I test for gas leaks myself?
Yes, using a soap solution on joints and hoses while the system is pressurized. Do not use flame to test leaks. If you see bubbles, tighten the joint or replace the component and re-test.
Leak-test with soap, never flames.
When should I replace rather than repair?
If parts are hard to source, repairs are frequent, or the unit is aging, replacement may be more cost-effective and safer. Always compare the cost and availability of parts with a new unit’s efficiency and safety features.
Frequent repairs or unavailable parts mean replacement may be best.
How do I shut off propane safely?
Close the tank valve or main shut-off slowly, then ventilate the area. Never operate equipment with a gas leak or after shutting off gas until you’ve confirmed safety.
Close the valve and ventilate before inspecting.
Are CO detectors important for propane heaters?
Yes. Place CO detectors near the heater and test them monthly. They provide early warning of dangerous combustion byproducts and save lives.
CO detectors are essential near heaters and should be tested regularly.
Watch Video
Key Takeaways
- Shut off gas and power before inspection.
- Test for leaks with soapy solution, not flames.
- Blue flame indicates proper combustion; yellow warns of issues.
- Follow the manufacturer’s manual; call a pro if unsafe.
- Maintain detectors and ventilation for continuous safety.