Sprinkler Head Repair: A Step-by-Step Guide for Homeowners
Learn to diagnose, repair, and maintain sprinkler heads with practical, step-by-step methods. This Home Repair Guide tutorial covers leaks, clogs, spray patterns, and seasonal upkeep for reliable irrigation.

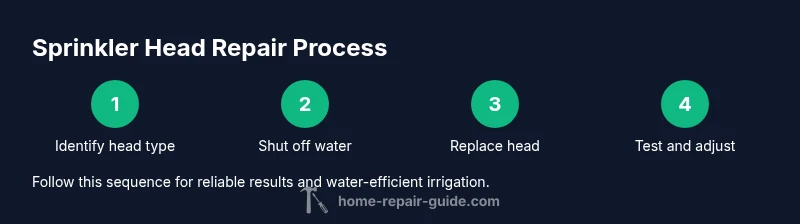
Learn how to diagnose, repair, and maintain sprinkler head issues to stop leaks, fix spray patterns, and improve irrigation efficiency. This guide covers common head types (pop-up and spray), how to shut off water safely, when to replace parts, and a practical, step-by-step workflow you can complete in 30-60 minutes with basic tools.
Why sprinkler head repair matters
Sprinkler head repair matters for conserving water, maintaining lawn health, and preventing costly leaks. When a head leaks or sprays unevenly, water is wasted and zones may not get even coverage. According to Home Repair Guide, proper sprinkler head repair begins with correctly identifying the head type and understanding the zone layout. A well-maintained irrigation system reduces water bills and extends your landscape's life. By addressing issues early, homeowners avoid unnecessary trenching or full system replacement. In 2026, proactive repairs and regular maintenance are even more important as drought awareness grows and water-use standards tighten. This guide walks through diagnosis, parts, and safe repair practices, with a focus on durability and easy, durable fixes.
Types of sprinkler heads and how they affect repair
Irrigation systems use several head styles, and your choice influences repair steps. Pop-up spray heads are common for lawns and are usually serviceable by replacing the cap, aerator, or nozzle. Rotor heads rotate in a circular arc and often require different spray adjustments and seal checks. Inline or fixed spray heads stay placed and may need O-rings replaced if leaks appear at the base. Understanding your head type helps you choose compatible replacement parts and prevents over-tightening or misalignment that wastes water. Identifying the head type also informs how you align spray patterns with borders, sidewalks, and plant beds for optimal coverage.
Diagnosing common problems
Leaks around the base, misting spray, and heads that fail to pop up are the most frequent sprinkler head issues. Leaks usually indicate worn O-rings or damaged seals, while misting points to a clogged nozzle or incorrect pressure. Uneven coverage often means misaligned spray patterns or a wrong nozzle for the zone. Start by inspecting the head visually, listening for hissing at fittings, and testing the zone while watching for spray arcs. Document findings before disassembly so you can verify improvements after repair. The Home Repair Guide analysis suggests noting the head type, location, and any recent landscape changes to guide repairs.
Safety and preparation
Before touching any irrigation components, turn off the water to the affected zone and relieve pressure by briefly opening a nearby drain or faucet. Wear safety glasses and work gloves to protect eyes from spray and sharp edges. Keep a bucket handy to catch water and a towel to wipe away dirt. Use small tools to avoid bending pipes, and never work beneath an active sprinkler head that could spray unexpectedly when pressure remains. For extra protection, position yourself so you are not directly in the spray pattern and avoid stepping on buried lines. These precautions help prevent injuries and pipe damage during repair.
Cleaning and replacing heads
To replace a head, start by removing the nozzle and collar: use a wrench gently to unscrew the head from the riser, then wipe threads and inspect O-rings. If the seal is cracked or the O-ring is deformed, replace the head or O-rings with compatible parts. Clean dirt and mineral buildup from the riser and nozzle with a soft brush. Apply PTFE tape to male threads before reinstalling to eliminate leaks, then thread the replacement head on by hand and snug it with a wrench—do not overtighten. Recheck for debris, test the valve, and observe that the head retracts fully after each cycle.
Adjusting spray patterns and water pressure
After installation, test the zone and observe spray arcs. If the arc or radius is off, adjust the nozzle cap, change to a compatible nozzle, or reposition the head. For even coverage across your lawn, aim to align spray patterns with landscape features and neighboring heads. Be mindful of water pressure; excessively high pressure can cause misting and overspray. If the pressure is high, consider reducing irrigation duration or installing a pressure regulator and ensuring the zone valve is fully open. Regular checks help sustain uniform watering and reduce waste.
Seasonal maintenance and winterization
Plan seasonal checks to prevent head damage and leaks. In spring, inspect all heads for cracks and reseat misaligned spray. In fall, clean filters and remove trapped debris. Winterize outdoor irrigation in cold climates by draining lines or using compressed air per manufacturer guidance. Home Repair Guide recommends documenting a simple maintenance schedule and keeping spare O-rings or nozzles on hand to minimize downtime. Consistent maintenance supports water efficiency and a healthier landscape year-round.
Common mistakes and when to call a pro
Rushing replacement without identifying head type leads to ill-fitting parts. Overtightening fittings can crack plastic components and create leaks. Ignoring zone-level testing means you may miss partial failures. If you encounter underground leaks, broken supply lines, or soil heave near the head, it's safer to call a professional. The Home Repair Guide team notes that persistent leaks after replacement, or a head that still won’t pop up, are signs to seek help.
Tools & Materials
- Replacement sprinkler head (same type and spray pattern)(Match current head type (pop-up, spray, rotor) and spray radius.)
- Adjustable wrench(Loosen tight fittings without crushing plastic.)
- Needle-nose pliers(Remove collars or seals as needed.)
- Screwdrivers (Phillips and flathead)(For screws on certain heads or fittings.)
- PTFE thread seal tape(Wrap 2-3 turns on male threads.)
- Bucket or tray(Catch water and hold parts.)
- Rags or towels(Clean surfaces and wipe debris.)
- Safety glasses(Eye protection against sudden sprays.)
- Work gloves(Protect hands from sharp edges.)
- Soft brush or old toothbrush(Clean dirt from head and riser.)
- Utility knife(Trim damaged O-rings or debris.)
- Optional replacement O-rings(Carry spares for quick fixes.)
- Silicone lubricant(Light lubrication for seals (avoid grease).)
Steps
Estimated time: 30-60 minutes
- 1
Identify head type and compatibility
Visually confirm whether you have a pop-up, spray, or rotor head and determine the exact model if possible. This ensures you buy the correct replacement and reinstall with proper orientation. Take a quick photo for reference.
Tip: Document head type and spray radius before disassembly. - 2
Shut off water and relieve pressure
Turn off the irrigation zone at the controller or main valve. Open a nearby zone drain or faucet to release remaining pressure and reduce spray when removing the head.
Tip: Never work on pressurized heads; you must relieve pressure first. - 3
Remove damaged head and inspect components
Carefully unscrew the head from the riser with a wrench, wipe threads clean, and inspect O-rings and seals for wear or cracks. If the body is cracked, replace the head rather than attempting a repair.
Tip: Check O-rings for soft, stretched, or torn surfaces. - 4
Install replacement head and seal
Apply PTFE tape to the male threads, install the new head by hand, then snug with a wrench. Avoid overtightening, which can crack plastic components and cause leaks.
Tip: Hand-tighten first, then snug—no excessive force. - 5
Test the zone and adjust spray
Turn the zone back on and observe the new head. If the spray arc is off, adjust the nozzle or rotate the head to align with nearby heads and property boundaries. Address leaks promptly if they appear.
Tip: Run the zone twice to confirm consistent operation. - 6
Document and plan maintenance
Record head type, location, replacement parts, and next maintenance window. Create a simple seasonal checklist to prevent future issues and extend system life.
Tip: Keep spare O-rings and nozzles on hand for quick fixes.
FAQ
What types of sprinkler heads can be repaired?
Most repairs apply to pop-up spray heads and rotor heads; damaged bodies require replacement. Check your model’s manual for compatibility.
Most repairs apply to pop-up and rotor heads; if the body is cracked, replace the head. O-rings can be replaced if the body is okay.
Do I need to drain the entire irrigation system to repair a head?
Often you can isolate the zone and relieve pressure; you may not need to drain the entire system. Always shut off water and relieve pressure first.
Usually you don’t need to drain the whole system—just isolate the zone and relieve pressure.
Can I fix a cracked head without replacing it?
A cracked body generally requires replacement. If only the O-ring is damaged, you can replace the O-ring or head for a quick fix.
If the body is cracked, replace the head. O-rings can be swapped if the body is still sound.
How often should sprinkler heads be inspected?
Inspect heads at the start of each irrigation season and after major weather events. Look for leaks, misalignment, and clogged nozzles.
Check heads every season and after big weather events to keep coverage even.
What safety precautions should I take when repairing irrigation heads?
Shut off water, relieve pressure, and wear safety glasses and gloves. Be mindful of buried lines and keep bystanders away during testing.
Turn off the water and wear eye protection. Be careful around buried lines.
Is hiring a pro worth it for sprinkler head repair?
For underground leaks or complex irrigation systems, a pro can prevent further damage. Simple fixes and replacements are often DIY-friendly.
For hidden leaks or complex setups, consider a pro; simple head fixes are usually DIY.
Watch Video
Key Takeaways
- Identify head type before replacement.
- Relieve water pressure before disassembly.
- Replace worn seals and O-rings as needed.
- Do not overtighten fittings to avoid cracks.
- Test the zone and adjust spray patterns for even coverage.