Siding Repair: A Step-by-Step Homeowner Guide
Learn to diagnose, plan, and perform siding repair safely with homeowner-friendly steps that protect your home from moisture, drafts, and energy loss. This guide covers materials, tools, step-by-step actions, safety, and budgeting tips for durable results.

In this guide you will learn how to perform safe, durable siding repair that protects your home from moisture and drafts. You’ll diagnose common problems (warped boards, cracks, loose panels), decide between repair and replacement, and follow a step‑by‑step process with tool lists, materials, and safety tips. By the end you’ll have a practical plan you can execute this weekend, with quality results.
What is siding repair and why it matters
Siding repair is the process of fixing damaged exterior cladding to protect your home from water intrusion, air leaks, and temperature fluctuations. According to Home Repair Guide, proper siding repair is essential to prevent moisture intrusion and energy loss. The Home Repair Guide team found that small cracks, warped panels, or loose fasteners can worsen quickly in freeze-thaw cycles, leading to costly damage if not addressed promptly. A well-executed repair not only improves curb appeal but also extends the life of the wall system and improves energy efficiency. This section sets the stage by helping you understand when a repair is needed, what materials are involved, and how to plan for a durable fix that lasts for years.
Common siding problems and when to repair vs replace
Most homes encounter several common issues with siding over time. Cracks in vinyl or fiber-cement panels allow water to seep behind the cladding, accelerating rot or mold growth on the substrate. Warping or buckling can occur from sun exposure, improper installation, or structural movement, reducing effectiveness and letting drafts in. Loose or missing fasteners create gaps that invite moisture and pests. Replacing an entire section is sometimes more cost-effective than patching multiple damaged areas, especially if the underlying substrate is compromised. When deciding repair vs. replacement, consider age, extent of damage, substrate condition, and your long-term goals for energy efficiency and maintenance.
Materials and preparation for a siding repair project
Before you start, lay out a clear plan and inventory of materials. Identify the siding material (vinyl, fiber cement, wood, or engineered wood) and obtain matching panels or patch pieces. Prepare the work area by removing obstacles, protecting nearby surfaces, and ensuring stable ladder placement. A thorough prep includes inspecting the underlayment or sheathing for water damage, checking flashing around windows and doors, and ensuring you have weather-resistant sealant, nails or screws, and a compatible patch material. This preparation prevents misfits and ensures a durable, weather-tight repair.
Siding types and how repairs differ by material
Each siding material has unique repair needs. Vinyl siding usually requires cutting, snapping in a patch piece, and sealing the seams with color-matched caulk. Fiber cement can be cut with carbide blades and bonded with exterior-grade adhesive and screws; flashing must be integrated to avoid water intrusion. Wood siding restoration may involve plank replacement, rot treatment, and re-staining. Understanding the material guides your cut, fastener choice, and sealing strategy, ensuring the repair lasts as long as the surrounding material.
Safety, weather considerations, and planning
Siding repair involves ladders, cutting tools, and potential exposure to sharp edges. Plan work for dry, mild weather to prevent sealant failure and material brittleness. Wear safety gear: gloves, safety glasses, and sturdy footwear. If you’re unsure about structural integrity or moisture behind the siding, pause and consult a professional. A careful plan reduces risk and delivers a better finished result.
Maintenance and long-term prevention to extend life
After completing repairs, establish a simple maintenance routine: inspect annually, clean joints, and reseal where needed. Address moisture sources such as roof overhangs, gutters, and downspouts to prevent future damage. Regular cleaning prevents mold and mildew growth and preserves paint, sealants, and patch materials. This ongoing care keeps your siding functioning well for years and protects interior walls from water damage.
Safety, permits, and when to hire a pro
Some siding repairs are straightforward for confident DIYers; others require licensed help, especially when rot involves structural elements or if electrical or plumbing behind walls is involved. Check local permitting requirements and building codes before starting more extensive work. If you doubt your ability to safely remove damaged sections or to properly flash repairs, hire a professional. Safety and code compliance should never be overlooked.
Cost, budgeting, and ROI of siding repairs
Costs vary by material, square footage, and repair complexity. A typical repair patch will be cheaper than full panel replacement, but long-term ROI improves when you prevent water damage and energy loss. Plan for materials, tools, and potential labor if you hire help. A smart budget considers future maintenance and potential upgrades to energy efficiency and curb appeal.
Tools & Materials
- Tape measure(For accurate patch sizing and layout)
- Safety gear (gloves, safety glasses)(Protect hands and eyes from debris)
- Ladder and stabilizer(Stable access to repair area)
- Putty knife(Scrape away damaged sealant and debris)
- Pry bar or flat bar(Loosen damaged panels without tearing substrate)
- Tin snips or circular saw with carbide blade(Cut patch piece to fit exact opening)
- Caulk gun and exterior sealant(Seal joints to prevent water ingress)
- Exterior patch piece (matching siding)(If patching, ensure color and profile match)
- Nails or corrosion-resistant screws(Attach patches securely)
- Hammer or cordless drill(Install fasteners efficiently)
- Caulking, paint, or stain (if required)(Finish to match surrounding siding)
- Flashlight or headlamp(Inspect dark corners for hidden damage)
- Water-proofer sealant (optional)(Additional protection around patches)
Steps
Estimated time: 2-6 hours
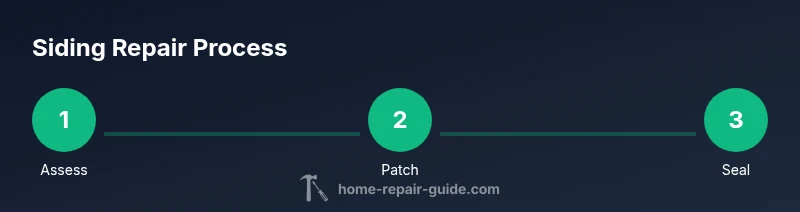
- 1
Assess the damage and plan
Walk the affected area, document damaged panels, rot, or gaps, and decide whether repair or replacement is best. Measure opening sizes to guide patch fabrication, and note any flashing that may be impacted. Create a quick materials checklist to prevent mid-project trips.
Tip: Take photos for reference and to aid color matching. - 2
Gather tools and materials
Collect all required tools and patch pieces before you begin. Verify patch color and profile match your siding and check weather forecasts to avoid rain during repair.
Tip: Have a small spare patch and spare nails on hand in case of miscuts. - 3
Remove damaged siding carefully
Loosen fasteners and detach damaged panels without disturbing neighboring sections. If rot is present behind the panel, address substrate damage first to prevent recurring issues.
Tip: Use a putty knife to separate caulk seams to minimize panel damage. - 4
Prepare substrate and install patch
Clean the opening, trim back any rotted edges, and fit the patch piece. Secure with corrosion-resistant fasteners, ensuring the patch sits flush with surrounding siding.
Tip: Dry-fit patch before permanently fastening to confirm fit. - 5
Seal, flash, and finish
Apply exterior sealant along joints, re-seal edges, and ensure flashing around the patch is integrated with existing flashing. If required, apply a matching paint or stain for a uniform look.
Tip: Use painter's tape to prevent sealant spreading onto the patch area. - 6
Inspect and clean up
Inspect the repaired area for gaps, moisture pockets, and color mismatch. Clean tools, remove debris, and perform a quick test by spraying water on the patch area.
Tip: Document the repair for future maintenance records.
FAQ
Can I repair vinyl siding myself, or is replacement always necessary?
Many minor vinyl siding issues can be repaired by a DIYer, especially cracks or small gaps. If damage is widespread, the substrate is rotten, or color matching is difficult, replacement may be more cost-effective and durable in the long run.
Many vinyl problems can be fixed at home, but extensive damage or rotten substrate might require replacement.
What signs indicate I should replace siding rather than repair?
Consider replacement if there is widespread warping, extensive rot behind panels, persistent moisture, or if color and texture mismatch can’t be achieved with patches. Replacement also improves energy efficiency more reliably in older homes.
If most panels are damaged or rot is extensive, replacement is often the better option.
Do I need permits for siding repairs?
Most minor siding repairs do not require permits, but larger repairs or replacements that involve structural elements, flashing, or roofline integration may. Check your local building department to confirm requirements.
Check with your local building department to be safe; major work may need a permit.
How long does a typical siding repair take?
A small patch on vinyl or fiber cement can take a few hours, while larger repairs or complicated flashing may take a full day. Weather, material availability, and site accessibility influence timing.
Most small repairs finish in a few hours; bigger jobs may take longer.
How should I match color and texture for patches?
Bring a sample or take precise measurements of the patch area, then choose a patch piece that closely matches the existing profile and color. For painted wood or fiber cement, refinishing the patch to blend with surrounding panels is essential.
Match the patch piece to the existing siding and refinish if needed for a seamless look.
What safety gear is essential for siding repair?
Wear gloves, safety glasses, and non-slip footwear. Use a sturdy ladder with a stabilizer and have a helper or spotter when working on elevated areas.
Gloves, eye protection, sturdy shoes, and ladder safety are essential.
Should I seal patches, and with what sealant?
Use exterior-grade sealant compatible with your siding material. Seal seams around patches to prevent water entry, and ensure it remains flexible in temperature changes.
Seal seams with exterior sealant that matches your siding material.
Are there maintenance tips to extend siding life after repair?
Inspect annually, clean surfaces, check flashing, and address small gaps promptly. Prompt maintenance slows deterioration and preserves appearance and performance.
Do yearly checks, clean, and seal minor gaps early.
Watch Video
Key Takeaways
- Identify damage early to prevent moisture migration.
- Choose patching or replacement based on substrate condition and age.
- Use matching materials and proper flashing for durable repairs.
- Prioritize safety and weather when planning work.
- Document the repair for future maintenance.