Repair Siding: A Practical DIY Guide for Homes & Exteriors
Learn practical, durable repair siding techniques—from patching small cracks to panel replacement—plus safety steps, tools, and weatherproofing tips for long-lasting results.

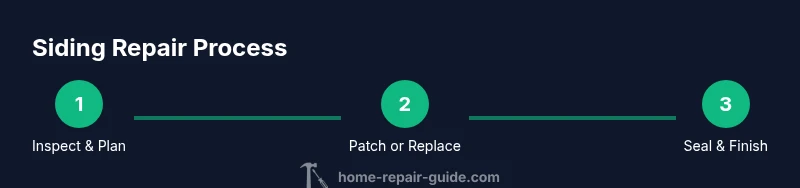
Goal: repair siding to stop leaks, restore appearance, and extend exterior durability. Start by identifying damage type (cracks, rot, loose panels) and the siding material you have. You can patch small cracks with exterior filler or sealant, or replace damaged panels. Plan for a weather window and gather the right fasteners and flashing. This Home Repair Guide approach delivers practical, durable results.
Understanding Siding Types and Common Failures
Siding protects a home from weather while delivering curb appeal. The most common materials are vinyl, wood, fiber cement, and metal; each has its own repair approach. Vinyl is usually patched when shallow dents appear, while wood can rot and delaminate, requiring more extensive repair. Fiber cement blends resist rot better but can crack with impact. Before you repair siding, identify your material and inspect the underlying sheathing for moisture damage. Look for loose panels, warping, or gaps that allow water to penetrate. Knowing the material helps choose the right patching compounds, fasteners, and flashing details for a durable repair. This practical diagnosis keeps you from over- or under-building the fix.
Safety First: Prep, PPE, and Site Access
Exterior repairs involve heights, sharp edges, and weather exposure. Wear protective eyewear, gloves, long sleeves, and sturdy footwear. Set up a stable ladder with a helper and never work on a windy or rainy day. Clear the area from plants, pets, and obstacles. Take clear photos before removing any siding; documenting original alignment saves time during reinstallation and helps you match color and profile later. Establish a clean, dry workspace and avoid rushing through steps that affect sealants and flashing.
Assessing Whether to Patch or Replace
Deciding between patching and replacing hinges on rot depth, backing integrity, and the siding’s age. If damage is localized to a few boards with solid backing, patching or sealing may be sufficient and cost-effective. If rot extends behind the siding, or the underlayment shows moisture signs, replacement is typically more durable and safer long-term. Consider climate, maintenance history, and the rest of the exterior when choosing a plan. A careful assessment helps you avoid repeated repairs and larger future costs.
Choosing Repair Methods: Patch, Seal, and Flashing
Patching involves exterior-grade filler or patch panels that match your siding profile. For gaps and small cracks, apply backer rod and a high-quality exterior caulk to seal joints, then smooth for a watertight finish. If you see rusted nails or loose panels, reseat with corrosion-resistant nails and verify fasteners are secure without overtightening. Replacing a panel may require matching the profile and color; keep flashing in place or replace it to ensure water is redirected away from joints. Thoughtful patching and flashing replacement dramatically extend siding life.
Materials: What's Needed for Common Siding Repairs
You’ll need a blend of patching compounds, sealants, matching replacement panels or patch kits, weatherproof caulk, flashing tape, corrosion-resistant nails, a hammer, a pry bar, a putty knife, a utility knife, a measuring tape, and safety gear. If you’re patching rot, you may also need exterior-grade wood filler and primer. Collect everything before you start to avoid mid-work trips. When possible, choose materials rated for exterior exposure and compatible with your siding type to ensure a seamless repair.
Best Practices for Long-Lasting Repairs: Maintenance and Weatherproofing
Durable siding repairs rely on clean surfaces, correct product choices, and proper curing of sealants. Clean the area with a mild solution before patching, and allow sealants to cure fully according to product directions before painting or loading the area with water. Apply flashing tape at joints to shed water and prevent leaks. Consider resealing every few years and inspecting after heavy storms. Regular maintenance reduces the risk of recurring issues and helps you catch problems early.
Troubleshooting Common Issues During Repair
Common problems include patch material not adhering properly due to dust or moisture, caulk not curing in humid conditions, and flashing not properly overlapped with siding. If patching fails, remove and re-clean the area, dry thoroughly, and reapply. For persistent leaks, recheck flashing alignment and ensure joints are fully sealed. If you encounter warped panels or unseen rot behind the siding, pause the repair and reassess with a professional to prevent structural damage.
When to Hire a Pro vs DIY Risks
DIY siding repair is suitable for small cracks, loose panels, or minor rot on exterior walls with solid backing. Large-scale rot, structural damage, or uncertain moisture issues demand professional assessment. Working on tall elevations or near power lines carries safety risks; if you’re unsure about the structural condition or adhesive compatibility, consult a pro. A cautious approach saves time and money by avoiding poor repairs and potential future leaks.
Quick Checklist Before You Start
- Identify siding material and assess rot depth
- Gather all required tools and replacement pieces
- Check weather window and safety equipment readiness
- Document the current layout before removing any pieces
- Plan flashing and sealant strategies to prevent water intrusion
Tools & Materials
- Safety glasses(ANSI-rated; splash protection)
- Work gloves(Durable, cut-resistant)
- Sturdy ladder(Non-slip feet; secure footing)
- Hammer(Finish nails for clean look)
- Nails (galvanized or stainless)(Corrosion-resistant)
- Pry bar(Gently lift siding without damage)
- Putty knife(For patch material and filler)
- Exterior patch material(Matching patch kit or filler)
- Exterior caulk(High-grade; paints well)
- Backer rod for caulk(For proper gap filling)
- Flashing tape(Water control at joints)
- Measuring tape(Accurate cuts)
- Replacement siding panel or patch kit(Match profile and color)
- Crowbar or multi-tool(Useful for stubborn panels)
- Sealant remover(Clean edges before patching)
Steps
Estimated time: 4-8 hours
- 1
Assess damage and plan
Carefully inspect the siding to identify rot depth and whether backing is sound. Decide patch or replace based on material and condition. Take photos for reference and measure the area to be repaired.
Tip: Document findings before removing any material to simplify reassembly. - 2
Prepare work area and safety setup
Set up your ladder, clear the area, and put on PPE. Ensure weather is suitable, and avoid working in high wind or rain. Have a helper if possible.
Tip: Test ladder stability before climbing; use a spotter on challenging elevations. - 3
Remove damaged siding and inspect backing
Gently pry away damaged panels or rot-infected sections. Check the sheathing and insulation for moisture and dry as needed before patching.
Tip: Work slowly to avoid cracking neighboring panels and to maintain alignment. - 4
Patch or replace the damaged section
If patching, apply filler or patch panels, then sand smooth. If replacing, cut a new panel to fit and fit tightly into place.
Tip: Use a sharp tool for clean edges and avoid over-cutting. - 5
Seal edges and install flashing
Apply backer rod and exterior caulk along joints, then install flashing tape where needed to divert water away from seams.
Tip: Ensure consistent caulk depth for durable sealing. - 6
Secure panel and check alignments
Nail or fasten the new section using corrosion-resistant fasteners. Recheck alignment with neighboring panels for a seamless look.
Tip: Avoid over-tightening nails, which can deform panels. - 7
Finish and cure
Clean any excess sealant, and allow patches to cure fully according to product instructions before painting or exposing to weather.
Tip: Test water runoff after curing to confirm seal integrity. - 8
Inspect and maintain
Perform a post-repair inspection after a rain event. Schedule regular checks to catch early signs of wear.
Tip: Keep a seasonal maintenance calendar to track resealing needs.
FAQ
What signs indicate rot behind siding?
Look for soft, spongy wood, dark staining, or mold behind boards. If moisture is persistent, rot may extend beyond the visible area and compromise the wall structure. In such cases, replace affected sections and inspect underlying sheathing for moisture damage.
Signs of rot include soft boards, staining, and mold behind siding. If you notice moisture, replace the area and check the wall underneath.
Can I repair vinyl siding myself?
Yes, small cracks and loose panels on vinyl siding can often be repaired with patch kits and caulk. Ensure color match and use vinyl-safe fasteners to prevent further damage.
Yes, small vinyl cracks can be patched with kits and proper caulk. Match color and use vinyl-safe fasteners.
How long does a siding repair typically last?
Durability depends on material, climate, and maintenance. Proper sealing, flashing, and correct panel installation extend the life of a repair compared with quick fixes.
Durability depends on material and climate; proper sealing and flashing help the repair last longer.
Is sealing the repair enough for water protection?
Sealant is essential, but it should be paired with flashing and proper panel seating to redirect water away from seams. Relying on sealant alone can lead to leaks.
Sealant is important, but needs flashing and proper seating to protect against leaks.
When should I replace rather than repair siding?
If rot extends behind multiple panels or backing is compromised, replacement is usually more durable and cost-effective long term than repeated patches.
If rot is widespread, replacement is typically the better option.
Watch Video
Key Takeaways
- Assess damage thoroughly before any work
- Prioritize safety with PPE and stable access
- Choose patch vs replacement based on backing integrity
- Apply a durable sealant and flashing for water control