How to Repair the Door: A Practical DIY Guide
A comprehensive, step-by-step approach to repair the door—hinges, frame, weatherstripping, and alignment—for secure, smooth operation. Learn safe, durable DIY fixes with clear checks and troubleshooting from Home Repair Guide.

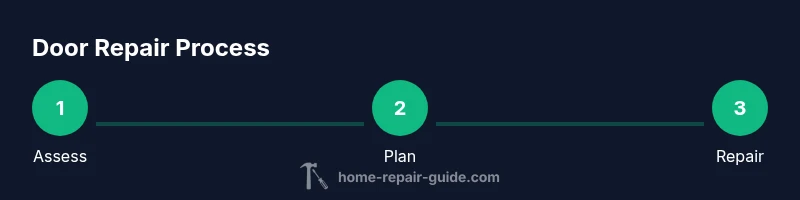
You're going to repair the door by diagnosing alignment, hinge wear, and latch issues, then restoring smooth operation. Gather basic tools, a few replacement parts, and a safety check before you start. This guide walks you through a practical, step-by-step repair that homeowners can perform with patience and care. No special licenses are needed.
Why repairing the door matters
A door that sticks, rattles, or fails to latch correctly is more than a nuisance; it can compromise security, energy efficiency, and privacy. According to Home Repair Guide, a well-executed door repair restores proper function and reduces energy loss by limiting drafts and moisture intrusion. The Home Repair Guide team found that most common door problems start with worn hinges, a misaligned frame, or degraded weatherstripping. Before you reach for tools, commit to a clear plan: identify the root cause, select appropriate fixes, and test the door at each stage. You’ll learn the signs of frame movement, hinge wear, and latch misalignment, plus how to prioritize steps so that your effort yields durable, safe operation over time.
Common failure modes to look for
Doors fail for a variety of reasons, from seasonal warping to hardware wear. A common symptom is a door that rubs the jamb or won’t latch smoothly. Look for gaps at the weatherstripping, cracked weatherstripping, or a cracked door edge. Inspect the hinges for loose screws, bent hinge plates, or shifted mounting screws that cause misalignment. The strike plate should align with the latch; if it’s bent or misaligned, the door may never latch cleanly. If the door sticks only in damp weather, moisture may have swollen the wood or warped the frame. In this section, you’ll get a structured checklist to identify root causes so you can plan a repair that lasts. Being systematic saves time and reduces the risk of over-tightening or over-sanding.
How to approach tools and materials (overview)
Having the right tools and materials makes a DIY door repair safer and more durable. Start with a basic toolkit: a hammer, screwdrivers, a drill, and a utility knife. Add weatherstripping and a few common fasteners for quick fixes. If hinges or the strike plate show excessive wear, plan to replace those components rather than attempt makeshift repairs. This overview helps you match the problem to a suitable fix, then stage your work so you don’t disturb other doors or trim. The goal is a stable, well-sealing door that operates smoothly and quietly.
Safety first: hazards to watch for
DIY door repairs can be straightforward, but there are hazards to consider. Always unplug power tools when not in use, wear eye protection, and keep fingers clear of the hinge area during testing. If you encounter structural damage to the door frame or to the surrounding studwork, pause and reassess. Warped or cracked wood can suddenly fail under stress, so support the door during removal and reattachment. This section highlights common safety practices to prevent injuries and ensure a durable repair.
How door hardware works (basics)
Understanding how hinges, latches, and strike plates interface helps you diagnose problems faster. Hinges support the door and control its swing; loose screws or worn hinge leaves cause misalignment. The latch must engage with the strike plate squarely; misalignment results in failure to latch or a loose feel. Weatherstripping creates a seal, reducing drafts and noise. When one component wears, it often stresses the others, leading to a cascade of issues. This section lays the groundwork for applying precise fixes later in the guide.
Plan your repair: assessment to action
Turn your inspection notes into a concrete plan. Decide whether you’ll tighten and adjust the current hardware, replace worn components, or reframe the opening. Create a simple checklist with priority tasks, estimated costs, and a rough timeline. By planning in advance, you’ll avoid overworking any single area and ensure you address the most critical issues first. This planning step is the bridge between diagnosis and durable results.
Quick fixes you can try before removal
Some door issues can be tackled without removing the door from its hinges. Tighten loose screws in the hinges and strike plate; reseat the hinge with longer screws if needed. Lubricate the hinge pins with a small amount of penetrating oil to reduce squeak. Re-seat weatherstripping that has shifted and replace torn sections. If the door binds only in one corner, you may gently sand the high spots in the jamb or door edge. These quick fixes can often restore smooth operation without major changes.
Step-by-step overview of the core repair approach
This section maps out how the actual repair will proceed once you’ve gathered tools and confirmed a plan. Start by removing the door or loosening its hinges to gain access to the frame and latch area. Inspect for warping, damaged screws, or bent plates. Replace worn hardware as needed, re-align the door in the frame, and retorque screws. Reinstall weatherstripping and test the latch. Finally, adjust the strike plate and sealing to ensure proper closure. This overview is designed to help you execute the core repair with confidence.
Finishing touches: weatherproofing and seals
Even small gaps can cause drafts and heat loss. After the core repair, apply fresh weatherstripping around the door and replace any degraded sweeps at the bottom. Check the door’s trim for gaps and fill with caulk or wood filler as appropriate. A well-sealed door not only improves comfort but also extends the life of the hardware by reducing moisture exposure. This section ties the repair to long-term energy efficiency and comfort.
When to call a pro and maintenance tips
Some problems warrant professional attention, especially if the door is structurally warped, the frame is cracked, or there is evidence of moisture damage that extends beyond the door itself. In those cases, a licensed carpenter or contractor can assess structural integrity and frame renewal. For ongoing maintenance, schedule periodic checks of hinges, screws, and weatherstripping, and re-tighten or replace as needed. Regular checks help prevent future misalignment and wear.
Tools & Materials
- Hammer (claw, 16 oz)(For tapping in pins and light prying; use straight hammering to avoid denting.)
- Screwdriver set(Phillips and flat-head; include #2 Phillips for most screws.)
- Drill/driver(Cordless preferred; have a full charge and spare battery.)
- Drill bits assortment(Assorted sizes; focus on pilot bits for screws.)
- Nails and wood screws(Use corrosion-resistant screws for exterior doors.)
- Replacement hinges (if needed)(Select identical leaf size; ensure bore pattern matches.)
- Weatherstripping(Self-adhesive foam or rubber; choose thickness by gap size.)
- Wood filler/caulk(For minor gaps or nail-hole refinishing.)
- Sandpaper (80-120 grit)(Smooth any high spots on wood edges.)
- Utility knife(Trim weatherstripping or cut away damaged material.)
- Chisel set(Use for minor frame adjustments if needed.)
- Pencil/measuring tape(Mark precise locations for screws and alignments.)
Steps
Estimated time: Estimated total time: 60-120 minutes
- 1
Assess and plan
Inspect hinges, latch, strike plate, and weatherstripping. Note where the door rubs or gaps form. Decide whether tightening, replacing, or re-framing is needed. This sets a clear scope before you touch the door.
Tip: Take photos before you begin to reference alignment later. - 2
Remove or loosen hinges
With the door supported, loosen but do not fully remove hinge screws to gain access to the frame. If hinges are loose, use longer screws to anchor into the framing for stability.
Tip: Have a helper hold the door so it doesn’t fall when screws loosen. - 3
Inspect hinge hardware
Check hinge leaves, screws, and pins for wear. Replace bent or corroded screws and worn hinge plates. If holes are stripped, install longer screws or wooden shims to restore bite.
Tip: Use a drill to pre-drill pilot holes to prevent wood splitting. - 4
Realign the door in the frame
reposition the door so it fits evenly in the jam. Tighten screws gradually, checking the gap around the door and ensuring the latch lines up with the strike plate.
Tip: Open/close the door a few times as you tighten to verify smooth operation. - 5
Adjust the strike plate and latch
If the latch misses the strike plate, loosen the strike screws and shift the plate slightly. If misalignment persists, file or chisel the strike opening for a clean engagement.
Tip: Mark tiny alignment changes with a pencil to track progress. - 6
Address weatherstripping
Replace worn weatherstripping and reseal any gaps. Ensure a snug seal when the door is closed without compressing the material excessively.
Tip: Choose a weatherstripping thickness based on the door gap at several points. - 7
Test and finish
Reinstall the door, test all functions, and check for any rubbing or sticking. Sand rough spots and apply finish as needed. Re-test after 24 hours for stability.
Tip: Test under different humidity conditions to ensure durability.
FAQ
What are the most common door problems you can fix yourself?
Loose hinges, misalignment, worn weatherstripping, and a faulty strike plate are typical issues you can address with basic tools. Start with tightening screws, reseating hinges, and replacing weatherstripping before considering more extensive work.
Common DIY fixes are hinges, alignment, and weatherstripping. Start with tightening screws and replacing worn parts.
Do I need to remove the door to fix hinges?
Often you can fix hinges without fully removing the door by loosening screws, aligning the frame, and retightening. For heavy doors or severely worn hinges, removing the door temporarily makes access easier.
Usually you can fix hinges without fully removing the door; for heavy doors, remove it temporarily.
How can I tell if the door frame is warped?
Look for gaps around the edge of the door when closed, or doors that bind unevenly across the frame. Warping usually shows as a twist in the door edge or uneven gaps along the jamb.
Look for binding and uneven gaps; warped frames twist the door out of square.
When should I replace a door instead of repair it?
Replace when frame damage or warping is extensive, when security is compromised, or when energy efficiency cannot be restored with hardware fixes.
If the frame is severely damaged or energy goals can’t be met, replacement is wiser.
Is weatherstripping worth the effort?
Yes. Proper weatherstripping reduces drafts, improves comfort, and prolongs the life of hinges and latches by reducing moisture exposure.
Weatherstripping is worthwhile; it saves energy and protects hardware.
Watch Video
Key Takeaways
- Identify root cause first before altering hardware
- Tighten, align, or replace hinges with proper screws
- Weatherstripping is essential for energy efficiency
- Test door operation after each fix
- Know when to call a pro for structural issues