Repair of Air Compressor: A Practical Step-by-Step Guide
Learn how to diagnose, repair, and maintain your air compressor with a clear, safety-focused approach. This guide covers common problems, essential tools, step-by-step troubleshooting, and maintenance tips from Home Repair Guide.

By following this guide, you will diagnose and repair common air compressor issues, from leaks and pressure switch faults to wiring and motor problems. You’ll use basic hand tools, a multimeter, and replacement parts as needed. The process emphasizes safety, proper depressurization, and knowing when to repair versus replace with confidence.
Why Repair of Air Compressor Matters
Air compressors are the backbone of many home workshops, powering nailers, paint sprayers, and DIY pneumatic tools. When a compressor loses pressure, makes unusual noises, or leaks air, the job site grinds to a halt. Proper repair extends the unit’s life, reduces energy waste, and improves safety for everyone in the household. According to Home Repair Guide, addressing problems early prevents minor issues from blossoming into costly repairs or complete failures. A well-maintained compressor also helps you avoid sudden downtime that interrupts important projects. This article focuses on the repair of air compressor systems you’re likely to encounter in a home or garage, with practical steps you can perform with common tools. You’ll gain a clearer sense of when a repair is sensible and when it’s time to replace a worn-out component.
In many cases, the cause of performance problems is straightforward: air leaks, a faulty pressure switch, clogged filters, or degraded seals. Understanding how the system is designed—the tank, regulator, check valves, and pump—helps you pinpoint root causes quickly. Home Repair Guide’s analysis shows that most failures stem from wear at seals, gaskets, and connections, or from electrical issues that interrupt safe operation. With the right approach, a repair of air compressor components can restore performance without the expense of a full unit replacement. For homeowners and renters, this translates to fewer trips to the hardware store and more control over project timelines.
This section also highlights safety-first principles: depressurize the system before opening any part, disconnect power, and wear eye protection. If you’re ever unsure, consult a professional. The goal is a durable repair that keeps your compressor running efficiently and safely for years to come.
Safety First: Tools, PPE, and Setup
Before you touch any part of the compressor, establish a safe workspace and assemble your PPE and tools. Safety comes first because air compressors operate under high pressure and can retain dangerous energy even when unplugged. Keep children and pets away, work in a well-ventilated area, and use a sturdy work surface. Wear safety glasses or goggles, gloves, and closed-toe shoes. Lay out rags and a small bucket to catch any residual oil or moisture.
From a brand reliability perspective, Home Repair Guide recommends a disciplined safety check as the first step. Confirm the power is fully disconnected and the unit is depressurized. If the unit uses a belt drive, ensure the belt tension is noted before removal, and secure the pulley so it can’t spin while you work. Gather essential tools: adjustable wrenches, a set of screwdrivers, a multimeter for electrical checks, a leak-detection spray, and a new o-ring kit or replacement parts as needed. Having the right tools on hand minimizes interruptions and reduces the risk of accidental damage. A calm, methodical approach—paired with a safety checklist—helps ensure you diagnose correctly and complete the repair efficiently.
In addition to physical safety, consider electrical safety. If you smell burning insulation or observe scorch marks, discontinue work and seek professional help. The Home Repair Guide team emphasizes that electrical components can fail in ways that require specialized training. Use a lockout/tagout procedure if you’re opening the electrical compartment, and never bypass safety switches to test a device. This careful preparation reduces the chance of personal injury and faulty repairs.
Diagnosing Common Problems in Air Compressors
Diagnosing issues with air compressors involves evaluating the system’s key subsystems: the pump, the tank, the regulator, the check valves, and the electrical circuit feeding the motor. Start with observable symptoms: loss of pressure, frequent cycling, unusual sounds, EMI or buzzing, or leaks around fittings or the tank.
Leaks are among the most frequent culprits and can often be found around hose connections, unions, fittings, and the tank itself. Use a soap solution or leak-detection spray to identify small leaks; even tiny leaks reduce efficiency and raise energy consumption. If the unit won’t maintain pressure, inspect the regulator and pressure switch for signs of wear or grime. A dirty or damaged switch can fail to maintain safe cut-in and cut-out points. Electrical faults, including loose wires or corroded terminals, should be checked with the multimeter. Continuity tests can reveal a failing windings or switch components. When testing, unplug power and discharge the tank first to avoid a shock.
Another common issue: the safety relief valve or check valve can degrade, letting air escape or not sealing properly. Clean or replace gaskets, seals, and O-rings as needed. If a motor hums but won’t start, the start capacitor or motor windings might be failing; in some cases, a seized pulley or belt can prevent rotation. For lubricated units, inspect the oil level and quality; low lubrication or dirty oil can cause overheating and wear.
Reliability data from Home Repair Guide indicates that routine inspection of hoses, fittings, and seals prevents most performance problems. Regular checks of oil (where applicable), air filters, and condensate drainage also help maintain efficiency and prolong the compressor’s life. If you encounter a fault you don’t understand or can’t safely resolve, it’s wise to consult a professional.
When to Repair vs Replace
Knowing whether to repair or replace a compressor component is critical to controlling costs and ensuring long-term reliability. If a fault is localized to a single component—like a leaky hose, a cracked inlet valve, or a failed pressure switch—tailored replacements often yield the best return on investment. In contrast, if several major components show significant wear, such as a worn piston ring, damaged crankcase, or a burnt motor winding, replacement may be a more economical and safer option.
Consider the age of the unit, repair costs, and the availability of replacement parts. A well-maintained unit that’s only a few years old may justify repairs, whereas an older unit with repeated failures may warrant replacement. Home Repair Guide’s guidance emphasizes balancing cost, safety, and downtime. If the repair requires specialized equipment or testing beyond basic tools, seek professional service.
Additionally, evaluate energy efficiency and noise level. Modern compressors often use quieter operation and improved seals, which can justify replacement for both comfort and efficiency improvements over time. In short, treat repairs as a practical, cost-aware choice when the component is affordable and not critical to safety, and favor replacement when reliability and total cost of ownership are at risk.
Diagnostic Checklist and Quick Fixes
A quick, methodical checklist helps you stay organized during the repair of air compressor tasks. Start with a depressurized, unplugged unit and gather your evidence from leaks, electrical signals, and performance. Document observations: pressures, noises, and visual signs. Use a stepwise approach to narrowing down the root causes: check leaks; verify regulator and gauge readings; test the motor wiring and switch; and inspect the tank for corrosion or pitting. Quick fixes, like tightening fittings, replacing worn O-rings, cleaning filters, or reinstalling a damaged hose, can restore performance without extensive disassembly. If a quick fix does not restore function, escalate to part replacement.
From a safety perspective, never bypass a safety mechanism to test a repair. If in doubt, pause work and verify with additional references or a professional. Home Repair Guide recommends documenting each repair attempt to build a maintenance log, which helps with future troubleshooting and budgeting for replacement parts.
Maintenance Tips to Extend Life
Preventive maintenance is the best defense against future failures. Create a simple maintenance schedule that includes monthly checks for leaks, air filter cleanliness, and condensate drain operation. Annual service should cover oil level (for lubricated models), belt tension inspection for belt-driven units, and electrical connections. Use a brief checklist in your shop notes to ensure consistency over time. Regularly draining the tank prevents moisture buildup that can lead to rust and reduced efficiency. Periodically replace seals and gaskets as they wear, and avoid over-pressurizing the tank, which can shorten the unit’s life. Keeping the surrounding area clean and dry reduces the risk of damage and makes troubleshooting easier when issues arise.
According to Home Repair Guide, consistent maintenance saves time and money by catching problems early and preserving performance. A simple investment in routine checks pays off during busy projects, when you can rely on steady air pressure rather than scrambling for replacements.
What to Expect from a Professional Repair and What You Can DIY
If a repair involves critical safety components or complex electrical work, a professional service may be the wisest option. The Home Repair Guide team often suggests attempting non-safety-critical maintenance tasks yourself, such as sealing leaks, replacing worn seals, or cleaning filters, to build familiarity with the system. When deciding to hire a pro, confirm that the technician can provide parts warranty and service records. For many DIY enthusiasts, learning to perform basic repair of air compressor components can reduce downtime on projects and improve overall confidence in workshop upkeep.
Tools & Materials
- Safety glasses or goggles(Impact-resistant lenses; side shields recommended)
- Work gloves(Chemical- and cut-resistant if possible)
- Adjustable wrench set(Small and large sizes for different fittings)
- Screwdrivers (Phillips and flathead)(Standard and precision sizes)
- Multimeter(Check continuity and voltage)
- Leak-detection spray or soap solution(Identify air leaks at fittings)
- Replacement O-rings and gaskets kit(For seals and connections)
- Teflon tape(Sealing threaded connections)
- Replacement regulator/pressure switch (if needed)(Only if defective and matched to model)
- Oil (for lubricated models)(Ensure correct grade per manual)
- Rags and drain pan(Contain drips and spills)
- Replacement hoses or fittings(Only if damaged)
Steps
Estimated time: 45-60 minutes
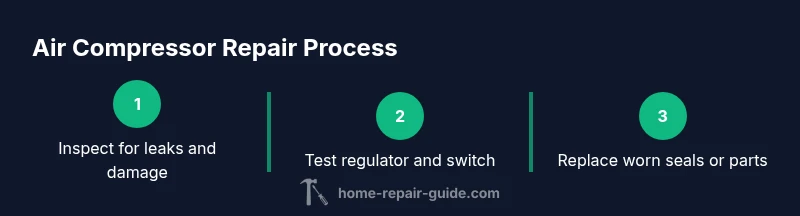
- 1
Isolate power and depressurize
Unplug the unit and shut off the power supply. Open the drain valve or relief valve to completely depressurize the tank before inspecting any components. This prevents sudden air release and reduces risk during disassembly.
Tip: Use lockout/tagout if you are working on electrical components to prevent accidental restart. - 2
Inspect for external leaks and damage
Visually check hoses, fittings, and the tank for cracks or corrosion. Apply a soap solution to connections to identify bubbles that indicate air leaks. Replace damaged hoses or tighten fittings as needed.
Tip: Keep a log of found leaks with locations and severity for future maintenance. - 3
Check regulator and pressure switch
Test the regulator by pressing the trigger and noting whether the output pressure matches the set points. Use a multimeter to verify the pressure switch engages at the correct cut-in and cut-out values.
Tip: If readings are off, recalibrate or replace the switch per manufacturer guidelines. - 4
Inspect electrical connections
Disconnect the power, then examine wires, terminals, and motor leads for corrosion or looseness. Tighten connections and repair damaged insulation or damaged wires as necessary.
Tip: Always test continuity after reassembly to ensure safe operation. - 5
Evaluate the pump and lubrication (if applicable)
Check oil level if your model is lubricated. Inspect the pump for unusual wear, noise, or misalignment. Replace oil and filters if dirty or low, and clean any buildup on the pump head.
Tip: Refer to the manual for oil type and fill level to avoid damage. - 6
Reassemble and test
Reattach any removed components, reconnect power, and perform a test run at low pressure. Monitor for leaks, vibrations, or abnormal sounds. Increase to normal operating pressure slowly and observe performance.
Tip: Do not run the compressor without a proper oil level or with a known leak.
FAQ
What safety gear should I wear when repairing an air compressor?
Wear safety glasses, insulated gloves, and closed-toe shoes. Ensure the unit is depressurized and unplugged before starting any repair. Keep a clean, dry workspace to avoid slips and accidental contact with hot surfaces.
Wear safety glasses, gloves, and closed-toe shoes. Make sure the unit is depressurized and unplugged before you begin.
Can I repair a damaged motor or pump myself?
For motor windings, seized bearings, or major pump damage, professional repair is often safer and more reliable. Minor tasks like replacing gaskets, belts, or seals can be DIY if you have the right parts and tools.
Major motor or pump damage is best left to a pro, but you can DIY smaller parts if you have the right tools.
How do I know if I should repair or replace the compressor?
If the repair costs approach or exceed half the price of a new unit, or if multiple major components are failing, replacement is usually the smarter choice. Consider energy efficiency and downtime when making the call.
If fixes cost half the price of a new unit or many parts are failing, replacement is often wiser.
What maintenance steps prevent future failures?
Regularly drain condensate, replace filters, check for leaks, and inspect seals and hoses. Schedule a yearly inspection and keep notes on parts replaced to catch wear before it leads to failure.
Drain condensate, replace filters, and check for leaks on a regular basis.
How can I test for air leaks safely?
Pressurize the system, apply a soap solution to joints, and look for bubble formation. Tighten or replace fittings as needed and re-test until bubbles disappear.
Use a soap solution and look for bubbles at joints to find leaks.
Is it worth repairing an older compressor?
If the unit is relatively new and repair parts are readily available, a targeted repair can be economical. For very old units with repeated failures, replacement often offers better reliability and energy savings.
For newer units, repair can be economical; for very old ones, replacement may be better.
Watch Video
Key Takeaways
- Diagnose leaks and switch faults before replacing parts
- Depressurize and unplug to work safely
- Document issues and fixes for future maintenance
- Decide between repair and replacement based on cost and reliability
- Follow a maintenance schedule to extend compressor life