Phone Screen Repair Apple: A Practical DIY Guide
Learn safe, practical steps for phone screen repair apple on iPhone. This in-depth guide covers DIY vs professional options, parts, tools, step-by-step replacement, testing, safety, and warranty considerations.

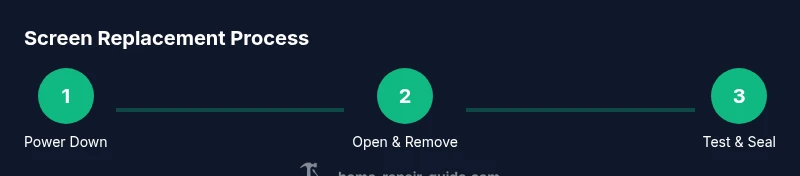
Goal: perform a safe phone screen repair apple by replacing a cracked iPhone display with the correct panel. This quick guide covers damage assessment, part selection, tool setup, and a step-by-step replacement. Home Repair Guide notes that DIY repairs can affect warranties—read each step carefully and test the device afterward.
What is included in phone screen repair apple options
When you plan a phone screen repair apple, you have several paths: DIY with a replacement display, a third-party service, or an Apple Authorized Service Provider. The term phone screen repair apple is commonly used to describe replacing cracked or unresponsive iPhone screens. Understanding the differences helps you choose between cost, turnaround time, and risk. DIY replacement requires careful handling of fragile parts, precise tools, and compliant safety practices. In this guide from Home Repair Guide, we emphasize methodical planning, model-specific parts, and test procedures to maximize your success. The iPhone screen assembly includes the display, touch sensor, and front camera alignment; mismatching any component can lead to touch issues, color shifts, or dead zones. Always verify compatibility with your exact model and iOS version before purchasing parts.
According to Home Repair Guide, using compatible parts is essential for a successful phone screen repair apple. Before you buy, confirm your model number (found in Settings > General > About) and the correct replacement panel. If you’re unsure, consult the manufacturer’s compatibility list or a reputable repair guide to avoid common mistakes such as incorrect digitizer connections or frame fit issues.
DIY vs professional repair: risks, costs, and quality
Choosing between DIY and professional options for phone screen repair apple hinges on risk tolerance, budget, and warranty considerations. DIY offers the potential for savings but includes risks like damaging connectors, puncturing a battery, or poor adhesive seal if not done correctly. Professional service ensures trained technicians, calibrated testing, and factory-grade adhesive, often with a warranty. For most iPhone models, professional screen replacements can cost more upfront, but you gain a tested repair with guaranteed workmanship. DIY parts cost vary by model and quality, so always factor in tool investments and potential redo costs. Home Repair Guide analysis emphasizes that using model-matched parts and following a verified guide improves success rates for phone screen repair apple when done at home.
Choosing replacement parts: OEM vs aftermarket for iPhone screens
Replacement parts for the iPhone screen come in several varieties. OEM (original equipment manufacturer) parts tend to fit more precisely and preserve color accuracy, but they can be harder to source and pricier. Aftermarket panels vary in quality; some offer good color and touch response at a lower price, while others might deliver misalignment or weakened touch sensitivity. When selecting parts for phone screen repair apple, prioritize model-specific compatibility, a trusted seller with return policies, and warranty on the panel itself. If you plan to sell or rely on the device soon, OEM parts may be worth the extra cost to maintain resale value and reliability.
According to Home Repair Guide, always verify the exact model and part revision, then check for documented compatibility with your iPhone’s serial number and iOS version. This reduces the risk of digitizer failure or poor touch response after installation.
Tools you'll need for phone screen repair apple
A successful phone screen repair apple requires the right tools and a clean, static-free workspace. Essential items include precision screwdrivers (P2/Pentalobe and Y000), a spudger, plastic opening tools, tweezers, a suction cup or display remover, and pre-cut adhesive strips or a complete adhesive kit. Work on an anti-static mat and wear grounding accessories if possible. Keep track of tiny screws in labeled containers and have a heat source or iOpener for gentle display loosening. If you’re using aftermarket parts, include alcohol wipes and a microfiber cloth to remove residue without scratching the panel. This setup minimizes the risk of connector damage and helps ensure a clean seal during reassembly.
Step-by-step guide: remove screen assembly
To begin, power down the device and unplug any connectors. Remove the bottom screws and the display assembly bracket with the appropriate driver. Use a suction cup to gently lift the display while inserting a plastic pick to separate adhesive. Disconnect the battery connector first, then the display cable and any associated connectors. Keep all screws organized by location, and avoid prying near the battery to prevent puncture. Safety-first reduces the risk of shock or short circuits during the screen removal process.
Step-by-step guide: install new screen and testing
Align the new screen with the frame and reconnect the display and battery cables in the correct order. Reattach the security screws, reinstall shields, and apply fresh adhesive along the edges. Re-seat all connectors and perform a careful boot-up test, checking touch response, color, brightness, and speaker/microphone function. If the device powers on but the touchscreen is unresponsive, recheck flex cables for proper seating. Finally, reassemble the frame and test again from multiple angles to ensure a secure seal against dust and moisture.
Common issues after repair and how to troubleshoot
After a screen replacement, common issues include touch sensitivity problems, color tint shifts, dead zones, or display flicker. Re-check the digitizer connector, ensure the adhesive is evenly pressed, and confirm the display data cable is fully seated. If a new screen shows ghosting or color distortion, verify the display model compatibility and consider calibrating the display settings. Battery swelling or heat during testing is a red flag—power down immediately and inspect the battery condition. In many cases, reseating connectors resolves intermittent touch issues.
Maintenance tips to prolong screen life and prevent future cracks
To extend the life of a repaired phone screen apple, apply a high-quality screen protector and keep the device in a protective case with reinforced corners. Avoid leaving the phone in hot environments and prevent direct pressure on the screen. Regularly inspect the gasket seal around the display for signs of wear and keep the home button and front camera area clean. Gentle cleaning with a microfiber cloth prevents residue buildup that could interfere with touch sensitivity or image clarity.
Safety considerations and warranty implications
Screen repairs can affect warranty terms with manufacturers and carriers. If your device is under AppleCare or extended coverage, a DIY repair may void part of the warranty. Always read the service terms before beginning a phone screen repair apple. Use personal protective equipment if handling damaged batteries, and avoid puncturing the battery with metal tools. When in doubt, seek a qualified technician to ensure safety and compliance with warranty requirements.
Tools & Materials
- Pentalobe screwdriver (P2)(For iPhone exterior screws)
- Tri-point Y000 screwdriver(For internal screws in some models)
- Spudger (ESD-safe)(Pry and disconnect connectors without damage)
- Plastic opening tools(Gently separate display from frame)
- Tweezers(Manipulate small connectors and dust caps)
- Suction cup or display puller(Loosen display adhesive)
- Adhesive strips or adhesive kit for iPhone(Seal the display against dust and moisture)
- Replacement display assembly (model-specific)(Ensure model compatibility)
- Isopropyl alcohol wipes(Clean surfaces before reassembly)
- Anti-static mat or wrist strap(Reduce static risk)
Steps
Estimated time: 60-90 minutes
- 1
Power down and protect
Power off the iPhone completely and disconnect from any accessories. Work on a clean, dry surface and ground yourself to reduce static risk before handling internal components.
Tip: Place the device on an anti-static mat; avoid charging cables during the process. - 2
Open the outer screws and brackets
Remove the external screws near the lightning port using a P2 driver. Detach the display bracket with the appropriate driver to expose the display assembly.
Tip: Keep screws in labeled containers to prevent loss and confusion later. - 3
Loosen the display adhesive
Use a suction cup to lift the display slightly while inserting a plastic pick to break the adhesive seal. Do not pry too aggressively to avoid damaging the display cables.
Tip: Work in short, gentle increments around the edges to avoid cracking the frame. - 4
Disconnect battery and display cables
Disconnect the battery connector first, then detach the display data cable and any camera or sensor connectors. Note the order for reassembly.
Tip: Ensure the battery is fully disconnected before touching other components. - 5
Remove the broken display
Carefully lift the broken screen away from the frame while keeping connectors safe. Do not bend flex cables; support the assembly as you detach it.
Tip: Use a pickup tool or plastic card for gentle separation rather than metal tools. - 6
Transfer essential components
If your replacement screen requires transferring the front camera, sensors, or bracket, perform this step carefully and verify alignment with the new panel.
Tip: Keep camera and sensor alignments perfectly seated to avoid misfocusing or night-mode issues. - 7
Install new display and reconnect
Position the new display assembly and reconnect all cables in the proper sequence. Reattach shielding plates and screws as needed.
Tip: Double-check that all connectors are fully seated before reassembly. - 8
Seal and reassemble
Apply fresh adhesive along the edges and reseal the frame. Reinstall brackets and secure screws to their original positions.
Tip: Avoid over-tightening screws to prevent warping or damage to the frame. - 9
Power on and test
Power the device, run a basic test of touch response, display clarity, brightness, and speaker quality. Confirm all cameras and sensors function.
Tip: Run multiple tests under different lighting conditions to catch issues early.
FAQ
Is DIY screen repair safe?
DIY screen repair can be safe with careful steps, proper tools, and model-specific parts. It carries risks like damaging connectors or harming the battery if not done correctly. If you’re unsure, consider professional help.
DIY repair can be safe with the right tools and steps, but there are risks. If you’re unsure, think about professional help.
Will it affect warranty when I replace the screen myself?
A DIY screen replacement can affect warranty terms depending on the manufacturer and coverage. Check your warranty or AppleCare status before starting and consider authorized service if warranty concerns are priority.
Warranty rules vary; check your coverage before you begin. Consider authorized service if warranty is a concern.
What parts are needed for phone screen repair apple?
You’ll typically need a replacement display assembly suitable for your iPhone model, an adhesive kit, precision screwdrivers, spudgers, and non-metal prying tools. Ensure parts are model-specific for reliable results.
You need a model-specific display, adhesive, and the right tools. Make sure parts match your iPhone model.
What’s the typical cost range for professional repair?
Professional screen replacements vary by model and region, but expect higher upfront costs than DIY parts. Consider service quality, warranty coverage, and turnaround time when comparing options.
Professional repairs cost more up front, but include service quality and warranty.
How long does a typical screen replacement take?
A standard screen replacement usually takes about an hour or two for an experienced technician. DIY attempts may extend that time depending on model familiarity and tool access.
Expect about an hour or two for a typical replacement if you’re experienced.
Can touch issues occur after a screen swap?
Yes, improper connector seating or incompatible digitizers can cause touch sensitivity issues. Verify all connectors are fully seated and ensure the replacement panel is compatible with your device.
Touch problems can happen if connectors aren’t seated or the panel isn’t compatible. Check carefully.
Watch Video
Key Takeaways
- Power off and ground yourself before starting
- Use model-specific parts to ensure fit and function
- Test thoroughly before final sealing
- Warranty implications vary by model