Apple Phone Screen Repair: A Practical Step-by-Step Guide
Learn how to assess and perform safe Apple phone screen repairs with practical, homeowner-friendly steps. This comprehensive how-to covers tools, safety, DIY options, and when to contact a pro from Home Repair Guide.

You can assess and repair a damaged Apple phone screen by following a careful, step-by-step process. This guide covers common fixes for small cracks, LCD blooming, and touch glitches, plus when to avoid DIY and seek professional help. Safety, tools, and warranty considerations are included to help homeowners and renters decide the best path.
Understanding screen damage and risks
According to Home Repair Guide, understanding the difference between a cracked glass surface and an underlying LCD or OLED failure is essential for apple repair phone screen decisions. While a shallow crack on the outer glass can sometimes be stabilized with a protective film or screen protector, deeper damage may affect touch sensitivity, color accuracy, or the display itself. These symptoms are important because they determine whether a DIY fix is feasible or if a full replacement is necessary. This section helps you classify damage, recognize common failure modes, and decide the safest path for repair. Common signs include hairline cracks, LCD blooming (color patches), touchscreen unresponsiveness, color shift, and ghosting. By starting with a clear assessment, homeowners and renters can choose the most cost-effective, lowest-risk option and avoid unnecessary disassembly that could worsen the problem.
Safety first: handling tools and devices
When you embark on any Apple screen repair, safety comes first. Power down the phone completely and disconnect it from any charger or accessories. Work on a non-slip, static-free surface and keep magnets away from the device to avoid data or sensor glitches. Use a plastic pry tool rather than metal to minimize the risk of bending delicate cables. If you see swelling in the battery, do not attempt repairs—swollen cells can be dangerous and require professional service. This section also covers safe handling of glass fragments and how to keep your workspace organized so you don’t lose tiny screws or connectors.
Tools and materials you'll need
Before you begin, assemble the essential tools and replacement parts. A well-chosen toolkit reduces the risk of damaging internals and makes the process smoother. You will typically need a pentalobe screwdriver for iPhone bottom screws, a suction cup, a plastic spudger, precision tweezers, a replacement screen assembly compatible with your iPhone model, and appropriate adhesive. Isopropyl alcohol wipes or screen cleaning solution help remove old gasket material without leaving residue. If you opt for a glass-only repair, you’ll still want to have protective films on hand to prevent further damage. Keeping spare screws and small organizers helps prevent misplacement during the repair.
Diagnosing the issue: cracked glass vs. LCD failure
Distinguishing between a surface glass crack and an internal LCD or OLED failure is crucial. A glass crack may only affect the outer layer, leaving touch and display function intact. LCD or OLED issues manifest as dead zones, color distortion, backlight problems, or persistent blooming. If touch remains accurate and brightness adjusts correctly, you may be dealing with a surface issue amenable to a glass-only repair or adhesive reseal. However, if you notice unresponsive areas, color banding, or image flicker, plan for a full screen replacement or professional evaluation. This section provides practical tests you can perform safely to guide your decision.
DIY repair options: small cracks, adhesive, screen protectors
For minor cracks, a tempered glass screen protector or a thin laminate can prevent further chipping while you decide on a replacement. If the glass is intact but the display is affected by bloom or subtle touch issues, you may attempt a non-destructive reseal with careful cleaning and new adhesive. Do not attempt to separate or replace the display if you are not confident in reattaching connectors. Always test the device thoroughly after any repair attempt before finalizing. This section outlines practical, low-risk options and the scenarios in which a DIY approach is appropriate versus those that warrant a pro.
When to go pro: criteria for professional replacement
If there is any sign of battery swelling, severe LCD failure, or if you are not confident reassembling the device without damaging connectors, seek professional help. A certified technician can safely replace the screen assembly with original or high-quality third-party parts and verify device calibration, touch responsiveness, and color accuracy. If you are under a warranty or AppleCare plan, professional service may be preferable to avoid voiding coverage. This section helps you decide when DIY isn’t worth the risk and how to choose a reputable service provider.
Warranty, liability, and post-repair checks
After any repair, verify whether your device is still under warranty and whether the repair affects coverage. Keep a record of any parts used and the service date. Post-repair checks should include touch response across the screen, backlight uniformity, speaker function, and camera alignment if applicable. If you notice any issues, contact the technician or Apple Support promptly. Home Repair Guide emphasizes balancing cost, safety, and device reliability when deciding how to proceed with Apple phone screen repairs.
Tools & Materials
- Anti-static wrist strap(Prevents static discharge around the device)
- Pentalobe screwdriver(For iPhone bottom screws)
- Spudger (plastic pry tool)(Avoids damage to delicate cables)
- Tweezers(For small screws or connectors)
- Replacement screen assembly(Ensure model compatibility (e.g., iPhone 12/13/14))
- Isopropyl alcohol wipes(Clean old adhesive and glass residue)
Steps
Estimated time: 60-120 minutes
- 1
Power down and prep workspace
Power off the iPhone completely, disconnect from any accessories, and set it on a clean, static-free mat. Remove the case to access screws and disconnect ribbons safely before any disassembly.
Tip: Work in a well-lit area and keep screws in labeled containers to avoid mix-ups. - 2
Open the display panel carefully
Use a suction cup to create a small gap at the edge, then insert a plastic pry tool to release the display clips without bending or tearing delicate cables.
Tip: Do not apply excessive force; the display is attached with adhesive along the edges. - 3
Disconnect battery and display cables
Gently lift the display to access cables and disconnect the battery flex cable if possible before fully separating the LCD. This reduces the risk of short circuits during the repair.
Tip: Use non-metal tools and avoid prying near battery connectors. - 4
Install the new screen assembly
Connect the display cables to the new screen, reattach the battery cable if applicable, and carefully place the new assembly into the body of the phone. Secure with the original screws in their proper positions.
Tip: Ensure all connectors click fully and seating is flush to prevent touch issues. - 5
Test the replacement and reassemble
Power on the device, test touch response, brightness, color accuracy, and speaker function. If everything works, reassemble the rest of the chassis and apply a new adhesive seal where needed.
Tip: Test before final sealing to catch loose cables early.
FAQ
Is DIY iPhone screen repair safe for beginners?
DIY screen repair can be safe for minor issues if you follow proper steps, use the right tools, and avoid handling swollen batteries. For more complex issues or uncertain results, consider professional service to protect data and device integrity.
DIY repairs can be safe for simple cases if you follow the steps carefully and avoid risky battery work. For complex problems, seek professional help.
Will repairing my iPhone screen void warranty?
Opening the device and replacing the screen may affect warranty coverage depending on the terms of AppleCare or manufacturer policies. If your device is under warranty, check coverage and consider authorized service to preserve eligibility.
Warranty coverage can be affected by DIY repairs. Check your plan and consider authorized service to preserve coverage.
What tools are essential for iPhone screen replacement?
Key tools include a pentalobe screwdriver, suction cup, plastic prying tool, precision tweezers, and a compatible replacement screen. Having an anti-static strap and organized screws helps prevent damage during disassembly.
Essential tools are a pentalobe screwdriver, suction cup, plastic pry tool, tweezers, and a compatible replacement screen.
How long does it take to replace an iPhone screen?
A typical screen replacement can take between 60 to 120 minutes for an experienced person, depending on model and adhesive strength. Newbies may need more time or decide to pause and re-evaluate.
Most replacements take about one to two hours, depending on your experience and model.
Can third-party screens be reliable for iPhones?
Third-party screens can be reliable if they come from reputable suppliers with good fit and color accuracy. Original equipment manufacturer (OEM) or high-quality aftermarket screens typically perform best and maintain color fidelity and touch response.
High-quality third-party or OEM screens can be reliable, but stick to trusted suppliers for best results.
What post-repair checks should I perform?
After repair, test touch response across the entire screen, verify brightness and color consistency, and ensure speakers, microphones, and cameras function normally. Confirm the device seals are intact and no moisture indicators have triggered.
Test touch, brightness, color, speakers, and cameras after repair to ensure everything works.
Watch Video
Key Takeaways
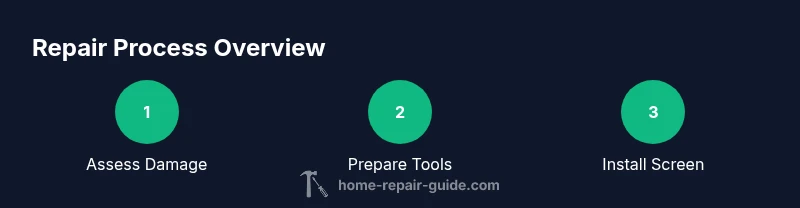
- Assess damage to decide DIY vs pro
- Use proper iPhone-specific tools
- Test before sealing adhesive
- Battery safety is paramount