iPhone Screen Repair at Best Buy: A Complete Guide
Learn how to navigate iPhone screen repair at Best Buy with practical steps, compare options, prepare your device, and verify quality and warranties for a confident repair.

This guide provides step-by-step guidance for iphone screen repair best buy options, so you can evaluate in-store service versus alternatives, prepare your device, and verify parts and warranties before repair. By following these steps, homeowners and renters will confidently navigate screen repairs with Home Repair Guide's trusted, practical approach in this article.
Understanding Why People Choose Best Buy for iPhone Screen Repair
According to Home Repair Guide, choosing a repair option for an iPhone screen often boils down to convenience, upfront pricing, warranty terms, and the perceived reliability of parts. Best Buy, with its Geek Squad presence, offers in-store analysis, on-site inspection, and a standardized intake process that many customers find straightforward. For homeowners and renters, this option can simplify scheduling, provide a clear service pathway, and reduce the burden of coordinating third-party repairs. It’s also common to compare Best Buy against Apple Store repairs or independent shops to balance cost, turnaround time, and assurance of genuine parts. The Home Repair Guide team emphasizes that evaluating these factors early helps avoid surprises when the device returns and guarantees are discussed at the counter.
How to Decide Between Best Buy, Apple Store, and Independent Shops
When your iPhone screen fails, you have several paths: Best Buy for a broad consumer footprint, an Apple Store for device-specific diagnostics and parts, or independent repair shops that may offer lower prices or faster turnaround. Consider the model and eligibility for warranty coverage, the availability of genuine parts, and the technician’s certification level. For instance, Apple Store repairs often require an appointment and may involve higher costs, while independent shops can present competitive quotes but vary in part quality. Home Repair Guide recommends listing priorities (price, speed, part origin) and using that as a tiebreaker when comparing quotes. This approach helps ensure you get transparent terms and a service plan you can trust.
What Best Buy Typically Covers and What It Doesn’t
Best Buy’s screen repair offerings generally cover screen replacement and related components when a device is eligible for service. Coverage terms, part origin, and warranty length can differ by location and by the phone model. It’s important to verify whether the service includes digitizer work, front glass replacement, or LCD assembly, as some repairs group these components differently. The technician can explain whether the screen comes with a parts warranty and what it excludes (e.g., accidental damage outside of the repair scope). The Home Repair Guide guidance here is to ask for a written scope of work, a repair quote, and a warranty card before authorizing the service to avoid ambiguity later.
How to Prepare for Your In-Store Repair Appointment
Preparation reduces wait times and helps ensure a smoother process. Start by backing up your iPhone data (iCloud or local backup) and turning off Find My iPhone to avoid activation lock issues. Bring any proof of purchase, your device, a valid photo ID, and the original SIM card if asked. If you have a case or screen protector, remove them to allow full access to the display. Write down symptoms (unresponsive touch, discoloration, dead pixels) and note when the problem began. Arriving with a clean device helps the technician diagnose faster and reduces the risk of misdiagnosis based on exterior damage only.
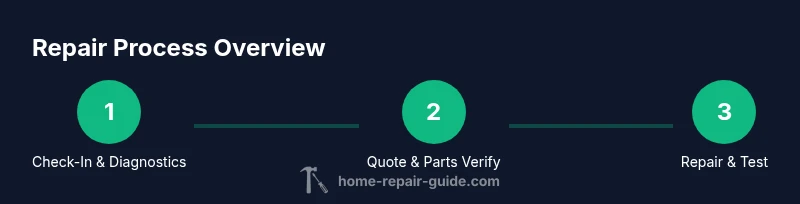
The In-Store Repair Process at Best Buy (Typical Steps)
In most stores, the process begins with a check-in at the repair counter. A technician will assess the screen and may run diagnostic checks to determine whether the issue is hardware-based or software-related. You’ll receive a formal quote, expected turnaround time, and a warranty outline. If you approve, the device goes to the repair bay, where technicians replace the screen assembly or perform necessary digitizer work. After the repair, the device is tested for touch response, display quality, and overall functionality. Finally, you’ll review the service notes and sign off on the bill and warranty information.
Post-Repair: Verifying Screen Quality and Data Safety
Before leaving the store, inspect the repaired display for brightness, color accuracy, touch responsiveness, and edge-to-edge alignment. Power the device on to verify startup, and run basic apps to check for lag or unresponsive areas. If you use biometric unlock, test Face ID or Touch ID to confirm proper sensor operation. Ensure that your data remains secure—backups should be intact, and the device should be free from unrequested software changes. If anything seems off, request a quick re-check with the technician before you depart.
Cost Factors and Budgeting for iPhone Screen Repair
Costs for iPhone screen repairs vary based on model, the component replaced (screen assembly vs. glass only), and the service provider. Best Buy and other retailers price according to the device’s compatibility and the parts used. When budgeting, anticipate three main factors: the core repair price, any diagnostic fees, and the potential for expedited service. The Home Repair Guide approach is to compare quotes from multiple sources and clarify whether the quoted price includes labor, parts, and a warranty. Avoid click-through prices that omit warranty terms, as that can lead to higher long-term costs if a replacement fails.
Maintenance Tips to Extend Screen Lifespan
After repair, protect your screen with a high-quality case and a tempered glass screen protector. Avoid placing heavy objects on the device and minimize exposure to extreme temperatures. Regularly clean the screen with a microfiber cloth to prevent scratches that can affect touch sensitivity. Consider adopting a routine that minimizes drops, such as always using a phone grip or strap. These measures help ensure longer screen life and reduce future repair frequency.
Quick Reference: What to Do Next if You’re Unsatisfied
If you’re unhappy with the repair quality, contact the store manager, request an inspection, or pursue a follow-up service under the warranty. Document the issues with photos and notes and ask for a written rework plan. The Home Repair Guide recommendation is to seek a resolution through the retailer’s standard channels first, and if needed, escalate to a corporate support line or relevant consumer protection resources.
Tools & Materials
- Phone with cracked screen(Model and iOS version documented)
- Proof of purchase / receipt(Needed for warranty validation)
- Backup method (iCloud or iTunes)(Ensure data is secure before service)
- Photo ID(Verification at service counter)
- Charger and cable(Could be requested for data transfer or tests)
- SIM tray ejector tool(If needed for SIM-related steps)
- Case or screen protector(Remove to expose the screen during inspection)
Steps
Estimated time: 60-180 minutes
- 1
Assess the damage and feasibility
Inspect visible cracks and touch response to determine if the screen replacement is necessary or if software adjustments could fix some issues. If there’s moisture or water exposure, note this as it may affect repair scope. This initial check helps you ask targeted questions at the counter.
Tip: Take clear photos of the damaged area to show the technician. - 2
Check repair options and ask for quotes
Ask about screen assembly vs. glass-only options, part origin (OEM vs. aftermarket), and warranty terms. Request a written quote including labor, parts, and any diagnostic fees. Compare this with other providers to avoid overpaying.
Tip: Get a printed warranty card and note its duration and coverage. - 3
Back up data and disable security features
Back up your data via iCloud or computer backup before repair. Turn off Find My iPhone and log out of iCloud to prevent activation lock issues during diagnostics and testing.
Tip: Keep your backups in a separate, secure location in case of device issues. - 4
Prepare the device and necessary details
Remove accessories, cases, and screen protectors. Bring your ID and proof of purchase. Write down symptoms and the date symptoms started to help the technician assess the root cause.
Tip: Arrive early to complete intake paperwork without rushing. - 5
Authorize the repair and monitor status
If you approve the repair, confirm the expected turnaround and whether the device will stay on-site or be moved to a repair bay. Check status updates and ask for an ETA if you need the device by a deadline.
Tip: Request a status check if you haven’t heard back within the stated timeframe. - 6
Inspect, test, and collect your device
After repair, verify screen clarity, touch sensitivity, brightness uniformity, and orientation. Test in-call microphone and speaker, and verify biometric sensors if present.
Tip: Test a few apps and color-rich content to ensure display quality.
FAQ
Is Best Buy a good option for iPhone screen repair?
Best Buy offers in-store repairs with trained technicians and a standardized intake process. It can be convenient and provide a warranty, but prices and part sources vary by location. Compare with Apple Store and independent shops to find the best balance of cost, speed, and quality.
Best Buy is a convenient option with trained staff and warranties, but compare quotes and parts quality to other shops before deciding.
How long does a screen repair typically take at Best Buy?
In-store turnaround varies by location and workload. Most repairs can take a couple of hours for evaluation and replacement, but some cases may require longer if parts are on backorder. Your associate will provide an estimated window after diagnostics.
Turnaround varies, usually a few hours, with exact timing given after diagnostics.
Are Best Buy screen replacements genuine and covered by a warranty?
Best Buy uses component parts that align with their service policies, and there is typically a parts and labor warranty for the repair. Confirm whether the part is OEM or aftermarket and understand the warranty duration and coverage before agreeing to service.
Parts and labor usually come with a warranty; ask whether the part is OEM and what the warranty covers.
Should I back up my data before visiting Best Buy for a screen repair?
Yes. Backing up ensures you don’t lose personal information if the device needs factory resets or testing during service. Use iCloud or a local backup and confirm you can restore data afterward.
Back up your data to protect personal information before service.
Will my repair affect my warranty with Apple or carrier?
Repair by third-party providers can affect existing warranties if the issue is related to workmanship or if non-approved parts are used. Check with Apple and your carrier for policy specifics and whether the repair resets eligibility.
Check with Apple and your carrier to understand warranty impact before service.
What happens if the repair doesn’t fix the issue or returns later?
Most retailers offer a rework or replacement under the same warranty terms if the problem recurs within the warranty period. Bring documentation and request a re-evaluation if you notice persistent issues after repair.
If the issue returns, request a re-evaluation under the warranty.
Watch Video
Key Takeaways
- Compare repair quotes and warranties before booking.
- Back up data and verify activation lock is disabled.
- Inspect the screen after repair for touch and display performance.
- Choose technicians and parts with clear warranty terms.