How Big Can Auto Glass Repair Be? A Practical Guide
Explore how big a crack can auto glass repair handle, what factors influence eligibility, and when replacement is safer. Practical steps for homeowners and renters to assess repair options.

Typical auto glass repairs are possible for small chips and short cracks, when the damage is not near the edge or within the driver’s line of sight. A technician will assess crack length, pattern, and location before proceeding. In most cases, longer cracks or cracks reaching the edge require windshield replacement rather than repair.
What size qualifies for repair: general rule of thumb
Most windshields can be repaired when the damage is a small chip or a short crack that does not compromise the driver's line of sight or the structural integrity. The Home Repair Guide team emphasizes that eligibility is decided case by case; a professional will consider crack length, pattern, edge proximity, and the location of the damage. According to Home Repair Guide, proximity to the windshield edge or the edge of a long crack significantly reduces repair success odds and increases the likelihood of needing a replacement. The key is to prevent the crack from spreading and to preserve the glass's safety performance.
A repair hinges on the ability to inject resin into the damaged area and cure it to a clear, durable bond. If the damage is too close to the edge, if the crack has penetrated deeply, or if the crack is oriented in a way that resin can't properly fill the void, a replacement is typically advised. The decision often comes after a quick inspection by a certified technician, who will assess the crack’s dimensions, depth, and whether the glass remains structurally sound. In practice, repair decisions aim to restore visibility, prevent crack propagation, and maintain the windshield’s load-bearing function.
Crack patterns and their implications
Not all cracks are the same. Some patterns are more amenable to resin repair than others. A simple star chip, a small bullseye, or a shallow line crack tends to respond well to resin fill because the resin can bond into the glass pores and stabilize the break. More complex patterns—cracks that branch, form a long line, or radiate toward the edge—are harder to seal reliably and may require replacement. The Home Repair Guide team notes that pattern matters as much as length; a crack that runs in a straight line across the driver’s view may still be dangerous even if short. The goal of repair is to restore clarity and structural integrity without leaving the resin visible or creating a new optical distortion. Technicians evaluate the crack pattern to decide if resin will restore a seamless, safe surface or if the damage will continue to propagate under stress from temperature changes, road vibration, and flexing of the windshield.
Weather, location, and edge proximity: how they affect eligibility
Weather can make glass more brittle; hot and cold cycles cause expansion and contraction that can widen microcracks. If a crack is near the edge or within the driver's field of view, repair success declines. The location is critical: cracks that extend toward the outer perimeter or the top edge are more likely to spread and compromise safety. The Home Repair Guide team emphasizes that exterior exposure, sun glare, and temperature swings can accelerate crack growth; professional technicians usually stop further growth during preparation and sealing. The best outcome is achieved when damage is captured early, the glass is clean, and the area around the crack is stabilized before any resin injection. If damage is on the passenger side or near the A-pillar, extra caution is warranted because driver visibility is a safety factor.
The professional inspection: what to expect
A trained technician will examine the crack under magnification, measure length and depth, and check the edge proximity. They will also assess if the damage lies in the driver’s line of sight. Many shops will test the structural integrity by gently tapping the glass and observing for propagation. The technician will document damage with photos; some shops use a video microscope to confirm repairability. After inspection, a clear verdict is given: repairable damage with resin, or replacement required for safety. Expect to discuss expectations, potential warranty, and aftercare instructions (e.g., avoiding windshield wiper use for a short period, not applying pressure on the area). The Home Repair Guide Team notes that a transparent assessment is essential to ensure you receive an honest recommendation and avoid unnecessary costs.
The repair process: resin injection and curing
In a typical repair, a resin filler is injected into the damaged area under low pressure, filling microvoids and re-bonding glass layers. The resin is then cured with heat or UV light to harden into a clear bond. The process can last 20-60 minutes, depending on the crack size and equipment. Technicians carefully remove air pockets and polish the area to minimize distortion; a proper seal around the windshield prevents moisture ingress. After curing, the area is inspected again for clarity and integrity. Some repairs leave a slight distortion or a faint line, but modern resins are designed to be nearly invisible under normal lighting. The Home Repair Guide team emphasizes that durability and safety should be the priority, not cosmetic perfection.
When to choose windshield replacement instead of repair
If the crack is long, extends to the edge, or has caused structural damage to the laminate layer, replacement is the safer option. Replacement may be advised for any crack that exceeds a recommended maximum length in a given jurisdiction, or for damage in the driver’s line of sight that cannot be corrected with resin. The cost difference between repair and replacement varies by vehicle and location; ongoing reliability and safety should trump price. Insurance coverage is another factor; some policies cover repairs with little or no deductible, while others require a separate claim for replacement. The Home Repair Guide Team’s guidance is to lean toward replacement when repair would only provide a temporary fix or compromise long-term safety.
DIY repair kits: why they are risky for larger cracks
DIY windshield repair kits are designed for small chips and simple cracks. Using them on larger, edge-reaching cracks often yields poor results, residual distortion, or resin leakage. If you are not trained to handle delicate tools, you risk further damage or voiding any existing warranties. For most homeowners, professional repair or replacement is the safer, more reliable option. If you still want to attempt a DIY fix, limit it to small chips and strictly follow kit instructions. The Home Repair Guide Team emphasizes caution; safety comes first, and missteps can lead to expensive repairs later.
Maintenance and prevention to minimize crack growth
Preventing crack growth starts with paying attention to temperature changes, road conditions, and windshield cleanliness. Regular inspection after temperature swings, prompt repair of chips, and using proper windshield wiper technique reduces risk. Park in shade when possible to minimize UV exposure, keep your car in stable climates when feasible, and use protective coatings or sealants as recommended by a professional. If you notice a crack expanding, seek professional evaluation quickly—crack growth can accelerate with stress. The Home Repair Guide Team advises keeping a maintenance log and scheduling periodic checks to catch new damage early.
Tools & Materials
- Safety gloves(Protect hands during inspection and handling glass)
- Safety goggles(Eye protection against glass shards)
- Windshield repair resin kit (optional for DIY)(Use only for small chips; professional kits vary)
- Cleaning wipes or alcohol wipes(Clean surface before resin application)
- Razor blade or plastic scraper(Trim dried resin edges after cure)
- UV curing lamp or sunlight(Cure resin in kits that require light exposure)
- Microfiber cloth(Wipe and polish after repair)
Steps
Estimated time: 60-90 minutes
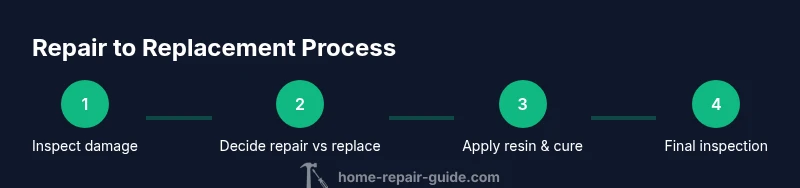
- 1
Inspect damage and assess eligibility
Begin with a clear view of the damage. Measure crack length roughly, observe its pattern, and note proximity to the edge. Photograph from multiple angles to document scope for a technician. Why: A precise assessment helps decide between repair and replacement.
Tip: Take close-up photos and note the distance from the edge for reference. - 2
Prepare the windshield and work area
Clear the area around the crack, lay a protective cover, and ensure the surface is dry. If you’re DIY-ing, wipe the glass to remove dust and oils that could affect resin bonding. Why: Clean surfaces improve adhesion and reduce distortion.
Tip: Use a clean microfiber cloth and avoid pressing on the crack while cleaning. - 3
Apply resin and stabilize the crack
For DIY or semi-professional kits, apply resin according to the kit’s instructions, ensuring the resin flows into the crack without overflow. Stabilize the area to prevent further propagation during the cure period. Why: Proper resin placement minimizes voids and stabilizes glass layers.
Tip: Do not overfill; excess resin can create optical distortions. - 4
Cure the resin and remove air pockets
Use the recommended curing method—heat or UV light—and allow sufficient time for the resin to harden. Gently remove any air pockets that form at the crack interface without scratching the glass. Why: Complete curing ensures long-term bond strength and reduces visibility.
Tip: Follow safety guidelines for UV exposure if using a lamp. - 5
Inspect repair and seal
Re-inspect the repaired area for clarity and integrity. If needed, polish the surface and re-seal to prevent moisture ingress. If distortion remains or the crack reopens, consider a replacement. Why: A final check confirms success and safety.
Tip: Document the result with photos in case of future claims. - 6
Decision point: repair vs replacement
Evaluate whether the repair fully meets safety and visibility standards. If the crack is long, edge-reaching, or has compromised laminate, replacement is advised. Discuss with a professional to avoid compromising safety.
Tip: When in doubt, prioritize safety and professional evaluation.
FAQ
Can a crack on the edge be repaired?
Edge cracks are often difficult to repair safely and may require windshield replacement. A professional will evaluate whether resin can stabilize the crack without compromising structural integrity.
Edge cracks are usually not repairable; a professional will determine if replacement is needed.
Is there a universal crack length limit for repair?
There is no universal length limit; eligibility varies by crack pattern, depth, location, and vehicle. A qualified technician assesses each case to decide whether repair is viable.
There isn’t a universal limit—an expert will decide based on pattern, depth, and location.
How long does a typical windshield repair take?
Most repairs take between 20 and 60 minutes in-shop, depending on crack size and resin cure requirements. Travel time to and from a shop adds to total time if you’re arranging service.
Typically, repairs run under an hour at the shop.
Will insurance cover windshield repair or replacement?
Many auto policies cover windshield repair under comprehensive plans, sometimes with a low or zero deductible. Coverage varies, so check your policy or contact your insurer for specifics.
Most policies cover repairs, but confirm with your insurer for your plan.
Are DIY repair kits safe for larger cracks?
DIY kits are generally not recommended for large or edge cracks. They can leave distortions or fail under road stress, potentially voiding warranties.
DIY kits aren’t safe for big cracks; seek professional help.
Watch Video
Key Takeaways
- Assess eligibility before repairing.
- Edge proximity and crack pattern matter as much as length.
- Professional inspection informs safe outcomes.
- DIY kits suit small chips only; large cracks risk safety.
- Prevent crack growth with prompt maintenance and care.