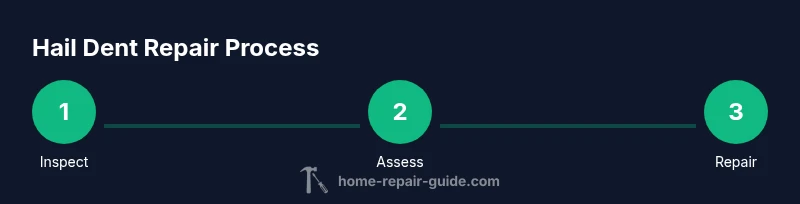
Hail Damage Paintless Dent Repair: A Homeowner's Guide
Learn how to use paintless dent repair (PDR) to address hail damage. This guide covers when PDR works, necessary tools, safety, and a clear, homeowner-friendly workflow for minor dents before seeking professional help.

By performing paintless dent repair (PDR) on hail-dented panels, you can restore the car’s original contour without repainting, as long as the dents are accessible from behind and the metal isn’t stretched. This guide explains when PDR is appropriate, the tools you’ll need, safety considerations, and a clear, step-by-step approach for common hail dents you can handle at home before seeking a professional.
What is hail damage paintless dent repair and why it works
Hail damage creates a field of small, shallow dents across a vehicle’s exposed panels. Traditional repairs often involve repainting and filler, which can be costly and require downtime. Paintless dent repair (PDR) offers a different path: skilled technicians massage the metal from behind the panel or use carefully shaped tools to coax the dent outward, preserving the factory paint. For homeowners, PDR can be a practical first line of defense when dents are shallow and accessible. According to Home Repair Guide, success in at-home PDR rests on a calm assessment, proper tools, and a methodical process. This article explores when PDR makes sense for hail dents, the toolset you’ll need, common missteps to avoid, and how to decide between DIY methods and professional service. The goal is to empower you to make informed decisions and achieve reliable results without unnecessary risk.
Evaluating dents for PDR suitability
PDR works best on dents that are shallow, smooth, and do not involve paint damage or stretched metal. Start by inspecting each dent’s depth using light and a reflective surface to reveal distortions. Dents within the first 2–3 mm of depth and with no creases typically respond well to PDR. Location matters too: panels with direct, relatively flat access from behind—like the hood, roof, or doors—are more forgiving than deeply creased edges or panels with limited back access. If you find paint chipping, rust, or underlying structural damage, PDR may not be the best option. In those cases, consult a professional to avoid compromising safety or resale value. As you assess dents, document the state of the paint and any changes after each attempt, so you can track progress and know when to stop.
Dents that are not suitable for PDR and when to avoid
Not all hail dents are repairable with PDR. Deep dents with pronounced creases, edge damage near doors or the body seam, or dents that have stretched the metal may not respond well to PDR and could jeopardize paint integrity. If the dent location interferes with underlying structure or if the paint around the dent shows cracking, PDR could worsen the problem. In cases of multiple dents clustered on one panel, or when a dent is near a welded seam, professional evaluation is advised. If you’re unsure about the severity, err on the side of caution and seek a quote from a certified PDR technician who can assess without risking further damage. Remember, the goal is a safe repair that preserves paint and structural integrity.
Safety, workspace setup, and protecting your vehicle
Work in a clean, well-lit area with a stable surface. Park away from direct sun to prevent heat-induced paint issues during the process. Gather PPE such as safety glasses and gloves, since some tools can slip or spring back. Protect nearby panels with soft cloths or painters tape to avoid unintended scratches. When using heat, keep the nozzle moving and avoid overheating any single spot. If you remove interior trim or access panels to gain back-dent access, disconnect the battery if required and follow vehicle-specific safety steps. Finally, test any adhesive or pressure method on a small, inconspicuous area before applying to visible panels.
Common myths vs. reality about hail dent repair
A common myth is that any hail dent can be fixed at home with glue and a hammer. In reality, PDR is a skilled technique that requires practice, proper tools, and a careful touch. Another misconception is that DIY PDR is always cheaper than professional service. While DIY can save money on minor dents, mistakes can be costly to repair later. A third misconception is that all paint survives PDR unscathed; some dents are within tolerances for paint protection, while others risk cracking if pressure is applied incorrectly. Understanding the limits of PDR helps homeowners decide when to push forward and when to call a pro.
How to evaluate a hail dent's repairability at home
Start by ranking each dent by depth, location, and paint condition. Use a bright light to reveal subtle distortions and compare the dent’s edge to surrounding panels. If you can access the back of the dent or if the dent doesn’t involve a crease, PDR is more likely to succeed. Keep a daily log of progress since small, incremental improvements are common with PDR. If, after a well-planned attempt, progress stalls or you notice new distortions, pause and seek professional evaluation to prevent additional damage.
Tools & Materials
- PDR dent repair kit (rods and knock-down tools)(Choose a kit with a range of tips and a flexible rod set)
- Glue pulling kit (tabs, glue sticks)(Low-temp glue and varied tab sizes for different dents)
- Heat source (heat gun or hair dryer)(Gently warm the panel to about 90–120F; avoid overheating)
- Soft microfiber cloths(For cleaning, drying, and protecting surfaces)
- Genuine rubber mallet or plastic tap tools(Optional for very gentle edge work from behind)
- Bright inspection light or flashlight(Raking light helps reveal subtle distortions)
- Safety gear: gloves and eye protection(Protect hands and eyes from tool slip or spring-back)
- Interior panel removal tools (as needed)(Only if access from behind is blocked by components)
Steps
Estimated time: 1-3 hours
- 1
Inspect the dent and clean the area
Survey each dent’s depth and shape, and clean the surface to reveal true contours. A clean panel helps you see how the metal will respond to pressure.
Tip: Take before photos and mark the dents with removable tape for reference. - 2
Check access from behind the panel
Identify whether you can reach the back of the dent by removing interior trim or by accessing through wheel wells. If back access is blocked, PDR may not be feasible.
Tip: Avoid removing more panel than necessary; preserve vehicle integrity. - 3
Warm the panel gently
Use a heat source to bring the metal to a pliable temperature without scorching paint. Move the heat source continuously to prevent hot spots.
Tip: Test the surface with your gloved hand every 15–20 seconds. - 4
Apply light pressure from the edge
Using PDR rods or a knock-down tool, apply gentle pressure along the dent’s edge toward the center to release tension and begin a gradual outward movement.
Tip: Start at the edges and work inward; avoid pushing too hard. - 5
Use glue pulling for stubborn spots
If some areas resist, apply a small glue tab, wait for the tab to cool, then pull to draw the dent outward. Repeat with different tabs as needed.
Tip: Do not leave glue tabs on longer than necessary; remove promptly to prevent residue. - 6
Check progress with light and reflection
Recheck the dent under bright raking light and look for high spots or remaining distortions. Mark improvements and areas that still need attention.
Tip: Compare with adjacent panels to ensure uniformity. - 7
Finish and protect the repaired area
Clean the repaired surface, inspect for any paint damage, and optionally apply a light protective wipe or wax to seal the area. A final test ride helps confirm surface smoothness.
Tip: If you see any deep distortions or reappearances, pause and seek professional help.
FAQ
What is paintless dent repair (PDR)?
PDR is a technique that removes dents without repainting by gently massaging or pulling the metal from behind the panel. It relies on preserving the factory paint and the panel’s original shape. Results vary with dent depth and accessibility.
PDR removes dents by massaging the metal from behind, preserving the factory paint. Results depend on how deep and accessible the dent is.
Can all hail dents be repaired with PDR?
No. Small, shallow dents with no paint damage and good back access respond best. Deep, creased, or stretched dents, or those near edges, may require traditional bodywork or replacement.
Not all dents are fixable with PDR; shallower, well-accessed dents fare best, while deep or creased ones may need other repairs.
Is DIY PDR safe for beginners?
DIY PDR can be safe for simple dents with proper tools and precautions, but there is a risk of paint damage or worsening the dent if done improperly. Start with small, unobtrusive areas and progress slowly.
DIY PDR can work for simple dents, but mistakes can cause paint damage. Start small and proceed cautiously.
When should I seek professional PDR?
Consult a professional if dents are deep, creased, near seams, or if back access is limited. A pro can assess unseen damage and may use more advanced tools or methods.
Call a professional if dents are deep, creased, or near seams, or if you can't access the back of the dent.
What tools do I need for at-home PDR?
A basic PDR kit with rods, a glue pulling set, a heat source, a bright light, and protective gear is typically enough for beginners working on shallow dents.
For home PDR, you’ll typically need rods, glue pulls, a heat source, a bright light, and safety gear.
Will PDR affect my vehicle warranty?
PDR itself usually does not void warranties, but aggressive repair attempts or damage during DIY can complicate warranty coverage. Always check with the manufacturer or dealership if you’re unsure.
PDR generally won’t void warranties, but improper DIY can. Check with your dealer if unsure.
Watch Video
Key Takeaways
- Assess dents for depth and access before starting
- Use proper tools and avoid aggressive force
- Preserve paint; don’t push beyond safe limits
- Know when to stop and consult a pro for complex damage