Hail Damage Repair Near Me: A Practical Guide
A comprehensive, step-by-step guide to hail damage repair near you. Learn how to assess damage, document for insurance, evaluate contractor options, and prevent future storms with Home Repair Guide.

To repair hail damage near you, start with a safe inspection of the roof and gutters, obtain necessary permits if required, and contact a licensed contractor for major work. Consider temporary tarping to prevent leaks while you shop. Verify licenses, insurance, and references, and document all damage for insurance claims. If DIY is chosen, limit work to minor fixes and know when to call a pro.
Understanding hail damage near me
Hail events can inflict damage on many parts of a home, but the roof, gutters, siding, and attic are the most vulnerable. When you search for hail damage repair near me, you’re looking for a trusted local professional who can perform a careful assessment, implement safe temporary fixes, and develop a durable repair plan. According to Home Repair Guide, the first step is a thorough safety check: avoid slick surfaces, wear fall protection on steep pitches, and wait out severe weather. A basic visual inspection from the ground can reveal obvious issues, but several signs require a professional eye. Look for missing or displaced shingles, dented gutters and flashing, loose fascia, and granule loss in gutters or downspouts. If interior stains or musty smells appear in the attic, you may have a roof leak or compromised insulation. Not all damage is visible from ground level, so a professional roof inspection is often necessary to identify hidden structural problems, moisture intrusion, or ventilation issues. Every hail event is different, and local climate plus roof type influence the repair approach.
Quick assessment tips before you hire
Now that you know what hail damage near me looks like, prepare for a professional assessment. Create a damage diary: date, location, weather conditions, and photos from multiple angles. Photograph shingles, siding, and gutters, plus any interior signs. Keep tarps or plywood ready for temporary coverage if leaks are present. Request a written inspection report with a scope of work and an estimated timeline. Prioritize contractors who carry liability insurance and workers’ compensation; ask for copies. Compare at least three written estimates, and ensure each includes materials, labor, and project milestones. Document all communications and agreements to avoid scope creep later. By the time the repair begins, you should have a clear plan and a realistic schedule based on the severity of the hail impact and your local weather patterns.
Insurance and documentation considerations
Most homeowners deal with insurance claims after hail events; the process is smoother when you have thorough documentation. Start by reviewing your policy’s hail or wind coverage and your deductibles. When you contact a contractor, insist on a detailed, itemized estimate that separates temporary tarping, permanent repairs, and any cosmetic work. Take photos of the entire property, including the roof edge, gutters, and exterior walls, and keep a log of conversations with your insurer. After repairs, produce a completion report with contractor warranties and any paint or material warranty details. Home Repair Guide analysis shows that hail damage often affects shingles, flashing, and gutters; a coordinated plan that includes moisture control and proper flashing is essential for long-term durability.
Choosing a repair strategy: DIY vs professional
DIY can be tempting for minor cosmetic damage, but hail can compromise a roof’s integrity and ventilation. For most households, major roofing repairs require licensed professionals who understand code compliance and warranty implications. Weigh safety risks, material durability, and long-term protection when deciding. If you opt for DIY, limit it to non-structural fixes such as cosmetic sealing on exterior surfaces or painting, and avoid walking on compromised shingles or on a roof with visible damage. Professionals bring expertise on flashing, underlayment, and ventilation—critical components that prevent leaks after storms. Always verify licensing, insurance, and credentials, and demand a written contract with a clear scope of work.
Common repair options and costs (narrative)
Repair options vary from temporary tarps and minor cosmetic fixes to full roof replacement. The right approach depends on the severity of hail damage, roof type, and local weather patterns. When evaluating quotes, consider material lifespan, warranty coverage, contractor reputation, and the potential for future storms. Home Repair Guide analysis shows that hail damage often affects shingles, flashing, and gutters; a well-planned strategy typically combines moisture control, structural repairs, and preventive upgrades such as impact-resistant shingles or reinforced flashing. Avoid the temptation to overspend on premium materials if the structure does not justify it; aim for durability, not just cosmetics.
Materials and methods for hail-damaged roofs
Shingle choices are central to resilience: architectural shingles often offer improved wind resistance compared with basic three-tab options. Underlayment choice matters for water ingress protection, while flashing around chimneys, vents, and transitions needs to be sealed with compatible sealants and metal flashing. Roofing decking (sheathing) damage may require removal and replacement; gutters and downspouts should be inspected and replaced if bent or cracked. For metal roofs, check fasteners and sealants; for tile roofs, ensure underlayment integrity and proper batten alignment. The goal is a watertight, durable surface that can withstand future hail events and provide long-term energy efficiency.
Safety and quality control checklists
Safety is non-negotiable. Always wear appropriate PPE, use fall protection on pitched roofs, and avoid working during storms or high winds. Regular safety checks include ladder stability, secure footing, and buddy systems when available. Quality checks cover shingle alignment, nail patterns and spacing, flashing integrity, and proper sealant application. After installation, perform a controlled water test if permitted and monitor for any leaks during subsequent rain events. Document warranties and ensure all workmanship is covered by the contractor’s guarantee. A systematic approach reduces post-repair call-backs and protects your investment.
Aftercare and prevention
Post-repair maintenance reduces future risk. Schedule routine roof inspections after major storms, clean gutters, reseal seals, and check for granule loss on shingles. Consider longer-lasting options such as impact-resistant shingles or metal roofing if you live in a hail-prone area. Maintain a home-maintenance calendar to catch issues early, and implement a proactive weatherproofing plan that includes sealing around windows and doors, protecting soffits, and ensuring proper attic ventilation. A solid preventive strategy minimizes the likelihood of expensive repairs following subsequent hail events.
Next steps: finding a contractor near you
With a solid understanding of hail damage repair near me, begin the contractor selection process. Use online reviews, request warranties, verify licensing and insurance, and demand a clear written contract with a start date and completion date. Ask for references and photos of previous hail repair projects, and verify any claims about material longevity. If a contractor pressures you for urgent decisions, pause and seek multiple opinions to ensure you are comfortable with the plan and price.
Tools & Materials
- Ladder (sturdy, certified)**(Extendable with stabilizers; use a buddy or spotter)
- Fall protection gear(Harness, rope or lanyard, and non-slip footwear)
- Roofing nail gun or hammer(Nails appropriate for shingle type, corrosion-resistant)
- Roofing tarps or heavy-duty plastic(For temporary weatherproofing during repairs)
- Pry bar and pry shovel(For lifting damaged shingles or debris)
- Measuring tape(Accurate measurement for material orders)
- Tin snips or shears(If cut metal flashing or gutters are needed)
- Roof sealant/caulk(Weatherproof sealant suitable for flashing seams)
- Putty knife(Spread sealant and clean surfaces)
- Safety goggles and gloves(Eye and hand protection)
- Gutters and flashing replacement parts(On-hand replacements for damaged sections)
- Camera or smartphone for documentation(Before/after photos for insurance and records)
Steps
Estimated time: 3-6 hours
- 1
Assess safety and weather
Before climbing a ladder or stepping onto the roof, check the forecast and assess the roof condition from ground level. If there are high winds, rain, or slippery surfaces, postpone. Ensure someone is nearby and wear fall protection. This initial check prevents injuries and preserves evidence for claims.
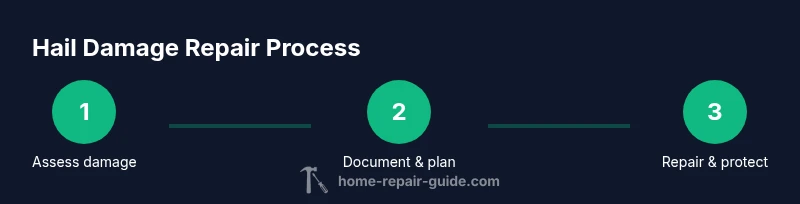
Tip: Always have a buddy assistant and a clear escape path from the roof. - 2
Document damage and plan
Take wide and close-up photos of shingles, flashing, gutters, and siding. Sketch a rough map of affected areas and note any interior signs of moisture. Create a temporary plan for tarping or patching to prevent water intrusion while you gather estimates.
Tip: Date-stamp photos and keep originals; insurers often request them. - 3
Obtain insurance guidance
Review your policy and contact your insurer to understand coverage for hail damage. Ask for an adjuster to visit, or request a virtual assessment if allowed. Keep a copy of all correspondence and written estimates.
Tip: Ask about depreciation, deductibles, and preferred repair timelines. - 4
Choose a contractor (and obtain estimates)
Solicit written bids from at least three licensed contractors. Compare scope of work, materials, warranties, and expected timelines. Verify licenses, insurance, and references before signing.
Tip: Require a detailed scope and itemized costs to avoid scope creep. - 5
Perform temporary protection
Install tarps or plywood to cover exposed areas, especially if leaks are detected. This reduces water intrusion while awaiting full repairs.
Tip: Use 4x8 tarps and secure edges with weight or fasteners. - 6
Execute permanent repairs
Contractor completes roofing, flashing, and, if needed, decking repairs. Ensure proper nail patterns, flashing seals, and attic ventilation are addressed. Schedule a final inspection after completion.
Tip: Ask for warranty documentation that covers workmanship and materials. - 7
Inspect and finalize
Review the completed work with the contractor, test for leaks after a rain event, and document the final condition with photos. Ensure all payment milestones align with progress.
Tip: Keep all receipts and warranty cards in an accessible file. - 8
Prevent future damage
Invest in maintenance like annual inspections, clean gutters, and consider impact-resistant shingles or metal options if you live in hail-prone areas. A proactive plan reduces long-term risk.
Tip: Create a yearly maintenance calendar and set reminders.
FAQ
What are the first signs of hail damage on a roof?
Common early signs include dented gutters, loose or cracked shingles, and granule loss in the gutters. If you notice attic moisture or staining after a storm, there may be a leak that requires professional evaluation.
Look for dented gutters and loose shingles after a hailstorm; attic moisture indicates possible leaks.
How soon should I file an insurance claim after hail damage?
File promptly after the storm to preserve the damage evidence. Your insurer may have deadlines and documentation requirements, so start with photos, a written report, and a list of affected areas.
File soon after the storm with photos and a written damage report.
Can I DIY roof repairs after hail damage?
DIY is generally not recommended for structural roof damage or compromised flashing. Minor cosmetic fixes may be possible, but major work should be handled by licensed professionals to protect warranty and safety.
Major roof work should be left to pros; you can handle small cosmetic fixes if safe.
What should I look for in a reliable local contractor?
Check licenses and insurance, ask for references and project photos, review warranties, and demand a detailed written contract with milestones. Verify their local reputation and how they handle warranty issues.
Look for proper licensing, solid references, and clear contracts.
How long do hail repairs typically take?
Timeline varies with damage extent and weather. A small patch may take hours, while full roof replacement can span days. Your contractor should provide a written schedule and update you if conditions change.
Most projects have a flexible timeline; get a written schedule from the contractor.
Watch Video
Key Takeaways
- Inspect roof and surroundings before repairs.
- Document damage for insurance claims and contractor bids.
- Hire licensed pros; demand a written scope and warranty.
- Prioritize safety and temporary protection during the process.