Fences Repair Near Me: A Practical Home Guide
A comprehensive, step-by-step guide to fences repair near me. Learn how to assess damage, choose materials, safely perform repairs, and decide when to hire a pro, all from Home Repair Guide.

With this guide, you will locate reliable fences repair near me, assess damage, and complete safe, durable fixes. You'll learn how to map damage, select materials (wood, vinyl, or metal), gather essential tools, and follow a clear, step-by-step plan. If needed, we’ll help you decide when to call a professional for post repairs.
Understanding why fences repair near me matters
According to Home Repair Guide, a well-maintained fence provides security, privacy, and curb appeal. The decision to repair rather than replace hinges on factors like material condition, post integrity, and the overall style of your property. This article explains how to assess damage, choose appropriate materials, and execute safe, durable fixes. By planning thoroughly, homeowners can extend fence life, protect investments, and avoid unexpected costs. The approach outlined here emphasizes reliability, safety, and practical DIY steps that work for most residential fences. Whether you’re dealing with a wooden picket, vinyl privacy screen, or a metal rail system, the fundamentals remain the same: inspect, prepare, repair, seal, and maintain.
Signs your fence needs repair
Visible signs of trouble include leaning posts, cracked boards, loose rails, rusted hardware, and gaps that let wind or animals through. In many cases, rot behind the visible boards indicates deeper issues that require post replacement or reinforcement. Take a walking survey along the entire fence run, measuring any sagging sections and noting posts that pull away from their anchors. For vinyl and metal fences, look for cracks, bent sections, and compromised fasteners. You’ll often find that the most affordable repairs fix the weakest links first—posts, then rails, then boards. Early detection saves time and money and prevents repairs from cascading into larger structural problems.
Materials and methods: wood, vinyl, and metal
Wood fences are common and economical but require routine maintenance to prevent rot. Vinyl fences resist weather but can crack or warp in extreme conditions. Metal fences (aluminum or wrought iron) offer durability but may need rust protection and repainting over time. Your choice affects the repair approach: wood may need new boards or posts; vinyl often requires replacing damaged panels; metal may need straightening and reinforcement. When in doubt, start with a visual inspection of the posts, rails, and panel integrity, then decide whether a patch or a full replacement section is warranted.
Safety and preparation basics
Before you begin, set up a clear work zone free of pets and children. Wear eye protection, gloves, and a dust mask when cutting wood or removing old nails. Use sturdy ladders on stable ground, and never stand on damaged or rotted boards. If you encounter buried utilities or suspect termite damage, stop and consult a professional. A well-lit workspace helps you spot small cracks or loose fasteners that could fail later. Having a plan and the right PPE reduces accidents and speeds up the repair process.
Testing damage and planning repairs: a practical approach
Start with post integrity: check for wobble by applying gentle pressure at the top and middle of each post. If a post moves, you’ll likely need to replace it or stabilize with a bracket. For rail and board repairs, test each joint for tightness and consider replacing entire sections rather than patching in mismatched pieces. Create a simple spreadsheet or sketch to map damaged sections and tally needed materials. This planning minimizes trips to the store and helps you estimate time more accurately.
Step-by-step repair techniques by material
Wood fences: replace rotten boards with fresh lumber, re-secure rails, and seal newly treated wood. Vinyl fences: swap out cracked panels and reset any bent posts, ensuring a snug fit. Metal fences: straighten bent rails, replace rusted fasteners, and repaint where needed. In all cases, ensure proper alignment with existing posts and maintain even spacing for a uniform appearance. If cables or brackets are involved, replace hardware with galvanized options to resist corrosion.
When to replace versus repair
If more than half of the fence shows significant rot, widespread rust, or structural post failure, replacement becomes more cost-effective and safer than piecemeal repairs. For historic or high-value fences, consult a professional to assess structural integrity and ensure compliance with local codes. In many cases, partial repairs can extend life, but a full replacement may save time and money in the long run.
Maintenance to extend fence life
Seasonal maintenance includes cleaning panels, treating wood with a preservative, inspecting fasteners, and resealing after exposure to harsh weather. Address leaning posts promptly and monitor clearance from soil to prevent wood rot. A proactive schedule—seasonal checks and minor touch-ups—keeps fencing secure and looking good year after year.
Authority sources and professional guidance
For further reading and best practices, consider university extension resources and safety guidelines from recognized authorities. The Home Repair Guide team emphasizes using reputable sources to inform decisions and ensure safe, durable repairs. The following resources provide additional context on materials, maintenance, and safety standards.
Tools & Materials
- Tape measure(to measure fence length, post spacing, and panel width)
- Level(to verify posts and rails are plumb)
- Post hole digger(for setting new fence posts)
- Shovel(for clearing debris and mixing concrete)
- Hammer(for removing nails and tapping boards into place)
- Cordless drill/driver(PH2 bits; for screws and hardware)
- Circular saw(for cutting boards to length)
- Galvanized nails and screws(prefer weather-resistant fasteners)
- Concrete mix(for setting new posts securely)
- Pry bar(useful for prying loose boards without breaking them)
- Safety gear (gloves, safety glasses, dust mask)(protect hands, eyes, and lungs)
- Replacement boards/panels (pressure-treated wood or vinyl)(match fence material and style)
- Sealant or paint/stain(protect wood after finishing)
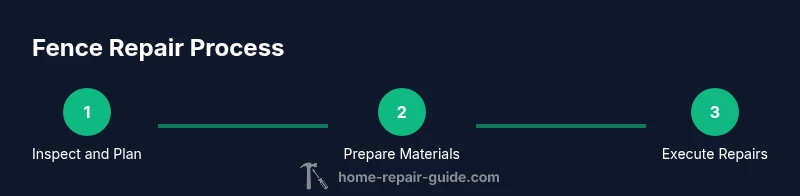
Steps
Estimated time: two to four hours
- 1
Inspect fence damage
Walk the fence line to identify leaning posts, cracked boards, and loose rails. Note sections that require the most work and plan your replacements accordingly.
Tip: Document dimensions and take photos for reference. - 2
Clear the work area
Remove obstacles, relocate plants, and mark the repair zone to keep pets and children away. Ensure stable footing and proper lighting before you begin.
Tip: Create a clean workspace to prevent miscuts. - 3
Remove damaged materials
Extract rotted boards and loose nails with a pry bar and hammer. Save usable components for reference if they’re in good condition.
Tip: Dispose rotten wood to prevent spreading decay. - 4
Prepare new posts and rails
Cut new posts and rails to match existing dimensions. Dry-fit sections to ensure correct alignment before permanent attachment.
Tip: Use a level during dry-fit to avoid misalignment. - 5
Set new posts in concrete
Dig post holes to the correct depth, place posts, and backfill with concrete. Allow concrete to cure for the recommended time before continuing.
Tip: Keep posts straight with temporary braces during curing. - 6
Attach rails and panels
Secure rails to posts, then fasten replacement panels or boards. Maintain even spacing and ensure nails or screws are flush.
Tip: Prefer weatherproof fasteners to minimize rust. - 7
Finish and seal
Seal wooden components or apply paint/stain to protect against moisture. Check for high-visibility touch-ups and ensure a uniform finish.
Tip: Choose a breathable sealant to prevent moisture buildup. - 8
Final inspection and cleanup
Review alignment, check for loose hardware, and clean the site. Verify stability by gently testing panels and posts.
Tip: Document final measurements for future maintenance.
FAQ
How do I know if my fence needs repair or replacement?
Evaluate post stability, extent of rot or rust, and overall safety. If most posts are unstable or the structure is compromised, replacement may be safer and more cost-effective than piecemeal repairs.
Check post stability and material condition. If the fence is wobbly or heavily damaged, replacement may be wiser than patching.
What are the most common fence problems?
Lean posts, cracked boards, loose rails, and corroded hardware are frequent issues. For vinyl, cracks and warped panels are common. Addressing these early reduces safety risks and prevents further damage.
Common problems include leaning posts, cracks, and rusted hardware. Fix early to avoid bigger costs.
Is it worth hiring a professional for fence repair?
DIY can save money for simple repairs, but complex post replacements or tall, high fences may benefit from professional installation to ensure safety and code compliance.
DIY saves money for basics, but experts can ensure safety and compliance for bigger jobs.
How long does fence repair typically take?
Most repairs take several hours to a day, depending on the fence length and material. Complex post work or replacements can extend the timeline.
Most repairs take a few hours to a full day depending on material and scope.
What safety gear should I wear when repairing a fence?
Wear safety glasses, gloves, and a dust mask. Use sturdy footwear and a hard hat if overhead work or heavy posts are involved.
Gloves, eye protection, and a mask keep you safe during repairs.
Can I repair a fence while the gate is in use?
Repairing with the gate in use is possible if you can segregate the work area and protect the gate from damage. If not, temporarily disable access to avoid accidents.
You can work with the gate in use if you block off the area safely and protect the gate.
Watch Video
Key Takeaways
- Assess damage thoroughly before buying materials
- Choose repairs based on material type and post integrity
- Safety gear and proper tools prevent accidents
- Plan, measure, and dry-fit before final assembly
- Seal or paint repaired sections for durability