Driveway Repair Near Me: Practical Home Fixes Guide
A step-by-step, educational guide to driveway repair near you. Learn assessment, surface-specific methods, safety tips, and when to hire a pro, with practical maintenance for asphalt, concrete, and gravel surfaces.

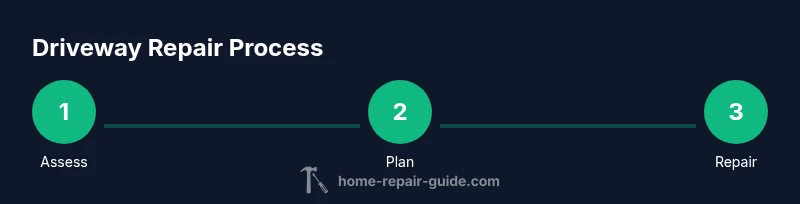
By the end of this guide, you’ll be able to assess common driveway issues, plan cost-conscious fixes, and decide when to hire a professional near you. You’ll learn safety basics, surface-specific methods for asphalt, concrete, and gravel, plus simple maintenance to extend life. This is a practical, field-ready approach to driveway repair near me.
Why driveway issues matter
Driveways are more than curb appeal; they’re a functional part of your home that keeps vehicles and pedestrians safe. When cracks widen, potholes form, or water pools near the edge, you risk tire damage, trips, and accelerated deterioration of the underlying base. A failed driveway can also affect drainage around your foundation and nearby landscaping. According to Home Repair Guide, the most common causes of driveway distress are freeze-thaw cycles, inadequate drainage, heavy loads, and aging materials. Recognizing these factors helps you pick a repair path that lasts. If you’re searching for driveway repair near me, you want a plan that balances durability, cost, and minimal disruption. Early, intentional fixes—paired with proper drainage and sealant maintenance—often save you money and time in the long run. The Home Repair Guide team emphasizes that timely intervention reduces the risk of costly resurfacing later and improves safety for everyone who uses the driveway. This section sets the stage for a practical, informed approach you can apply this season.
Assessing the damage: cracks, potholes, and drainage
Not all driveway damage is equally serious. Start by surveying the surface at walking speed, noting crack width, the depth of any potholes, and signs of water pooling or edge deterioration. Small, hairline cracks under 1/8 inch wide are usually manageable with crack filler, while wider cracks may indicate substrate movement that needs professional assessment. Potholes that expose the base or undermine compaction require cleaning, edge stabilization, and a durable patch or resurfacing. Drainage issues are often the sneakiest; water that doesn’t shed away from the pavement can accelerate all other problems. Home Repair Guide analysis shows that resolving drainage problems first often reduces future cracking and spalling. Document the affected areas with photos and measurements so you can compare pre- and post-repair results. Remember, safety matters—avoid loose material and unstable edges while you inspect. If you see wide, shifting cracks or cracks that run in multiple directions, consider scheduling a professional evaluation for a long-term solution.
Surface-specific repair strategies: asphalt, concrete, and gravel driveways
Different surface types demand different repair approaches. Asphalt patches and sealants work well for surface cracks that don’t threaten the base and can be rolled or troweled into place. Concrete repairs often rely on polymer-modified mortars or epoxy coatings to restore a flat, sealed surface and prevent water intrusion. Gravel driveways benefit from grading to ensure drainage, tamping to recompact the surface, and adding new gravel for a stable, crowned profile. Each method has its own preparation steps—cleaning debris, removing loose material, and drying the area—followed by proper curing periods. If you’re evaluating options near you, compare the expected lifespan of a DIY patch versus a full resurfacing. The best choice aligns with the surface condition, climate, traffic levels, and how soon you want to resume normal use. This section helps you pick a repair path that minimizes future maintenance while maximizing durability.
Planning, safety, and prerequisites
Before you pick a repair method, map out the scope, budget, and timing. Check local regulations or homeowner association rules if you live in a shared driveway. Gather safety gear—eye protection, gloves, and a dust mask—and clear the area of obstacles to prevent accidents. Weather matters: avoid repairs when temperatures are extreme, and ensure the surface is dry for best material adhesion. If drainage work is required, plan for grading changes or installing proper edging to keep water away from the repaired area. A clear plan lets you forecast labor time, material needs, and the impact on daily routines. The Home Repair Guide team recommends documenting the plan and setting realistic milestones to prevent scope creep. This upfront work pays off with a smoother project and a more durable result.
DIY vs professional: deciding the right path
Many homeowners start with small patches or crack fillers as a DIY project, especially on low-traffic areas or minor cracks. For wider cracks, structural movement, or potholes that expose the subbase, a professional assessment is wise. Major drainage corrections, edge repairs, or resurfacing typically require specialized equipment and expertise to guarantee a durable finish. Use a simple rule of thumb: if the repair involves the base or edge stability, or if the surface shows signs of ongoing movement, bring in a pro. For routine maintenance and minor fixes, DIY methods can save money while delivering satisfactory results. This section gives you a decision framework so you can act confidently near me without overcommitting to a single path.
Maintenance and long-term care
A successful driveway repair near me combines a solid repair with ongoing maintenance. Seal cracks after patching to prevent moisture penetration, regrade and clean the surface annually to keep drainage on the correct path, and add fresh asphalt or gravel as needed to restore a smooth crown. Regular cleaning helps prevent weed growth in cracks and keeps the surface from deteriorating due to stains, freeze-thaw cycles, or oil intrusion. Keep an eye on drainage conditions following heavy rains; small adjustments to grading can dramatically extend the life of a repair. By integrating sealing, cleaning, and periodic reapplication into your routine, you’ll maximize the interval between major resurfacing projects and preserve the driveway’s functionality and curb appeal.
Tools & Materials
- Safety goggles(ANSI Z87.1 or equivalent)
- Work gloves(Nitrile or leather)
- Dust mask(NIOSH-approved)
- Hammer(Claw hammer for quick detents)
- Chisel or utility knife(For opening cracks or edging)
- Trowel or putty knife(2–4 inch width)
- Measuring tape(Minimum 25 feet)
- Broom and stiff brush(Clean debris from cracks)
- Concrete crack filler / asphalt patch material(Choose by surface type)
- Water source / hose(For cleaning and curing control)
- Sealant or epoxy coating (optional)(For long-term seal and protection)
Steps
Estimated time: 2-6 hours
- 1
Assess safety and scope
Identify the area to repair, gather PPE, and mark off the workspace to keep children or pets away. Confirm weather conditions and ensure the surface is dry before starting. This step reduces risk and helps you plan material needs accurately.
Tip: Wear all PPE before handling any patch material or power tools. - 2
Inspect and document drainage
Check how water drains away from the driveway and note any low spots where water tends to pool. Poor drainage often drives repairs and could require reshaping edges or adding edging to redirect flow.
Tip: Take photos for reference and to compare after the repair. - 3
Choose the repair method by surface
If asphalt, consider cold-patch materials for small patches; for concrete, polymer-modified mortars or epoxy are common; for gravel, grading and fresh material work best. Match the patch to the surface for best adhesion and longevity.
Tip: Avoid mixing patch types across different surfaces; compatibility matters. - 4
Prepare the area and clean cracks
Sweep away loose chips, dirt, and vegetation. Use a chisel or utility knife to widen and clean cracks, then dry the area thoroughly. Proper prep improves patch adhesion and prevents future cracks.
Tip: Drying time is critical; do not rush the clean-and-dry step. - 5
Apply patch material and level
Fill cracks with patch material or patching compound, then press it in with a trowel or putty knife. For potholes, backfill with material and compact from the bottom up to restore the base. Smooth the surface to a uniform grade.
Tip: Overfill slightly to account for settling and cure shrinkage. - 6
Cure, seal, and restore drainage
Allow patch material to cure per manufacturer guidance, which may require shade and steady temperature. Apply a sealant or traffic-grade coating if recommended by the product. Re-check drainage and re-grade if necessary to maintain a proper crown.
Tip: Protect the repair from heavy traffic for the first 24–48 hours.
FAQ
What counts as driveway repair near me?
Driveway repair near me includes crack sealing, pothole filling, resurfacing, and drainage improvements performed in your area. For large structural issues, seek professional evaluation.
Driveway repair near me covers sealing cracks, filling potholes, resurfacing, and fixing drainage nearby. For big structural problems, call a pro.
When should I call a professional?
Call a professional if cracks are wide, doors or slabs shift, or drainage is persistent despite minor fixes. These signs indicate potential base movement or underlying issues that require equipment and expertise.
If cracks are wide, slabs shift, or drainage persists after patches, get a professional evaluation.
Can I repair a driveway myself?
Yes for small cracks and patches with proper materials and instructions. For major movement, extensive potholes, or base problems, professional work is safer and often more durable.
DIY is fine for small fixes; bigger problems usually need a pro.
What materials work best for asphalt vs concrete repairs?
Asphalt repairs use patch compounds designed for asphalt, while concrete repairs use polymer-modified mortars or epoxy-based products. Match the repair product to the surface to maximize adhesion and longevity.
Use asphalt patch for asphalt; polymer mortars or epoxy for concrete.
How long does a driveway repair typically take to cure?
Minor patches cure quickly, often within a day or two, while larger resurfacing or drainage work may require several days and weather windows to fully set.
Small fixes dry fast; bigger jobs take days depending on weather.
Watch Video
Key Takeaways
- Assess damage thoroughly before fixing.
- Choose surface-appropriate methods for durability.
- Safety and planning reduce risk and scope creep.
- DIY fixes work for minor issues; larger problems usually require a pro.