Car Oil Leak Repair: A Practical Step-by-Step Guide
Learn to diagnose and repair a car oil leak at home with a practical, step-by-step guide. Identify sources, gather tools, and prevent future leaks.

You’ll learn how to locate and repair a car oil leak safely at home, focusing on identifying common sources, assembling the right tools, and choosing between gasket or seal fixes. According to Home Repair Guide, start with a clean workspace, inspect for fresh oil, and plan your repair around the most likely culprits like the oil pan gasket, valve cover gasket, or drain plug. This quick overview sets you up for the in-depth steps that follow.
Understanding why car oil leaks matter
Oil leaks are not just messy; they’re a signal that your engine is not sealing properly. Even small drips can lead to oil loss, reduced lubrication, and accelerated wear on bearings and seals. If you drive with a leak, you may also increase the risk of a fire in extreme cases where oil finds a hot exhaust component. The Home Repair Guide team emphasizes early detection and safe handling to minimize engine damage and environmental impact. Throughout this guide, you’ll see practical checklists, clear warnings, and actionable steps you can take in a typical home driveway or garage. By understanding how leaks develop and what parts are commonly involved, you’ll be better prepared to decide between DIY fixes and seeking professional help.
Common sources and how they behave
Leaks can originate from several locations, and the exact culprit often determines the repair path. The most frequent sources include the oil pan gasket, valve cover gasket, and the drain plug washer. Less common but more serious sources include the rear main seal and oil pump seals. Observing the pattern of oil staining—whether it appears under the front, middle, or rear of the engine—helps narrow the field. The color and consistency of the oil can also offer clues about contamination or age. As you diagnose, document where the oil drips most and note any accompanying issues like blue exhaust smoke or burning odors, which could signal a deeper, more urgent problem.
Preparing your workspace and safety basics
Before you touch anything, ensure you have a safe, well-lit area and the proper PPE. Wear eye protection and gloves to shield skin from hot oil and sharp edges. Use wheel chocks and a sturdy jack stand or ramps to stabilize the vehicle, never relying on a jack alone. Have a drain pan ready to catch used oil and absorbent pads or rags for cleanup. If you’ll be using UV dye for leak tracing, follow the dye kit’s instructions and dispose of any waste according to local guidelines. The Home Repair Guide approach centers on safety-first and a tidy workspace that makes inspection and cleanup easier.
Tools and consumables you’ll need (essential vs. optional)
Here’s a practical shopping list with essentials marked as required. Essentials: oil compatible with your engine, a clean drain pan, rags, gloves, safety glasses, a socket wrench set, torque wrench, replacement gaskets (oil pan, valve cover, or others as indicated by your inspection), gasket scraper or solvent, and a UV dye kit if you plan to trace the leak. Optional but helpful: an inspection mirror, shop flashlight, oil filter wrench, and a car ramps or jack stands if you need more space under the engine. Keeping a spare oil fiter, crush washers for the drain plug, and a funnel on hand can speed up the process and reduce mishaps.
DIY feasibility: when to fix yourself vs. call a pro
Many minor leaks from inexpensive gaskets can be repaired at home by a mechanically inclined DIYer, especially if you already have basic tools. More complex leaks—like a rear main seal or crankshaft oil passages—often require engine disassembly or specialized equipment and should be handled by a professional. The decision hinges on leak location, the labor required, and whether you’re comfortable raising and supporting the vehicle safely. Home Repair Guide recommends weighing the cost of parts and time against the risk of improper installation or missed leaks. When in doubt, obtain a diagnostic from a certified technician before buying components.
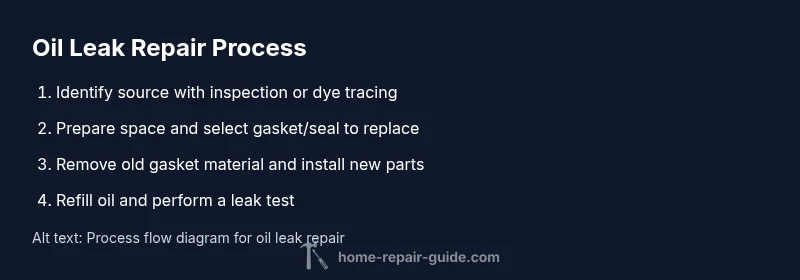
Step-by-step overview: leak diagnosis and repair planning
This section provides context for the upcoming detailed steps. After locating the likely source, you’ll decide whether a gasket replacement, seal swap, or component reseal is necessary. You’ll also plan for oil draining, filter replacement if needed, and refilling to the correct level. Taking photos, labeling bolts, and organizing parts will minimize reassembly confusion. By establishing a clear plan and safety precautions upfront, you reduce the chance of creating new leaks or causing engine damage. The Home Repair Guide team stresses patience and careful inspection to avoid rushing through a critical repair.
Preventive maintenance to minimize future leaks
Prevention is easier than cure in many cases. Regular oil changes, using the correct oil grade for your engine, and replacing worn seals before they fail can extend engine life and prevent costly repairs. Periodic checks for oil spots on the driveway, underhood inspections for cracked hoses, and ensuring the oil drain plug and gasket are in good condition are simple habits with big payoffs. Consider keeping a maintenance log and scheduling pre-season checks to catch developing leaks early. By staying proactive, you reduce the chance of bigger, more disruptive repairs later on.
Tools & Materials
- Engine oil (correct grade for your vehicle)(Ensure you have the exact viscosity and spec as per manufacturer.)
- Drum or drain pan(Big enough to hold all drained oil without spilling.)
- Rags and absorbent pads(For quick cleanups and drips.)
- Gloves and safety glasses(Protect skin and eyes from hot oil.)
- Socket set and ratchet(To remove fasteners on gaskets and covers.)
- Torque wrench(To tighten fasteners to manufacturer specs.)
- Replacement gaskets/seals (oil pan, valve cover, etc.)(Only replace those indicated by inspection.)
- Gasket scraper or solvent(Remove old gasket material cleanly.)
- UV dye kit (optional)(For tracing leaks in hard-to-see areas.)
- Jack stands or ramps(Vehicle stability while working underneath.)
- Funnel and cleaning solvent(For refilling oil and cleaning areas.)
- Shop light or flashlight(Inspect crevices and verify leak source.)
- Oil filter wrench (if replacing filter)(Only if you plan to replace the filter.)
Steps
Estimated time: 2-6 hours
- 1
Gather tools and prepare workspace
Collect all required tools and parts before starting. Clean the work area, set the vehicle on level ground, and chock the wheels. Verify you have a clear route for draining oil and disposing of waste.
Tip: Label fasteners as you remove them to simplify reassembly. - 2
Secure the vehicle and raise safely
Place wheel chocks, then lift the vehicle using a jack and support with jack stands or ramps. Ensure the vehicle is stable and cannot shift while you work underneath or near engine areas.
Tip: Never rely on a jack alone for support. - 3
Locate the leak source with initial inspection
Wipe the engine area clean, start the car briefly, and inspect for fresh oil. Use a bright light to inspect seams around the oil pan, valve covers, and drain plug area. Note the area that shows fresh oil most clearly.
Tip: If you’re using dye, apply it per kit instructions and wait for accumulation. - 4
Decide the repair path based on source
If the leak is from a gasket easily accessible, plan to replace that gasket. For difficult regions like a rear main seal, evaluate whether professional service is warranted. Document the path you’ll take before disassembly.
Tip: Avoid over-tightening seals; torque to manufacturer specs. - 5
Remove old gasket material
Carefully disconnect any panels or covers that block access. Use a gasket scraper to remove old gasket material completely, taking care not to gouge the mating surfaces.
Tip: Work slowly to avoid damage to mating surfaces. - 6
Install new gasket or seal and reseal
Place the new gasket in position, then reinstall the cover with new fasteners. Tighten gradually in a crisscross pattern to ensure even seating, and verify it seats without distortion.
Tip: Set aside old hardware and inspect for wear before reuse. - 7
Refill oil and check level
Reinstall any removed components, refill the engine with the correct oil grade, and check the level with the dipstick. If you replaced the filter, ensure it is seated properly and that there are no leaks around the filter base.
Tip: Avoid overfilling; oil overfill can cause engine issues. - 8
Test for leaks and clean up
Start the engine and let it reach operating temperature. Inspect all suspect areas for fresh leaks and recheck after a short run. Dispose of used oil and rags according to local regulations.
Tip: Take a photo log of the final condition for future reference.
FAQ
What are the most common causes of a car oil leak?
The most frequent culprits are the oil pan gasket, valve cover gasket, drain plug washer, and worn seals. Inspecting these areas first often leads to a quick fix. If the source isn’t obvious, consider using UV dye to trace the leak more accurately.
Common causes are the oil pan gasket, valve cover gasket, drain plug washer, and worn seals. UV dye can help trace elusive leaks.
Can I drive my car if I suspect an oil leak?
No. Driving with an oil leak can lead to engine damage, fire risk, and environmental harm. If you notice a leak, reduce trips and seek a diagnostic or repair promptly to prevent costly damage.
No. Don’t drive long distances with a leak; get a diagnostic or repair soon.
How much does it cost to repair an oil leak?
Repair costs vary widely based on location, source of the leak, and whether you handle it yourself. Expect differing parts costs and potential labor charges if a professional is involved. DIY fixes are typically cheaper but require the right tools and accuracy.
Costs vary a lot; DIY is cheaper but riskier if you’re not sure what you’re doing.
Should I use stop-leak products to fix an oil leak?
Stop-leak additives may seal minor, slow leaks temporarily but are not a cure for larger or mechanical seal failures. They can also clog galleries over time and complicate future service. Use them with caution and follow manufacturer guidance.
Stop-leak products aren’t a guaranteed fix and can cause clogs; use them sparingly and follow guidance.
What if the leak is behind the engine or near a rear main seal?
Leaks from the rear main seal are typically more involved and often require engine access or teardown. This is usually a signal to consult a professional. Early evaluation can prevent unnecessary disassembly and higher costs.
Rear main leaks are tricky; often require a professional evaluation.
Is dye testing necessary for accurate leak detection?
Dye testing is a reliable method to pinpoint leak sources, especially in hard-to-see areas. It’s worth using if a quick visual check isn’t conclusive. Follow dye kit instructions for best results.
Dye testing helps pinpoint leaks when visuals aren’t clear.
Watch Video
Key Takeaways
- Identify leak sources with a clean, staged approach
- Prioritize safety and stability first
- DIY gasket repairs are feasible for simple sources
- Refill oil to the correct level and check for fresh leaks
- Prevent future leaks with regular maintenance