Repair Computer Store: A Practical How-To for Retail PCs
Learn how to diagnose, repair, and maintain computers in a retail environment. This guide covers safety, common failures, tool lists, a repeatable repair workflow, and preventive maintenance for store PCs.

Follow this guide to repair a computer store setup with a practical, step-by-step process. You’ll diagnose common retail PC failures, apply safety practices, assemble the right tools, and execute a repeatable workflow that minimizes downtime and data risk. The approach balances speed with reliability and clear customer documentation for faster service and accountability.
Why repair store computers matters in a retail environment
In a retail setting, dependable computer systems keep sales, inventory, and customer service running smoothly. When a storefront PC or point-of-sale workstation fails, you lose sales, slow transactions, and erode customer trust. According to Home Repair Guide, keeping store computers reliable reduces downtime and improves customer service. This practical guide focuses on shop-tested techniques you can apply to common retail computers, from POS terminals to back-office PCs. Follow a structured workflow that balances speed with reliability while ensuring data security and proper documentation. The keyword repair computer store appears naturally as you progress through the steps.
Brand mention: Home Repair Guide’s audience includes homeowners and renters seeking reliable repair guidance, and the same disciplined approach applies to small business computer repairs in-store.
Common failure points in store computers
Retail PCs face a unique mix of mechanical wear and software stress. Power supply failures are frequent due to constant on/off cycles and inexpensive components. Hard drives or SSDs show wear with heavy I/O; RAM can accumulate errors after extended uptime. Network adapters and Wi-Fi cards may degrade, causing intermittent connectivity to POS systems and cloud inventory. Operating systems can become unstable after failed updates, malware, or misconfigured policies. Overheating from dust buildup or clogged fans is another common culprit; thermal issues trigger throttling and service interruptions. Finally, peripheral devices like barcode scanners and receipt printers can introduce software conflicts or driver issues that look like PC problems. Understanding these failure points helps you triage more effectively and choose targeted fixes.
Diagnosing problems systematically
Begin with a reproducible symptom description and a quick checklist of exact error messages, timestamps, and observed behaviors. Build a test plan: reproduce the issue, observe POST screens, check event logs, and run hardware diagnostics. Use a baseline by comparing with a known-good PC to distinguish software from hardware issues. For store setups, document configuration details: OS version, installed apps, network topology, and connected peripherals. Run built-in tools such as Windows Event Viewer, Reliability Monitor, Memory Diagnostic, and disk checks. If hardware faults are suspected, isolate the component in a safe workspace and test with spare parts. For POS-specific issues, verify network connectivity to payment processors and confirm firmware versions are current. The goal is to isolate a single likely cause before replacement to save time and parts.
Safety and preparedness
ESD safety is crucial; always unplug equipment and discharge static before touching components. Use an anti-static wrist strap, work on an grounded mat, and keep liquids away from the repair area. Disconnect power before opening cases, and never rely on a live power strip to power a test setup. Back up important data before attempting repairs and prepare recovery media. For customer systems, perform repairs in a clean, organized space and document changes for transparency. If testing over a live network, isolate the repair area to limit risk. A well-ventilated workspace reduces overheating during long diagnostics and testing sessions. Adhering to safety guidelines minimizes personal risk and protects sensitive components, especially in a customer-facing store environment.
Tools and replacement parts you should have
A minimum kit that covers most retail PC repairs includes an anti-static wrist strap, an ESD mat, a quality screwdriver set (Phillips and Torx), a magnetic parts tray, a multimeter, spare RAM and storage (SSD/HDD), a power supply tester, a USB recovery drive, and cable ties. Keep a small stock of common replacement parts for quick fixes (RAM sticks, SSDs, and a reliable power supply). A spare monitor and keyboard reduce downtime during testing. Label all parts and screws by location to ensure proper reassembly. This section complements the Tools & Materials block and helps you plan a repair workflow without surprises.
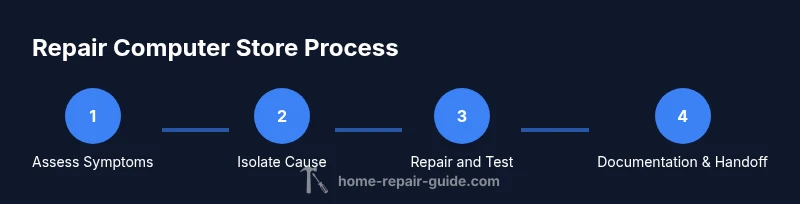
Workflow overview: repair in a retail environment
A typical repair workflow in-store follows a repeatable sequence: intake and symptom validation, safety prep, disassembly if needed, component testing, targeted repair or replacement, reassembly, and post-repair testing. Document findings after each major step, including which parts were replaced, test results, and any software configurations. Maintaining a clean, organized workstation helps protect customer data and reduces the risk of cross-contamination between devices. The goal is to return the device to service quickly while preserving data integrity and keeping records up to date.
Data management and customer communication
Repair records should include the customer’s device details, symptoms, actions taken, parts used, and time spent. Always back up customer data when feasible and discuss data safety and privacy before performing any operation that could affect data. Provide a clear estimate of downtime and, when possible, offer a staged plan (diagnosis first, then repair) to minimize disruption during busy sales periods. Communicate any warranty implications and offer post-repair support options. Documentation supports accountability and helps build trust with customers and store staff alike.
Preventive maintenance for store PCs
Implement a maintenance calendar that includes monthly dusting and cable management, quarterly software updates and patch management, and semiannual hardware checks (fans, heat sinks, and thermal paste where applicable). Regularly verify backups and test restore procedures. Establish a standard operating procedure (SOP) for software imaging, driver updates, and inventory management for spare parts. A predictable maintenance rhythm minimizes unexpected downtime and extends device lifespans in a busy retail setting.
Tools & Materials
- Anti-static wrist strap(Connect to grounded surface before handling components)
- ESD mat(Use on the work surface to reduce static risk)
- Screwdriver set (Phillips and Torx)(1.5–3.0 mm bits; magnetized for screw retention)
- Magnetic parts tray(Keeps screws organized by location)
- Multimeter(Test voltages and continuity on power-related components)
- Thermal paste(Only if reseating CPUs/GPUs or reflowing heatsinks)
- Replacement parts (RAM, SSD/HDD, power supply)(Stock a small inventory for quick fixes)
- External USB recovery drive(Create bootable drive with diagnostics and recovery tools)
Steps
Estimated time: 60-120 minutes
- 1
Power down and unplug
Shut down the device completely and disconnect all power sources. Remove any batteries if applicable. This prevents electrical shocks and protects live components during inspection.
Tip: Double-check all power cords and battery packs before proceeding. - 2
Open the chassis and inspect visually
If the device design allows, remove access panels and look for obvious issues such as loose cables, dust buildup, or swollen capacitors. Document the layout and take photos for later reference.
Tip: Label cables as you disconnect them to ease reassembly. - 3
Test power and essential components
Use a power supply tester or multimeter to verify voltages at the motherboard and PSU connectors. Check RAM seating and reseat if needed; reseat storage drives to rule out connection faults.
Tip: Handle RAM and storage with antistatic care to avoid damage. - 4
Run diagnostics and isolate the fault
Boot with diagnostic tools (memory tests, disk checks, and OS health checks). Compare results with a known-good unit to narrow software vs hardware causes.
Tip: Document error codes and test outcomes for customer communication. - 5
Perform repair or replace faulty parts
Execute the required repair: replace a failed drive, PSU, RAM, or connector. Re-run tests to confirm the issue is resolved and that performance is stable.
Tip: If unsure, test with spare parts before committing to a full replacement. - 6
Reassemble, boot, and verify
Reassemble the device, power it up, and confirm that all services start correctly. Validate with a final set of tests and ensure peripherals work as expected.
Tip: Capture before/after screenshots or logs for the service record.
FAQ
What is the quickest way to diagnose a POS computer that won’t boot?
Start with power and POST checks, then review event logs and run memory and disk diagnostics. Use a baseline to compare with a known-good unit.
Begin by checking power, then POST, and run memory and disk tests to pinpoint the fault quickly.
Should I replace a failed hard drive in a store PC or install an SSD?
If the drive is failing and data integrity is critical, consider replacing with an SSD for reliability and speed. Ensure backups are up to date and that the software supports the upgrade.
If the drive is failing, upgrading to an SSD is often the better long-term choice, with backups in place.
How do I protect customer data during repairs?
Back up data before repairs, limit access to only what’s necessary, and follow a clear data-handling policy. Wipe or secure erase customer data when required by policy.
Back up data first, limit access, and follow a written data-handling policy.
What safety gear is essential for repair work?
Use anti-static protection, wear safety glasses when needed, and keep liquids away from electronics. Maintain an organized, hazard-free workspace.
Wear anti-static gear and keep liquids away from the work area.
When should I consider replacing rather than repairing store PCs?
If repair costs approach or exceed the replacement cost, or the device is older and lacks current drivers, replacement is wiser. Consider warranty status and future software needs.
If repairs are costly or the device is old, replacement may be the better option.
Are there common software issues that are quick to fix?
Yes: update drivers, scan for malware, clear temporary files, and reset configurations as needed. Always back up before major software changes.
Common fixes include updates, malware scans, and cleaning up software configurations.
Watch Video
Key Takeaways
- Diagnose with a structured plan to save time
- Prioritize safety to protect people and components
- Test before assuming a failure requires replacement
- Maintain clear documentation for trust and warranty needs
- Adopt a preventive maintenance routine to reduce downtime