How to Repair a Computer: Step-by-Step DIY Guide
Learn a practical, safe approach to repairing a computer at home with our step-by-step guide. From diagnostics to testing, empower your DIY repairs with reliable guidance from Home Repair Guide.

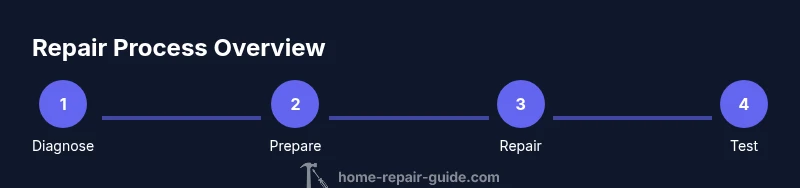
By following this guide, you will diagnose and repair common computer issues, from dust cleaning to reseating components. It covers safety steps, required tools, and a clear step-by-step workflow you can perform at home. You’ll learn how to verify fixes with tests and how to decide when professional help is wiser.
Diagnosing common PC issues
According to Home Repair Guide, most home computer problems share a few familiar patterns: power problems, overheating, storage or memory faults, and software conflicts that prevent boot. The Home Repair Guide team analyzed hundreds of DIY repair scenarios in 2026 and found that most fixes start with a methodical, non-destructive approach. Start with observable symptoms: does the PC power on? Are there beeps, LED codes, or fan noises? Is the system slow, freezing, or crashing after startup? By cataloging symptoms, you narrow down the likely causes and avoid chasing invisible gremlins. This stage is less about finding a single culprit and more about building a shortlist of likely suspects—from the power supply to the motherboard and storage devices—so you can plan your next steps with confidence.
Safety and preparation
Safety must come first when repairing a computer. Always unplug the system and disconnect all peripherals before touching any internal components. Ground yourself with an anti-static wrist strap or by touching a metal chassis to discharge static electricity. Work on a clean, uncluttered surface and keep track of screws and small parts in labeled containers. Data protection is critical, so consider backing up essential files before you begin, even if the repair seems minor. The Home Repair Guide analysis emphasizes safety as the foundation of any successful DIY repair, reducing the risk of damage to components and to you.
Tools and workspace setup
A well-organized workstation speeds up repairs and minimizes mistakes. Gather the essential tools: a precision screwdriver set (Phillips #0, #1, and #2), an anti-static wrist strap, cans of compressed air, and a small flashlight for lighting dark corners. A digital multimeter helps verify power delivery in cases where you suspect the PSU or motherboard is at fault. Keep a magnetic parts tray handy and lay out screws in the order you remove them. Clear labeling for cables and connectors prevents confusion during reassembly. A tidy workspace also reduces the risk of losing small components during disassembly.
Diagnostic mindset: isolate, observe, infer
Adopt a structured diagnostic mindset: isolate the problem, observe symptoms, and infer likely causes from reliable signals. Begin with non-invasive tests—check external cables, BIOS/UEFI settings, and software updates. If the computer powers on but crashes, test memory and storage separately, then watch for POST sequences or beep codes. Avoid replacing parts at random; instead, verify each hypothesis with a simple test: reseat a RAM module, swap a suspect cable, or test a cleaned port. This disciplined approach saves time and money while reducing the chance of collateral damage.
Common failure points and fixes
Some failures are easy to fix, others are more involved. Dust buildup is one of the most frequent culprits; a thorough cleaning with compressed air and a soft brush often restores performance and lowers temperatures. RAM faults usually show up as intermittent freezes or crashes; reseating or swapping modules can confirm a faulty stick. Storage problems may manifest as boot errors or slow loading; check SATA cables, run SMART diagnostics, and consider replacing failing drives. Power supply issues often present as sudden shutdowns or failure to boot; test voltages and inspect connectors for signs of wear or burn marks. If you identify a faulty component, replace with an equivalent part and retain anti-static precautions to protect sensitive circuitry.
Data protection and backups before repair
Before opening the case, ensure you have a reliable backup strategy. Copy essential documents, photos, and work files to an external drive or a secure cloud service. Create a system image if possible, so you can restore your environment quickly if something goes wrong during the repair. Verify the backup by attempting to access files from another device. This precaution protects your data against accidental loss during disassembly, component replacement, or BIOS reset. The Home Repair Guide team stresses that prudent backups are your best defense when things don’t go as planned.
Cleaning and preventive maintenance
Dust is the silent killer of many PCs. After removing the case cover, use compressed air to blow dust from fans, vents, and heatsinks from several angles to prevent recirculation. A clean heatsink and fan improve airflow and cooling efficiency, reducing thermal throttling. While you’re in there, reseat cables and components carefully, check for loose connectors, and replace worn-out thermal paste when temperatures rise or paste appears dry or gray. Regular cleaning and preventive maintenance extend the life of your system and reduce the frequency of major repairs. Keeping components accessible also makes future maintenance easier and faster.
When to seek professional help and testing
Not every problem is a DIY fix. If you encounter a burning smell, smoke, or visibly damaged components, stop immediately and unplug the system. More complex issues involving the motherboard, power supply with non-standard outputs, or data recovery scenarios may require specialized tools or a professional service. Use supplied diagnostics to guide your decision: if testing suggests a power fault, but you cannot safely measure voltages, contacting a professional is the prudent choice. The Home Repair Guide team recommends prioritizing safety and data integrity when deciding whether to proceed yourself or call in an expert.
Tools & Materials
- Phillips screwdriver set (sizes #0, #1, #2)(Magnetic tip helps with small screws)
- Anti-static wrist strap(Ground yourself to prevent ESD)
- Canned compressed air(Blow dust from fans and heatsinks)
- Digital multimeter(Check PSU outputs and continuity)
- Thermal paste(Reapply if CPU temps are high)
- Small container or magnetic tray for screws(Keep fasteners organized)
- USB flash drive with diagnostic tools(Tools like memtest86 or SMART utilities)
- Isopropyl alcohol (90% or higher) and lint-free swabs(For cleaning stubborn residues)
Steps
Estimated time: 90-180 minutes
- 1
Power down and prepare
Shut down the computer, unplug the power cord, and disconnect all peripherals. Ground yourself with an anti-static strap or by touching a metal chassis. Remove the case cover to access internal components and photograph cable layouts for reassembly.
Tip: Label screws and cables as you remove them; photos help you put everything back correctly. - 2
Document interior layout
Take clear photos of the motherboard, cables, and component placements before moving anything. This helps avoid mistakes when reassembling and makes it easier to identify where each part belongs. Use a small tray or organizer for fasteners.
Tip: Keep a map of connectors; color-coded taped notes can be very effective. - 3
Check basic power and POST signals
Verify that the power supply is delivering power to the motherboard and that there are no obvious signs of damage. Listen for POST beeps or observe LED codes during startup to narrow down the issue. If there are no beeps, the problem is likely upstream of the motherboard.
Tip: If you hear no beeps, check the power switch and power cable connections first. - 4
Inspect power connections and the motherboard
Examine all power connectors from the PSU to the motherboard and storage devices. Look for loose cables, signs of wear, or burnt smells. Reseat connectors firmly and ensure alignment with sockets to restore reliable power delivery.
Tip: Power down completely between reseats to avoid shorting components. - 5
Test RAM and reseat modules
Remove all RAM sticks and reinstall one at a time to identify a faulty module. If the system boots with a single module, test the others individually. This helps locate memory faults without replacing hardware unnecessarily.
Tip: Use the correct memory slots for dual-channel operation as per the motherboard manual. - 6
Inspect storage devices and cables
Check SATA/PCIe cables and power to storage devices. Run basic SMART checks if the system boots, or connect a known-good drive to test bootability. Faulty drives or cables can mimic motherboard issues.
Tip: Replace aging cables with high-quality replacements to improve reliability. - 7
Thermal management and CPU seating
If temperatures are high or the CPU cooler has loosened, reseat the CPU cooler and reapply a thin layer of thermal paste. Ensure the fan is functioning and the heatsink has unobstructed airflow. Tighten mounting screws evenly to avoid warping.
Tip: When applying paste, use a small pea-sized dab and spread evenly or use a reputable pre-applied pad. - 8
Reassemble, test, and verify
Carefully reassemble the case, reconnect power, and boot the system. Run core diagnostics, memory tests, and storage checks to confirm stability. If issues persist, revisit earlier steps or consult professional support.
Tip: Document test results so you can track changes and conclusions over time.
FAQ
Is it safe to repair my own computer?
Yes, with proper safety practices and careful handling of components. Unplug the system, discharge static, and avoid working on live power sources. If you're unsure, pause and seek guidance.
Yes, with proper safety practices and careful handling. If unsure, pause and seek guidance.
What should I do first when my computer won't boot?
Check power connections and the PSU, listen for POST beeps or LED codes, and verify that the power switch is on. If there are no signs of life, test the power supply with a multimeter or known-good components.
Check power connections and POST signals first, then test the power supply if needed.
Do I need to replace components to fix my PC?
Not always. Many issues are solved by reseating memory, cleaning dust, or updating drivers. Diagnose first, then replace only the suspected faulty part.
Not always; diagnose first before replacing parts.
How long does a typical PC repair take?
A simple fix can take 30-60 minutes; more complex hardware repairs can run 2-4 hours depending on the issue and parts availability.
Most repairs take from half an hour to a few hours, depending on complexity.
Can I upgrade while repairing?
If you have compatible parts and a current backup, upgrading while the system is open is feasible. Verify compatibility and safety procedures before proceeding.
Yes, if you’re comfortable and prepared for potential issues.
How should I back up data before repairs?
Back up important files to an external drive or cloud storage, then verify you can access them. A restored backup prevents data loss if something goes wrong.
Back up your data before you start repair work.
Watch Video
Key Takeaways
- Diagnose before disassembly to target the right causes.
- Safety and data protection come first in every repair.
- Document everything to ensure smooth reassembly.
- Test thoroughly and know when to seek professional help.