Battery Repair Car: A Practical Home Guide
A practical, safety‑mocused guide to diagnosing, replacing, and maintaining car batteries for homeowners and renters. Learn when to DIY, how to test health, and how to dispose of old batteries responsibly, with clear steps and safety tips from Home Repair Guide.

This quick guide walks you through battery repair car basics: how to test charge, replace a worn battery, and perform simple safety checks. You'll learn when to DIY, how to avoid common mistakes, and how to prevent future failures, all while keeping your vehicle and yourself safe. This overview is designed for homeowners and renters.
Why Battery Health Matters
Battery health directly affects starting reliability, electrical system performance, and overall vehicle reliability. A weak or failing battery can put you at risk of a stalled engine or a damaged alternator if it drags down charging. According to Home Repair Guide, the most common battery issues in everyday cars are sulfation buildup on plates, loose or corroded terminals, and inadequate charging. Understanding these factors helps homeowners diagnose problems early, plan a safe replacement, and avoid unnecessary trips to the shop. In this section, we’ll explore how the battery functions, how age and usage influence life expectancy, and how to recognize warning signs like slow cranking, dim headlights, or warning lights on the dashboard. With the right approach, you can extend life, improve reliability, and keep your vehicle ready for daily driving.
Safety First: Tools and Precautions
Safety must come first when working on a car battery. Wear eye protection and insulated gloves to guard against acid splashes and sparks. Make sure the engine is off, the parking brake is set, and the area is well-ventilated. Gather essential tools before starting: a wrench or socket set, a multimeter or voltmeter, terminal cleaner, dielectric grease or terminal protector, a clean rag, and the correct replacement battery if needed. Keep metal jewelry off and avoid leaning tools across the terminals to prevent short circuits. When in doubt, step back and reassess; a calm, methodical approach minimizes risk while you work. This guidance reflects Home Repair Guide’s recommended safety workflow for DIY automotive tasks.
Diagnostic Steps: Is It the Battery or Other Components?
To determine if the issue is the battery, begin with a voltage check: a healthy, fully charged lead-acid battery should read around 12.6 volts at rest. If the reading is significantly lower, or if the engine turns over slowly, you’re seeing signs that require further testing. Inspect for corrosion on terminals, swollen or leaking cells, and any cracking in the battery case. Next, check the charging system by measuring the alternator output with the engine running; a healthy alternator typically produces between about 13.8 and 14.8 volts. Don’t forget to inspect cables and clamps; loose connections can mimic battery faults. If diagnostics point to alternator or wiring issues, plan professional intervention rather than a DIY battery swap.
Replacing a Car Battery: A Safe, Stepwise Overview
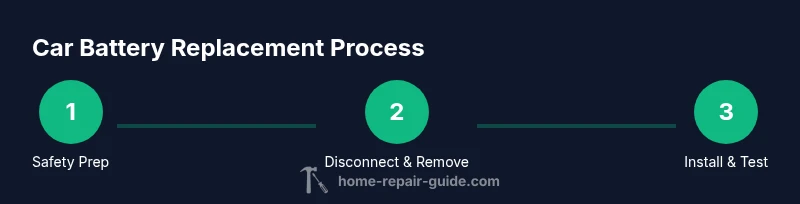
Replacing a car battery safely involves several structured steps: disconnect the negative terminal first, then the positive, remove the hold-down clamp, lift the old battery from the tray, clean the tray and terminals, install the new battery, reconnect positives and finally the negative, and test the system. It’s crucial to ensure you have the correct battery size and rating for your vehicle. Work calmly, keep track of all parts, and avoid touching both terminals at the same time with conductive tools. After replacement, reset any electronics and test cranking and lights to confirm the fix. This overview aligns with Home Repair Guide’s best practices for DIY battery work.
Battery Maintenance to Extend Life
Battery longevity improves with proper maintenance that minimizes sulfation and corrosion. Regularly check for corrosion at terminals and clean with a baking-soda solution if needed, then dry thoroughly. Apply a thin layer of dielectric grease to terminal posts to slow corrosion and improve connectivity. Keep the battery securely mounted to prevent vibrations, and avoid short trips that don’t allow the alternator to recharge the battery fully. If your vehicle sits idle for long periods, consider using a battery maintainer to sustain charge. By adopting a routine like this, you can maximize performance and extend service life, reducing total ownership costs.
Common Pitfalls and How to Avoid Them
Common mistakes include reversing polarity, which can cause immediate damage, or leaving tools on the battery and creating a short. Inadequate cleaning leads to poor terminal connection and recurring faults. Never try to jump-start a battery while the terminals are corroded or the vehicle is still connected to power sources. Another frequent issue is purchasing the wrong battery size; always verify the group size, cold-cranking amps (CCA), and reserve capacity for your specific vehicle. Finally, never dispose of a battery in regular trash; many regions require battery recycling. Following careful steps and using the correct parts prevents many DIY mistakes and keeps your vehicle safe.
When to Seek Professional Help
Some situations really benefit from a professional diagnosis. If you see persistent dim lights, recurring inability to start after charging, or you notice a swollen battery, seek professional service immediately. Electrical faults in the charging system or wiring can present risks that DIY repair cannot safely address. If you’re unsure about your vehicle’s battery group size, or if the battery is under warranty with specific replacement requirements, a professional technician can ensure proper fit and coverage. The Home Repair Guide team recommends erring on the side of caution when complex electrical systems are involved.
Quick Reference Checklist
- Park on a level surface, engage parking brake, and wear safety gear.
- Identify battery location and inspect for signs of damage or leakage.
- Disconnect negative terminal first, then positive; remove hold-down clamp.
- Lift battery straight up from the tray and set it aside in a safe area.
- Clean terminals and tray; apply terminal protector if available.
- Install new battery, reconnect positive then negative, and secure clamps.
- Start the engine and verify cranking, lights, and charging indicators.
- Dispose of the old battery at an authorized recycling facility.
Safety After Replacement and Disposal
After replacing the battery, double-check all connections for tightness and ensure no tools remain in the engine bay. Proper disposal of the old battery is essential due to hazardous materials; take it to an authorized recycling center or auto parts store that accepts spent batteries. Keep the old battery away from children and pets until it is properly recycled. Store the new battery away from extreme heat or direct sunlight and avoid exposing it to moisture. By following these safety steps, you protect yourself, your family, and the vehicle while ensuring compliant disposal of hazardous waste.
Tools & Materials
- Safety gear (gloves and eye protection)(Wear chemical-resistant gloves and safety glasses; batteries can leak sulfuric acid.)
- Wrench or socket set(Needed to loosen terminal clamps; have metric sizes handy.)
- Multimeter or voltmeter(To confirm resting voltage and charging status.)
- Battery cleaner or terminal brush(Used to remove corrosion buildup on terminals.)
- Dielectric grease or terminal protector(Optional but recommended to slow future corrosion.)
- Replacement battery (correct size and rating)(If tests indicate the current battery is worn out.)
- Rag or paper towels(Dry and wipe terminals and tray; prevent moisture contact.)
- Battery tray lubricant or anti-slip mat(Helps keep battery stable during driving.)
- Old battery recycling bag or container(Use for safe disposal or transport to recycling center.)
Steps
Estimated time: 60-90 minutes
- 1
Prepare workspace and safety gear
Park on a level surface, engage the parking brake, and disconnect all jewelry. Put on gloves and eye protection. Gather the tools you’ll need and ensure the area is well ventilated. This reduces the risk of acid exposure and accidental short circuits.
Tip: Keep a clean, dry area around the battery to prevent slips and misplacements. - 2
Identify battery location and inspect condition
Open the hood and locate the battery. Look for signs of damage such as cracks, bulges, or leaks, and check terminal posts for corrosion. If you see damage, do not proceed; plan professional service.
Tip: If corrosion is heavy, use a baking-soda solution with a plastic brush to neutralize and clean it away. - 3
Disconnect the negative terminal
Loosen and remove the negative (usually black) terminal first to prevent short circuits. Wiggle gently and lift straight up to avoid damaging cables. Cap or tape the terminal end to stop accidental contact with the battery.
Tip: Always break the connection on the negative side first to reduce risk of arcing. - 4
Disconnect the positive terminal
Loosen the positive (red) terminal and remove it. Inspect the clamps for wear; replace if necessary. Keep clamps away from metal surfaces during removal to prevent shorts.
Tip: Do not touch both terminals at once with metal tools. - 5
Remove the hold-down clamp and battery
Loosen the clamp securing the battery and carefully lift it free from the tray. Do not tilt; lift straight up to avoid damaging other components or spilling acid.
Tip: If the battery is heavy, use proper lifting technique or ask for help to avoid back injuries. - 6
Clean tray and terminals
Clean the tray and terminal posts with the rag and cleaner. Remove any corrosion from the terminals and apply dielectric grease if available. Ensure the contact points are dry before installing the new battery.
Tip: Dry everything thoroughly to prevent immediate corrosion after reconnection. - 7
Install the new battery
Place the new battery in the tray, secure it with the hold-down clamp, and reconnect the positive terminal first, then the negative. Tighten clamps snugly but do not over-tighten to avoid terminal damage.
Tip: Verify the battery is oriented correctly and that all cables are free of obstruction. - 8
Test system and set electronics
Start the engine and verify a normal crank with no hesitation. Check dashboard indicators and lights for proper operation. If available, perform a quick voltage check to confirm charging is within normal range.
Tip: If you notice warning lights, recheck connections and test again before driving. - 9
Dispose of old battery
Transport the old battery to a recycling facility or auto parts store that accepts spent batteries. Do not place it in regular trash due to hazardous materials. Handle with care and keep away from children.
Tip: Bring proof of drop-off if required by local regulations. - 10
Document maintenance and plan follow-up
Note the replacement date, battery type, and observed performance. Schedule a follow-up check if abnormal symptoms recur, such as frequent hard starts or slow cranking.
Tip: Set a reminder for 3–5 years to preempt failures, based on your climate and driving patterns.
FAQ
Can I replace my car battery myself?
Yes, with basic tools and safety, though some models require professional service. Follow a structured step-by-step guide to avoid common mistakes and ensure proper installation.
Yes, you can replace a car battery yourself if you follow a safe, structured process and use the right tools.
What tools do I need to replace a car battery?
You’ll need safety gear, a wrench or socket set, a multimeter, terminal cleaner, and the correct replacement battery. Optional items include dielectric grease and a rag for cleaning.
Essential tools include safety gear, a wrench, a multimeter, and the proper replacement battery.
How do I test a car battery’s health without a tester?
Visual inspection for corrosion, loose connections, and physical damage can indicate health issues. For reliable results, use a voltmeter or have the charging system tested at a shop or auto parts store.
Look for corrosion and loose connections; use a voltmeter for a more reliable check.
How long does a car battery typically last?
Durability varies with climate, driving patterns, and maintenance. If you notice frequent starting issues, replacement is worth considering rather than frequent jumps.
A battery’s life varies; watch for starting issues to decide if replacement is needed.
Is jump-starting a dead battery safe?
Jump-starting can be safe if cables are connected correctly and the vehicle is in park with the engine off. If you’re unsure, seek professional help to avoid risks.
Jump-start can be safe with proper procedure; if unsure, get help.
Can a battery be repaired rather than replaced?
Most consumer car batteries are not repairable; replacement is typically the recommended course when performance declines. Some cases may benefit from cleaning and terminal treatment, but the core issue often remains.
Most batteries aren’t repairable; replacement is usually best when performance drops.
Should I recycle old car batteries?
Yes. Car batteries contain hazardous materials and should be recycled at authorized facilities or retail partners that accept them for recycling.
Absolutely recycle old batteries at approved centers.
Watch Video
Key Takeaways
- Check battery health before replacing.
- Follow correct order when disconnecting and reconnecting.
- Use proper safety gear and handling to prevent harm.
- Clean and protect terminals to extend life.
- Recycle old batteries responsibly.