Apple Repair at Home: Step-by-Step DIY Guide for Devices
Learn safe, practical methods to diagnose and fix common Apple device issues at home with this step-by-step, non-destructive DIY guide from Home Repair Guide. Includes tools, safety tips, and a clear plan for beginners and seasoned DIYers.

Goal: safely perform basic Apple device repairs at home, such as battery checks, screen reseating, and port cleaning. This guide focuses on non-destructive maintenance and publicly available information. You’ll learn required tools, what to avoid, and a step-by-step approach that minimizes risk. If the device is under warranty or you’re unsure, consult a professional. This method emphasizes safety and proper static precautions.
Understanding Apple Repair: Scope and Safety
Apple devices can be resilient but require care. This guide clarifies what DIY repairs you can safely attempt at home and where caution is essential. The goal is to extend device life without compromising data or voiding warranties. According to Home Repair Guide, starting with non-destructive maintenance yields the best outcomes for most users. For beginners, software health checks, port cleaning, and battery health monitoring are good starting points. If you encounter a swollen battery, a cracked display, or water damage, stop immediately and seek professional help. The emphasis is on safety, static control, and using the right tools to minimize risk. With patience and careful planning, you can improve performance without turning a routine fix into a costly mistake.
Essential Tools for Apple Repair: Building a Safe Toolkit
A well-equipped workspace reduces risk and makes repairs more reliable. Gather a non-conductive mat, a small parts bin, and a dedicated toolkit designed for Apple devices. Key tools include a pentalobe screwdriver (0.8 mm), precision Phillips drivers, plastic spudgers, and non-marring opening picks. Add a microfiber cloth, isopropyl alcohol (99%), anti-static wrist strap, and a soft-bristled brush for ports. Keep spare screws organized and labeled, because misplaced fasteners are a common source of reassembly errors. A quality toolkit not only helps you perform tasks more efficiently but also protects fragile components from damage during handling. Home Repair Guide analysis shows that disciplined tool use correlates with higher success rates in DIY Apple repairs.
Diagnosing Common Problems Without Opening the Case
Many issues can be diagnosed through software health checks and non-invasive tests. Start with updating the operating system to the latest version and running built-in diagnostics. Check battery health and performance metrics, then clean charging ports using a dry brush or compressed air (short bursts). If you notice touchscreen lag, speaker distortions, or Wi-Fi problems, look for pattern consistency and recent app installations. Photograph symptoms for reference and search model-specific troubleshooting guides from reputable sources. The aim is to identify whether the problem is software-related or hardware-related before deciding to open the device. This cautious approach aligns with Home Repair Guide’s emphasis on gradual, safe steps.
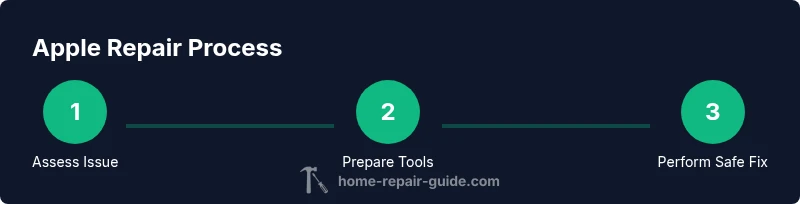
Step-by-Step Overview: Non-Invasive Fixes
This overview covers fixes that typically do not require opening the device. Start with software refreshes and port maintenance, then consider connector reseating if visuals indicate looseness. Cleaning and re-seating can resolve many charging and responsiveness issues. If you proceed to hardware tasks, keep a detailed map of connections and reference photos for reassembly. Always verify device health after each action to ensure you’re progressing toward a stable state. Use non-destructive methods first and reserve disassembly for situations where it’s clearly necessary.
When to Stop and Seek Professional Help
If you encounter soldered components, sealed enclosures, or unfamiliar connector layouts, stop. Do not apply brute force, and avoid exposing batteries to heat or puncture. Warranty status matters—opening a device can void coverage in some cases; review your terms before proceeding. If the device shows signs of water ingress, unusual heat, or persistent failure after software fixes, professional repair is the safest option. Document symptoms and steps taken so a technician can pick up where you left off, or provide a precise brochure of the issue to speed up service.
How Home Repair Guide Analyzes DIY Apple Repair (Authoritative, Practical Insights)
At Home Repair Guide, we encourage practical, safe repair practices that homeowners can perform without turning the task into a safety risk. Our 2026 analysis emphasizes the importance of using the correct tools, following manufacturer guidelines when possible, and recognizing when a task is beyond safe DIY scope. We highlight non-invasive strategies first, such as software updates and port cleaning, and remind readers to avoid battery puncture or forceful prying. This approach helps homeowners gain confidence while protecting devices and data.
Troubleshooting Checklist for Apple Repair Projects
- Confirm device model and warranty status before starting.
- Gather the correct Apple-specific tools and a clean, static-safe workspace.
- Start with software fixes (updates, resets) before disassembly.
- Photograph every step and keep screws organized by location.
- Test the device after each fix to confirm improvement.
- If you’re unsure, stop and consult a professional to avoid costly mistakes.
Common Mistakes and How to Avoid Them
Avoid relying on generic tools that may scratch or bend delicate components. Do not force connectors or prying tools into tight spaces. Work with a calm, step-by-step plan and never bypass safety guidelines. Always back up data and power down the device before beginning. Learn from credible, model-specific guides and verify parts compatibility before purchasing replacements. Following a methodical approach helps you learn and prevents avoidable damage.
Tools & Materials
- Pentalobe screwdriver (0.8 mm)(Essential for iPhone and some MacBook screws)
- Precision Phillips screwdriver(For internal screws and battery frames)
- Plastic spudgers(Non-conductive pry tools)
- Opening picks(Gently separate clips without damage)
- Microfiber cloth(Keep surfaces clean and avoid scratches)
- Isopropyl alcohol 99%(For cleaning connectors and ports)
- Anti-static wrist strap(Prevent static discharge)
- Small parts tray/label pins(Organize screws by location)
- Plastic card or guitar pick(For gentle detents or seals)
- Heat source (low setting)(Use with caution for adhesive tasks)
- Replacement components (model-matched)(Battery, display assembly, or connectors as needed)
Steps
Estimated time: 60-90 minutes
- 1
Prepare Your Workspace
Clear a wide, static-free surface. Lay out a labeled tray for screws and a soft mat for the device. Power down the device and disconnect any peripherals before you begin.
Tip: Double-check you have model-specific screws organized by location to avoid reassembly issues. - 2
Power Down and Disconnect
Turn off the device completely and unplug any charging cables or accessories. If the device has a removable battery, disconnect it. This reduces the risk of short circuits during handling.
Tip: Work in a room with good lighting to spot small parts easily. - 3
Document the Layout
Take photos or notes of connector orientations and cable routes. This helps with correct reassembly and reduces guesswork when reconnecting parts.
Tip: Label cables with painter’s tape for easy reference. - 4
Open the Enclosure Gently
If your model requires lid removal, use plastic tools to release clips rather than metal tools that can scratch or puncture. Avoid forcing any seam.
Tip: Follow model-specific disassembly guides to minimize risk. - 5
Check Connectors and Adhesives
Inspect connectors for corrosion or debris. Reseat any loose connectors with careful, even pressure. Do not twist or bend delicate flex cables.
Tip: Work slowly and test fitments before fully seating components. - 6
Perform the Planned Replacement
If you’re replacing a component, install the new part following the original orientation. Reconnect cables in the same order as documented.
Tip: Use new adhesive or seals if the model requires them after a battery or display swap. - 7
Reassemble and Inspect
Carefully reattach the enclosure, tighten screws to manufacturer torque limits, and visually confirm there are no loose parts.
Tip: Keep an even hand; avoid overtightening which can strip threads. - 8
Test and Calibrate
Power on and run basic tests: battery health, display response, and connectivity. If safe, run a full diagnostic test or a clean setup to confirm stability.
Tip: If the device doesn’t boot, retrace steps or seek professional help.
FAQ
Is it safe to repair an Apple device at home?
Yes, with caution, proper tools, and non-destructive methods. Always back up data and power down before starting. If you’re unsure, seek professional help to avoid damaging the device.
Yes. Make sure you have the right tools and back up data before starting; if you’re unsure, consult a professional.
Do DIY Apple repairs void my warranty?
DIY repairs can affect warranty status, especially if the device is serviced by non-authorized technicians. Review the terms for your model and consider official service if under warranty.
It can affect your warranty, so check terms and consider authorized service if you’re unsure.
What basic tools do I need for Apple repair?
A small toolkit with a pentalobe and Phillips screwdriver, plastic spudgers, opening picks, microfiber cloth, and anti-static wrist strap is typically sufficient for many non-invasive tasks.
A basic Apple repair toolkit with the right screwdrivers and plastic tools will cover most non-invasive tasks.
Can I repair a swollen battery at home?
Swollen batteries pose serious safety risks. Do not puncture or bend them. Power down, avoid heat, and seek professional service or official replacement parts immediately.
No—swollen batteries are dangerous. Power down and seek professional replacement.
How long does a typical DIY Apple repair take?
Time varies by model and complexity. Plan for 60-120 minutes for non-invasive fixes; longer for battery or display replacements and if you need to source parts.
Most DIY fixes take about an hour to two, depending on the task and parts involved.
Where can I find trustworthy replacement parts?
Look for model-compatible parts from reputable vendors. Verify compatibility and check return policies to avoid costly mistakes.
Buy parts from reputable vendors and verify compatibility before purchasing.
Watch Video
Key Takeaways
- Plan with a model-specific guide before starting.
- Use the correct tools and organized layouts.
- Differentiate between software fixes and hardware fixes first.
- Stop if you see signs of damage or voided warranty.
- Test after each step to confirm progress.