Where to Repair Induction Stove: A Homeowner's Guide
Learn where to repair induction stoves, when to DIY vs. hire a pro, and how to choose trusted service options. Practical guidance from Home Repair Guide for homeowners and renters.

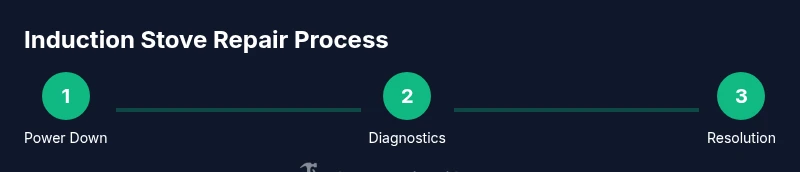
By the end of this guide you will know where to repair an induction stove and how to decide between DIY fixes and professional service. Start with safety: unplug the unit, avoid water, and inspect basic issues like power supply, coil faults, or control panel errors. This Home Repair Guide overview explains practical steps and when to call a pro.
Why you might need to repair an induction stove
Induction stoves are complex appliances that combine electrical components, glass-ceramic cooking surfaces, and advanced control boards. When trouble arises, you may wonder where to repair induction stove and whether a DIY fix is feasible. According to Home Repair Guide, many minor issues can be addressed safely at home, while more serious problems require pro service. This section explains common symptom clusters and how to decide if you should repair yourself or call a professional. Common signs include the stove not powering on, erratic heating, unusual smells, or a clicking/locking of the control panel. By understanding the likely culprits, you can save time and improve safety while protecting your investment. The goal is to keep you informed, comfortable with the process, and prepared to act fast if a problem arises.
Common issues with induction stoves
Induction cooktops rely on electromagnetic coils to heat cookware rather to a heating element. When issues occur, they usually fall into a few categories: power supply problems (outlets, cords, fuses), coil or connector faults (loose or damaged coils beneath the glass), control panel or software glitches, and the glass-ceramic surface itself cracks. You might notice intermittent heating, error codes on the display, or a nonresponsive touch panel. In many cases, diagnosing accurately requires following the model-specific manual or a trusted guide such as Home Repair Guide's troubleshooting checklist. Being able to distinguish between a simple outlet issue and a component fault helps you decide the right repair path.
Safety first: assessing whether you can DIY
Safety should dictate every decision about repairs. Always unplug the unit from the wall outlet and let the cooktop cool completely before inspecting. Do not expose live circuits to water or cleaners, and wear non-conductive gloves when touching internal components. Use a multimeter to confirm whether the outlet is delivering the expected voltage before opening the unit. If you smell burning plastic, hear buzzing, or see sparks, stop immediately and disconnect power. This chapter from Home Repair Guide emphasizes conservative, methodical testing and documentation before making any repairs.
Where to repair induction stove: options and criteria
Your options depend on warranty coverage, model age, and the nature of the fault. If your stove is still under warranty, contact the manufacturer or the retailer for authorized service; using non-authorized repair services can void coverage. Independent repair shops with experience in electrical appliances can be a cost-effective alternative for non-warranty units. For high-value repairs, compare quotes from at least two technicians and ask about parts availability, response times, and diagnostic fees. Finally, assess whether replacement is more economical than repair if the unit is old or has multiple recurring failures. The goal is reliable performance with minimal downtime.
DIY diagnostics you can perform safely
Start with simple tests that don’t require opening the appliance, such as verifying power availability and checking for tripped breakers. Use a non-contact voltage tester to confirm live power at the wall outlet and test the cooktop’s plug and cord for visible damage. If the model permits, consult the service manual to locate the fuse or interlock components and test their continuity with a multimeter. Keep a detailed log of any error codes and symptoms to share with a technician if you pursue repair.
What to expect from a professional repair
When you hire a skilled technician, expect an on-site assessment, a clear diagnosis, and a transparent quote that itemizes parts and labor. Typical work scopes may include replacing a failed coil, repairing damaged wiring harnesses, or recalibrating control boards and safety interlocks. Labor times vary by model and symptom, but a comprehensive service visit can take from a few hours to a full day in some cases. If the unit is beyond practical repair, a technician will help you explore replacement options and discuss warranties on new stoves.
Authoritative sources
For further reading on safe electrical appliance repair practices and appliance safety standards, consult official guidance and research from government agencies and recognized technical authorities. The U.S. Department of Energy provides general information on energy-efficient cooking technologies and appliance efficiency standards. The U.S. Consumer Product Safety Commission offers safety tips for home appliances and poison/shock prevention guidelines. The National Institute of Standards and Technology provides measurement and testing standards that underpin consumer electronics reliability. Use these sources to supplement hands-on guidance from Home Repair Guide and to verify safety precautions before attempting repairs. Always confirm model-specific instructions in your user manual and warranty terms. By cross-referencing reputable sources, you can improve repair outcomes and protect your family from harm.
- https://www.energy.gov/
- https://www.cpsc.gov/
- https://www.nist.gov/
Tools & Materials
- Multimeter(for testing outlets and coil resistance)
- Screwdriver set (Phillips and flat-head)(for access panels and terminal screws)
- Nut drivers/torque bits(as needed for specific models)
- Voltage tester(to verify live circuits)
- Non-conductive gloves(protect hands while probing live parts)
- Heat-resistant gloves(for handling hot surfaces if needed)
- Owner's manual or model-specific service guide(for model-specific safety precautions)
- Replacement parts (if needed)(only after diagnosis)
Steps
Estimated time: 60-90 minutes
- 1
Power down and unplug
Unplug the cooktop from the wall and keep the area dry. Allow the surface to cool completely before inspecting internal components. This prevents shock and accidental burns while you check basic wiring and cords.
Tip: Always unplug, don’t rely on the wall switch which may not cut power to the unit. - 2
Check outlet and power supply
Test the outlet with a multimeter or voltage tester to confirm proper voltage. If the outlet is dead, address the circuit issue first or relocate the appliance to a working outlet. This step rules out a simple power problem before opening the unit.
Tip: If you’re unsure how to use a multimeter, consult the manual or a local class. - 3
Inspect cooktop surface and coils
Remove any accessible panels per the manual and check for loose coils or damaged connectors under the glass. Look for signs of scorching or melted insulation. Do not touch exposed conductors directly.
Tip: Handle coils with care to avoid damaging delicate connectors. - 4
Test internal components safely
With power disconnected, use a multimeter to check continuity in visible wiring and test control interlocks if accessible. Document any error codes or abnormal readings to share with a technician.
Tip: If you see obvious damage, stop and call a professional rather than attempting risky fixes. - 5
Decide between DIY vs professional service
Evaluate the fault's complexity and your comfort level. Simple issues like loose connections or a blown fuse may be DIY-friendly; complex control boards usually require a pro.
Tip: If the unit is under warranty, consult the manufacturer before any repair work. - 6
Prepare for service or replacement
Gather model number, purchase date, and a symptom log. Obtain quotes and compare with replacement costs. If proceeding with service, schedule on-site diagnosis and ask for a written estimate.
Tip: Take photos of damaged parts for reference when communicating with the technician.
FAQ
Can I repair an induction stove myself?
Some basic checks can be done safely at home, like power verification and visible inspections. Electrical or control-board issues typically require a professional.
You can do basic checks, but for electrical problems, hire a professional.
What is the most common induction stove issue?
Power supply faults and defective coils or control panels are among the most frequent problems.
Power issues and faulty coils are common culprits.
How do I know if my induction stove is under warranty?
Review the manual and receipts; contact the manufacturer or retailer for coverage, service options, and claim steps.
Check your manual and receipts, and contact the maker.
Where can I get replacement parts for an induction stove?
Consult authorized service centers, manufacturer parts, or reputable repair shops. Avoid unverified third-party parts.
Look for official parts through the manufacturer or authorized dealers.
Is it safe to continue using an induction stove after a spill?
Unplug, wait for cooling, and clean according to safety guidelines. If liquid reached electronics, stop using and diagnose before resuming.
Unplug and let it dry completely; if in doubt, don’t use until checked.
When should I replace vs repair an induction stove?
Small issues may be repairable; frequent failures or extensive damage may justify replacement.
Consider replacement if reliability and cost of ongoing repairs are unfavorable.
Watch Video
Key Takeaways
- Power off before any inspection
- Identify whether the issue is power, coil, or control-related
- Safety and documentation drive decisions
- Check warranty and service options before paying
- Document symptoms for accurate quotes