V W Repair: A Step-by-Step Washing Machine Fix Guide
A practical, safe, step-by-step guide to diagnosing and repairing common v w repair issues in a washing machine. Learn safety, tools, and when to repair versus replace for homeowners and renters.

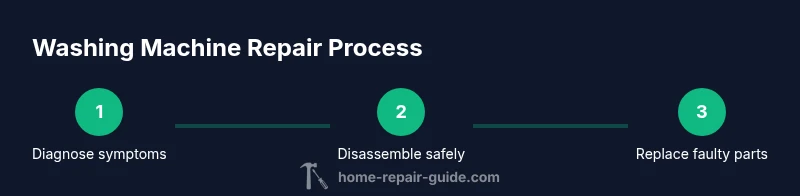
In this guide, you will learn how to diagnose, troubleshoot, and safely repair common issues with a v w repair setup. You’ll start with a quick diagnostic checklist, move through safe disassembly, identify typical fault points, and perform practical, kitchen‑table repairs. This step-by-step approach minimizes downtime, reduces unnecessary parts purchases, and helps you decide when to repair versus replace.
Understanding v w repair: scope, safety, and planning
v w repair refers to washing machine repair. According to Home Repair Guide, most residential washer problems fall into four categories: power and controls, drainage, agitation and spin, and drum issues. By recognizing these domains you can prioritize testing and avoid unnecessary part purchases. This guide emphasizes safety, labeling, and a clear reassembly strategy to apply to front-load, top-load, and compact machines alike. Whether you rent or own, the goal is to restore function with minimal downtime while protecting yourself from electrical and water hazards. Throughout this section we’ll lay out a practical workflow you can adapt to nearly any washer model and space.
Note: Always verify power is disconnected before touching any internal components and respect local plumbing codes to prevent leaks or flooding.
Diagnostic Checklist for Common Symptoms
Diagnosing washer problems quickly saves time and money. Use this practical checklist to categorize faults and focus your repair efforts.
- Symptom: The washer won’t start. Check the outlet, circuit breaker, and the lid/door interlock.
- Symptom: It fills slowly or not at all. Inspect water inlet hoses, screens, and the water valve for clogs or kinks.
- Symptom: It drains poorly or not at all. Look at the drain hose and pump for clogs; verify the pump is running when it should be.
- Symptom: It agitates or spins unevenly. Inspect the drive belt (older models) or the pulley and motor coupler for wear.
- Symptom: It leaks during operation. Check hose connections, door seal/gasket, and the tub fittings for cracks or loose clamps.
- Symptom: It makes loud noises. Investigate drum bearings, idler pulley, and pump impeller for wear.
For renters and homeowners alike, document symptoms with a quick video or photo log to track what’s changed after each test. This helps you decide whether a repair is affordable or if replacement is a better option.
Safe Disassembly and Inspection
Disassembly should be deliberate and safe to avoid further damage or injuries. Follow these steps to reach the core components without causing leaks or electrical shocks.
- Unplug the machine from the wall outlet and shut off the water supply before touching any hoses or panels.
- Move the appliance to a dry area, place a bucket or towel under any exposed joints, and have a container ready to capture residual water.
- Remove the access panel or back panel according to your model’s design. Keep screws organized in labeled containers.
- Take photos of wiring connections before disconnecting any harnesses; this makes reassembly easier and reduces confusion.
- Inspect hoses for cracks, bulges, or corrosion and check clamps for tightness. Tip: replace aging hoses to prevent future leaks.
Safety reminder: never run the unit with an open cabinet. If you encounter a live wire or burnt components, stop and seek professional help.
Common Faults and How to Replace Parts
Many washer faults involve a small handful of parts that commonly wear out. Replacing these parts typically restores function without needing a full overhaul.
- Lid switch or door interlock: Symptoms include the washer not starting or refusing to drain. Replacement is straightforward but requires proper alignment of the switch with the control assembly.
- Drain pump: Common signs are a clogged or non‑operating pump, or water remaining in the drum. Replace the pump assembly following the manufacturer’s orientation to avoid misrouting hoses.
- Water inlet valve: If you have slow filling or no fill at all, the inlet valve or its screens may be clogged. Replace the valve and clean screens to restore flow.
- Drive belt or coupling (older models): A worn belt or failing coupling can cause poor agitation or spinning. Replacing these parts requires proper tensioning and alignment.
- Hoses and seals: Leaks often originate from worn door seals, cracked hoses, or loose clamps. Inspect and replace as needed, ensuring proper hose length and restraint.
When replacing parts, verify compatibility with your washer model and follow the manufacturer’s installation guidelines. After replacement, run a short test cycle with no load to observe performance and detect leaks early.
Wiring and Electrical Safety Basics
Electrical work carries risk; approach with caution and respect. This section covers essential safety practices for dealing with control boards, wiring harnesses, and sensors.
- Always disconnect power before handling any electrical components. Use a non-contact voltage tester to verify circuits are dead.
- Wear insulated gloves if you must touch exposed metal parts or connectors near water. Use only dry tools and keep your workspace dry.
- Label all connectors before detaching them to ensure correct reattachment. Double‑check harness routing to avoid pinched wires.
- If you encounter burnt wires, melted insulation, or a burning smell, stop immediately. These are signs of a potentially dangerous fault and require a licensed professional.
These guidelines help you perform safe, controlled repairs while reducing the risk of shock or flooding. If you’re ever unsure, consult a professional.
When to Repair Yourself vs Replace
Every repair decision depends on machine age, fault severity, and overall cost. If replacement parts are readily available, and the repair cost remains reasonable, DIY repairs can be a smart option. However, some situations favor replacement over repair.
- Age and efficiency: Older washers consume more water and energy; replacing with a newer model may yield long-term savings.
- Cost drivers: If the repair requires multiple high-cost parts or a major mechanical overhaul, consider replacement.
- Reliability: If the machine has a history of recurring failures, a newer unit may provide better reliability and energy efficiency.
- Warranty status: If the appliance is under warranty, consult the manufacturer’s service options.
Home Repair Guide analysis shows that many homeowner repairs are worthwhile when approached methodically, but it’s prudent to weigh long-term costs and energy efficiency before deciding. The goal is to avoid repeated fixes and unexpected downtime while maintaining home safety and efficiency.
Maintenance and Quick Start Reference
Before using the washer after any repair, perform a quick maintenance check to prevent future issues and extend the appliance’s life.
- Inspect hoses and clamps monthly for signs of wear or leaks and replace as needed.
- Clean lint traps, filters, and pump screens to maintain consistent drainage.
- Run a short test cycle with a small load after repairs to verify performance and catch leaks early.
- Schedule periodic checks (e.g., every 6–12 months) to inspect belts, seals, and electrical connections.
These practices reduce the likelihood of common failures and help extend the life of your washer, especially in homes with hard water or fluctuating water pressure.
Tools & Materials
- Flat-head screwdriver(Small screws for access panels)
- Phillips-head screwdriver(Classic #2 size for most panels)
- Needle-nose pliers(For hose clamps and small connectors)
- Adjustable wrench(Or a set of metric/SAE wrenches)
- Bucket(Catch residual water during drain and disconnect steps)
- Towels or rags(For spills and drying components)
- Gloves and safety glasses(Personal protective equipment)
- Multimeter(For advanced electrical testing (only if comfortable))
- Replacement parts kit(Lid switch, drain pump, inlet valve, belts as needed)
Steps
Estimated time: 30-90 minutes
- 1
Power down and prep
Unplug the washer and shut off the water supply. Move the unit to a dry area and prepare a bucket to catch any remaining water. Clear the area of obstacles and gather your tools.
Tip: Label cords and hoses before disconnecting to simplify reassembly. - 2
Access the main components
Remove the back or front panel per model to access the pump, motor, and control board. Keep screws organized and photograph connections for reference.
Tip: Use a magnetic tray for tiny screws and connectors. - 3
Test and identify faults
Check the lid switch, door interlock, and visible hoses for wear or clogs. If safe, perform minimal electrical tests with a multimeter.
Tip: Document symptoms with notes or a short video before replacing parts. - 4
Replace the faulty part
Install the new lid switch, drain pump, or hose as needed. Ensure correct orientation and snug connections; avoid overtightening clamps.
Tip: Double-check that the new part matches the model and sits flush with its mount. - 5
Reassemble and seal
Reattach panels, secure screws, reconnect hoses and wiring as pictured earlier, and ensure gaskets and seals are seated properly.
Tip: Leave no loose components that could rattle or snag during a cycle. - 6
Test run and final checks
Plug in the unit and run a short test wash with a small load. Check for leaks, unusual noises, and proper drainage.
Tip: Monitor the first few minutes closely and be ready to power down if leaks appear.
FAQ
What does 'v w repair' mean?
V W repair is shorthand for washing machine repair, focusing on diagnosing and fixing common washer faults. The guidance covers safety, diagnosis, part replacement, and decision points about repair versus replacement.
V W repair refers to washing machine repair and covers diagnosing and fixing common washer problems safely.
Can I safely repair a washer at home?
Yes, many washer issues can be addressed at home if you unplug the unit, shut the water, and follow safety steps. Complex electrical faults or internal motor issues may require a licensed technician.
Yes, you can DIY many fixes if you stay safe, unplugged, and cautious; call a pro for complex electrical work.
When should I repair versus replace?
Consider the machine’s age, repair costs, energy efficiency, and reliability. If repairs are expensive or the unit is old and inefficient, replacement may be more economical in the long run.
Think about age, cost, and efficiency. If it’s old or costly to fix, replacement might be the smarter choice.
What parts are commonly replaced?
Lid switch, drain pump, water inlet valve, and drive belts are typical wear items. Replacements should match model compatibility and be installed per manufacturer guidelines.
Lid switch, drain pump, inlet valve, and belts are common replacements.
How long does a typical repair take?
Most household washer repairs take between 30 and 90 minutes, depending on model and fault complexity. More involved fixes may take longer.
Most repairs take about half an hour to an hour and a half, depending on the fault.
Do I need special tools?
Many fixes require common hand tools, but some models may need specialized equipment. Start with standard screwdrivers, pliers, and a multimeter only if you’re comfortable.
Usually, standard tools are enough, but some jobs need specialty gear. Only proceed if you’re comfortable.
Watch Video
Key Takeaways
- Identify fault categories before diving in
- Prioritize safety and proper disassembly
- Test parts before replacing to save costs
- Know when to call a professional
- Document steps for future maintenance