Bosch Washing Machine Repair: Step-by-Step Guide
A comprehensive, homeowner-friendly guide to diagnosing and repairing common Bosch washing machine faults safely and effectively. Learn practical steps, tool lists, and maintenance tips from Home Repair Guide.

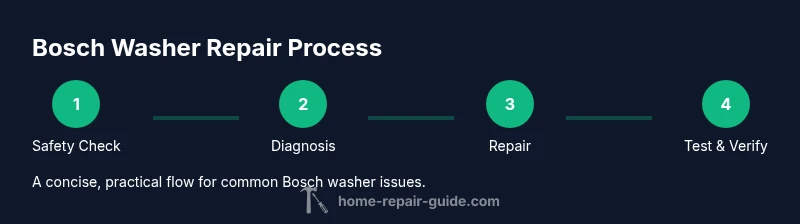
This guide helps you perform Bosch washing machine repairs safely and effectively. You’ll identify common faults, verify symptoms, and complete straightforward fixes that many homeowners can handle themselves. If you’re comfortable with basic electrical safety and appliance disassembly, you can tackle clogged drains, faulty inlet valves, and misbehaving door latches. For severe faults, consult a professional.
Why Bosch Washing Machine Repair Matters
Bosch washing machines are renowned for efficiency and longevity, but even premium appliances benefit from a methodical repair approach. According to Home Repair Guide, Bosch models are built for performance, yet a careful diagnostic mindset yields safer, more reliable repairs. The term bosch washing machine repair encompasses symptom verification, targeted part checks, and safe fixes that minimize downtime and service calls. This guide emphasizes practical, evidence-based steps you can perform at home before escalating to professional service. By understanding common failure modes and sustainable repair practices, you’ll protect your investment and extend the life of your washer.
Common Bosch Washer Problems and Root Causes
If your Bosch washer isn’t draining, won’t start, or vibrates excessively, you’re often facing a handful of recurring culprits. Common issues in bosch washing machine repair include a clogged drain pump, restricted filters, a faulty inlet valve, worn belts, or a dysfunctional door latch. Minor blockages or misalignments can create poor draining or intermittent operation, especially when hoses or screens gather lint. In many cases, reseating inlet hoses, clearing lint filters, or replacing a worn door latch resolves the symptom without a service call. However, signs like burning smells, visible damage, or active leaks require caution and possibly professional service. Home Repair Guide analysis shows that regular maintenance reduces the risk of minor faults like clogged filters and blocked inlet screens.
Safety First: Before You Begin
Safety comes first when performing any appliance repair. Unplug the machine and shut off the water supply to prevent accidental floods. Have towels and a shallow bucket ready to catch residual water. Wear gloves and use insulated tools for any electrical work. Work in a well-lit area with a clear path, and never reach into moving parts or attempt a repair if you’re unsure about the risk. If your model uses a high-voltage inverter or traps water behind a sealed panel, consider professional service rather than DIY.
Tools, Materials, and Preparation
Having the right tools at hand reduces both time and risk. You’ll want a basic tool kit (screwdrivers in both Phillips and flathead sizes, pliers, and a nut driver), a multimeter for electrical checks, a drain pan, towels, and a bucket for water. Keep model-specific replacement parts ready (valves, pumps, door latch) and have the user manual or an online schematic handy for reference. Plan your workspace so you can safely raise and access the washer without bending or reaching into tight spaces. Label fasteners as you remove them to ease reassembly.
Diagnosing the Problem: A Diagnostic Checklist
Begin with symptom mapping: note when the issue occurs, what error codes appear, and any unusual sounds. Confirm error codes by consulting the model’s display or manual, and reset codes after testing to see if they reappear. Check the water inlet screens for debris, verify the water supply is steady, and inspect the door latch for proper engagement. If the drum fails to spin, verify belt condition (where applicable) and motor coupling. Use a multimeter to test switches and sensors, listening for a steady motor hum or a clear absence of activity. Document all observations for future reference.
Common Parts to Inspect in a Bosch Washer
During bosch washing machine repair, inspect the drain pump and hose for blockages or cracks, the door lock mechanism for proper operation, the water inlet valve for leaks or failure, and the drive belt or motor coupling if the drum doesn’t rotate. Look for signs of lint buildup inside the pump housing and check hoses for cracks and kinks. Inspect seals around the door and tub for wear. Replacing worn gaskets or seals can prevent leaks and extend the machine’s life. Keep replacement parts on hand and confirm compatibility with your exact Bosch model.
When to Call a Pro and How to Handle Repairs Safely
Some issues warrant professional help. Persistent leaks, electrical faults, or error codes that reappear after basic checks indicate the need for a technician. A licensed pro can safely test high-voltage components and access parts that require specialized tools. If you decide to hire, gather your model number, purchase date, and a concise symptom summary to speed the service. For complex electrical faults or machine-level diagnostics, professional support is the safest choice.
Verifying Repairs and Testing Performance
After completing any repair, run a test cycle with a small load of towels to verify draining, spinning, and motor function. Monitor for leaks around the door seal and verify accurate water fill levels. If the machine stalls or shows new error codes, stop, recheck your work, and consult the manual. Document the test results and note any changes in performance over several cycles to confirm a successful repair.
Maintenance Tips to Extend Bosch Washer Life
Regular maintenance helps prevent major faults. Clean the lint filter and drain filter monthly, inspect hoses for wear, and run an empty hot wash monthly to reduce mineral buildup. Use the detergent recommended by Bosch and avoid overloading the drum. Schedule annual checks for seals, hoses, and the door latch to keep performance high and unexpected downtime low. A proactive maintenance routine is often cheaper than urgent repairs.
Tools & Materials
- Phillips screwdriver set (various sizes)(Magnetic tips help with small fasteners)
- Flathead screwdriver(Use as pry tool only where appropriate)
- Pliers (needle-nose)(Useful for clips and hoses)
- Nut driver set(For hose clamps and fasteners)
- Torx bit set(Some Bosch models use Torx screws)
- Multimeter(Test continuity and voltage on switches/sensors)
- Drain pan(Catch water during removal of hoses or pumps)
- Towels or rags(Keep the work area dry)
- Bucket(Optional for larger spills)
- Replacement parts (as needed)(Ensure compatibility with your exact Bosch model)
Steps
Estimated time: 60-90 minutes
- 1
Power down and secure the workspace
Unplug the washer from the wall outlet and turn off the water supply. Move the machine to a space with good ventilation and lay towels to catch any residual water. This initial safety step prevents shocks and flooding.
Tip: Take a quick photo of the back panel wiring before disconnecting anything to aid reassembly. - 2
Gather your tools and confirm model compatibility
Lay out your tools and confirm the replacement parts are compatible with your exact Bosch model. Cross-check part numbers with the user manual or Bosch support site to avoid ordering the wrong component.
Tip: Keep fasteners sorted by location to speed reassembly. - 3
Check water inlet and drain paths
Inspect the water inlet hoses and screens for debris; clear any blockage. Remove the drain pump access panel if needed and check for clogs in the pump, hoses, or filter. This step addresses many drainage and filling issues.
Tip: Do not force hoses free if they resist - assess clamps and clips first. - 4
Test electrical components safely
With the machine unplugged, use the multimeter to test door switch, inlet valve coils, and the motor connections for continuity. Look for obvious signs of wear like melted insulation or burnt smells.
Tip: Never bypass a safety switch to test; replace a faulty switch instead. - 5
Replace worn parts and reseal the area
Install any identified worn parts (door latch, seals, hoses) and reseal panels. Ensure gaskets sit evenly without pinching and that fasteners are tightened to manufacturer specs.
Tip: Apply a small amount of silicone lubricant to door gaskets to extend life. - 6
Reassemble, power up, and perform a test run
Reconnect all components, plug in the unit, and run a short cycle with a small load to confirm no leaks and proper draining/spinning. If issues persist, review the diagnostic steps or consult a professional.
Tip: Observe for 2-3 complete cycles to ensure stability and consistency.
FAQ
What are the most common Bosch washer problems?
Not draining, not spinning, and error codes are frequent Bosch washer problems. Blocked filters, failed inlet valves, and damaged door latches are common culprits. A systematic check of these components often resolves the issue without professional help.
Common Bosch washer problems include not draining, not spinning, and error codes. Check filters, inlet valves, and the door latch, then test the cycle.
Can I repair a Bosch washer myself?
Many basic fixes, like clearing clogs and reseating hoses, can be done by a careful homeowner. Always prioritize safety and consult the manual. For electrical or high-voltage issues, consider professional service.
Yes for simple fixes, but serious electrical issues are better handled by a professional.
How do I reset a Bosch washing machine?
Unplug the machine for about a minute, then plug it back in and start a cycle. If your model uses a specific reset sequence, refer to the manual and perform the model-appropriate steps.
Unplug for about a minute, replug, and start a cycle. If your model needs a specific reset, check the manual.
What tools do I need for Bosch washer repairs?
A basic tool kit, a multimeter, and replacement parts compatible with your Bosch model are essential. Having towels, a drain pan, and clamps helps manage water and connections safely.
You’ll need a basic toolkit, a multimeter, and model-compatible replacement parts.
When should I replace a faulty motor or inverter?
If the motor or inverter shows persistent faults after checks, or if the unit fails to run despite repairing ancillary components, replacement or professional diagnosis is recommended.
If faults persist after checks, consult a professional for motor or inverter replacement.
Is Bosch warranty coverage enough for repairs?
Warranty coverage varies by model and purchase date. Check your warranty terms; some repairs may be covered, while others may require out-of-pocket costs.
Warranties vary—check your model’s terms to understand coverage.
Watch Video
Key Takeaways
- Diagnose before disassembly to avoid unnecessary parts replacement.
- Safety first: unplug, turn off water, and wear protective gear.
- Keep parts organized and labeled during repair.
- Know when to call a professional for electrical or motor faults.