Whirlpool Washing Machine Repair: A Practical Step-by-Step Guide
Learn to diagnose and repair common Whirlpool washing machine problems with practical steps, safety checks, and maintenance guidance for homeowners and renters—without unnecessary risk.

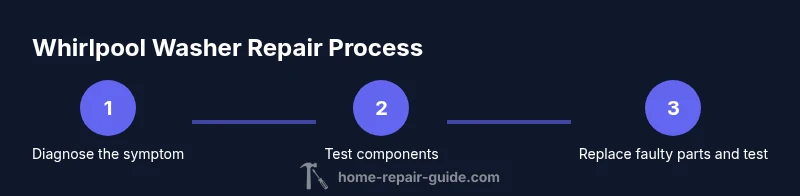
You will learn to diagnose and repair common Whirlpool washing machine issues yourself, using basic tools and safe practices. This guide covers frequent faults, how to test components, and when to replace parts. You’ll also gain safety checks, cost considerations, and where to source dependable replacement parts.
Foundations: how a Whirlpool washer operates
A Whirlpool washing machine integrates several working sub-systems that must cooperate for reliable performance: the drive motor or direct-drive system, the transmission or belt, the agitator or impeller, the water inlet valve, the drain pump, the door or lid switch, and the control board. When any of these subsystems misbehaves, symptoms such as failure to fill, unusual noises, poor draining, or an error code can appear. Understanding how these parts interact helps you narrow down the likely cause quickly. According to Home Repair Guide, most residential Whirlpool issues originate from a small set of common culprits, so a structured fault tree will save you time and frustration.
In practice, approach repairs by observing symptoms in sequence: what you hear, what you see, and when in the wash cycle the problem occurs. Keep in mind that electrical components can tolerate only limited cycles of testing; always work with power removed to reduce shock risk. The Home Repair Guide team emphasizes documenting each step—photos, notes, and part numbers—so you can reassemble confidently, even if you’re working on a borrowed or second-hand machine.
Safety and planning before you start
Before you begin any repair on a Whirlpool washer, take a moment to plan and protect yourself. Unplug the machine from the wall outlet, and if the unit is hard-wired or connected to a surge-protected circuit, switch off the corresponding circuit breaker. Shut off the hot and cold water supply, then place towels or a shallow tray to catch any residual water. Clear a clean workspace with good lighting, and remove items around the machine to prevent trips or spills. This planning minimizes the risk of electric shock, water damage, and tool mishaps, and it helps you stay organized as you work through the diagnostic process.
Tools and basic safety gear you’ll need
Having the right tools at hand keeps the repair efficient and safe. A basic toolkit for Whirlpool washer repairs includes a Phillips head screwdriver, a flathead screwdriver, a multimeter for continuity and resistance checks, needle-nose pliers, and a small nut driver set. You’ll also want a digital camera or smartphone to document connections, a soft cloth for wiping spills, and a bucket and towels for leaks. Wear safety glasses and insulated gloves when handling energized components, and work on a dry surface with the power disconnected. If you’re unsure about a specific model’s wiring, consult the service manual before testing.
Note: Replacement parts should be model-specific. Use manufacturer-approved parts wherever possible to ensure proper fit and safety.
Diagnosing common Whirlpool issues and how to test them
Most Whirlpool washer faults fall into a handful of categories: lid switch problems, drainage issues, faulty water inlet valves, worn drive belts or damaged couplings, and problematic control boards or timers. Start by confirming the symptom: is the tub filling slowly or not at all? Does the machine agitate irregularly or fail to drain? With power off, inspect the lid switch under the lid; a simple continuity test with a multimeter will reveal if the switch is failing. If the switch checks out, move on to the drain pump and hoses for clogs, listening for the impeller in operation when the machine should be draining. Next, verify the water inlet valve operation by listening for an audible click when power is supplied to the coil, and check hoses for kinks or debris. If you suspect a belt-driven model, inspect the belt for wear and the drive coupling for cracks. For any suspected control board issue, look for burn marks, loose connectors, or error codes in the display.
Safe, limited repairs you can perform to extend life
Many repairs on Whirlpool washers are manageable with calm, methodical steps. If the lid switch is faulty, replacing it typically requires removing the top panel and reconnecting a few wires. For a clogged drain pump, you can remove the pump and clean the impeller path, replacing clamps as needed. A stuck or leaky inlet valve may respond to a simple cleaning or a quick valve replacement. After replacing any component, reassemble carefully, then run a short test cycle with a small load to verify function. If wiring or the control board shows signs of damage, limit testing to safe checks and consider professional service to avoid further damage.
When to replace parts vs. replace the machine and how to budget
Deciding between repair and replacement depends on the machine’s age, repair complexity, and the projected cost of parts. Very cheap fixes (like replacing a switch or a hose) are low risk and worth attempting, while major components (drum, motor, control board) can approach or exceed mid-range replacement costs. Home Repair Guide's analysis suggests weighing three factors: the age of the washer, the frequency of breakdowns, and the likely lifetime after repair. In many cases, a trusted repair can extend life by several years, but if the model is older or multiple major parts fail, replacing the unit may be the more economical choice. Always obtain a clear price range for parts and labor before committing, and compare with the cost of a new machine in your budget window. The Home Repair Guide team recommends careful documentation, safety-first testing, and consulting a professional for complex symptoms or high-voltage concerns.
Tools & Materials
- Phillips head screwdriver (size #2)(Used for removing outer screws on access panels)
- Flathead screwdriver(Prying panels or prying connectors)
- Multimeter(For testing continuity and resistance on switches and coils)
- Needle-nose pliers(Grasping small connectors and clamps)
- Nut driver set(Screw and clamp fasteners)
- Towels and a shallow bucket(Catch spills and keep area clean)
- Camera or smartphone(Document connections for reassembly)
- Replacement parts (lid switch, drain pump, inlet valve)(Model-specific; obtain exact part numbers)
Steps
Estimated time: 60-120 minutes
- 1
Power down and unplug
Unplug the machine from the wall outlet. If possible, switch off the corresponding circuit breaker for extra safety. This step reduces the risk of electric shock when you reach inside.
Tip: Keep the cord away from damp areas and use a non-contact voltage tester to confirm no live power before touching exposed contacts. - 2
Shut off the water supply
Close both hot and cold water valves and place towels nearby to catch dripping water. This protects floors and helps you work without unexpected splashes. If the machine is in a tight space, have a helper steady the hoses as you begin.
Tip: Have a bucket ready for any residual water inside hoses or the drum. - 3
Remove access panels and secure the unit
Use the appropriate screwdriver to remove the rear or side access panel, exposing internal components. Gently move the machine or tilt it to access hoses and wiring without pinching them. Keep track of screws and label connectors as you go.
Tip: Take a few photos from multiple angles to aid reassembly. - 4
Test the lid switch with a multimeter
Disconnect the harness from the lid switch and set the multimeter to continuity. Press the switch and verify a brief continuity reading; lack of continuity indicates a faulty switch. Replace if needed and re-test.
Tip: If you’re unsure about the wiring, consult the service manual for the exact switch layout. - 5
Check drain pump and hoses for clogs
Inspect the drain pump for debris and disconnect hoses to check for blockages. Remove any buildup from the impeller path and ensure clamps are secure. Reattach hoses and test for proper drainage.
Tip: Backflush hoses with clean water to clear stubborn clogs. - 6
Test the water inlet valve
With power off, access the inlet valve coil and use the multimeter to check resistance. Listen for a click when power is applied and ensure there are no leaks around the valve.
Tip: Damaged or leaking valves should be replaced to prevent overflows. - 7
Inspect drive belt or motor coupling (model dependent)
If you have a belt-driven model, inspect the belt for wear, cracks, or fraying. For direct-drive machines, check the motor coupling for cracks. Replace as needed and ensure the drum can rotate freely.
Tip: Support the drum while loosening belt clips to prevent it from dropping suddenly. - 8
Reassemble and test
Reconnect all connectors, reattach panels, and secure screws. Restore power and run a short wash cycle with a small load to confirm the repair.
Tip: If the issue persists, retrace steps or seek professional assistance to avoid further damage.
FAQ
What is the most common Whirlpool washer problem?
Lid switch failures, drain pump clogs, and control board faults are among the most frequent Whirlpool washer issues.
Common problems include lid switches, drain pump clogs, and faulty control boards.
Can I repair a Whirlpool washer myself?
Yes, many basic issues can be repaired with common tools and careful safety practices. More complex problems may require professional service.
Yes, you can handle many basics, but some problems need a pro.
How do I know if the problem is electrical?
Sudden shutdowns, tripped breakers, or burning smells indicate electrical problems. Use a multimeter to test switches, fuses, and coils when safe to do so.
Look for shocks, burns, or tripped breakers and test with a meter.
Is it worth repairing a Whirlpool washer that’s old?
Consider the machine’s age, repair costs, and the expected remaining lifespan after repair. If several major components would need replacement, replacement may be more economical.
If the machine is old and needs many parts, replacement can be wiser.
Where can I find replacement parts for Whirlpool washers?
Source parts from reputable suppliers or the manufacturer, ensuring you have the exact model number and part cross-compatibility.
Check official parts sources or trusted retailers with your model number.
What safety precautions should I follow when repairing?
Always unplug, shut off water valves, wear safety gear, and work on a dry surface. If in doubt, stop and consult a professional.
Unplug, turn off water, wear gear, and work dry; don’t rush.
Watch Video
Key Takeaways
- Diagnose before disassembly to save time.
- Safety first: unplug and de-energize before work.
- Test components in stages to pinpoint the fault.
- Know when to repair versus replace based on age and cost.