Repair for KitchenAid Dishwasher: A Step-by-Step Guide
Learn to diagnose and repair common KitchenAid dishwasher problems with a practical, safe, at-home approach. This Home Repair Guide tutorial covers leaks, drainage, filtration, door latches, and cycle issues, with a clear plan for safe DIY fixes.

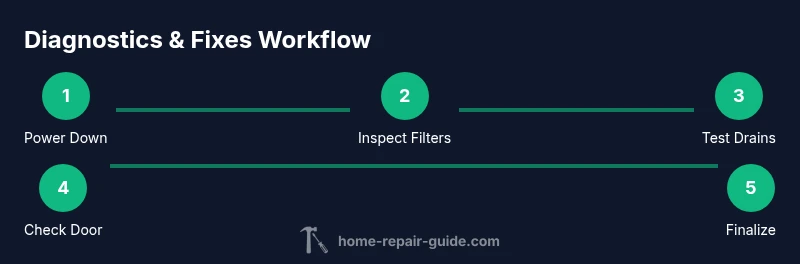
This guide shows you how to perform a safe, at-home repair for KitchenAid dishwashers by diagnosing drainage, clogged filters, door latch misalignment, and spray-arm problems. You’ll learn essential safety steps, tool prep, and a clear sequence of fixes to restore cleaning performance and prevent repeat failures. Each step includes quick safety reminders and key tests to perform after repairs.
Why Brand Reliability Matters for KitchenAid Dishwashers
When you tackle a repair for KitchenAid dishwasher, you’re dealing with a precision appliance designed for quiet operation and consistent cleaning results. The Home Repair Guide team recommends starting with model-specific guidance rather than generic fixes, because different KitchenAid models use distinct spray-arm geometries and interlock systems. According to Home Repair Guide, following manufacturer-recommended procedures reduces risk to wiring, seals, and electronics and increases the odds of a durable fix. A careful diagnosis based on a few repeatable failure modes—drainage, filtration, door interlock, and spray arm blockage—lets you determine whether a DIY repair is appropriate or if a pro should intervene. Throughout this guide, you’ll see practical checkpoints, safety reminders, and common-sense tests you can perform in a standard kitchen.
Common Failure Points in KitchenAid Dishwashers
KitchenAid dishwashers share several frequent trouble spots. Clogs in filters or the sump can impede drainage and reduce cleaning efficiency. A kinked or blocked drain hose often causes standing water at the bottom after a cycle. Worn or misaligned door gaskets and interlock switches can prevent the door from sealing properly, triggering error codes or incomplete cycles. Sprayer arms clogged with mineral buildup hamper spray patterns. Leaks around the tub seal, loose clamps, or cracked hoses are also common sources of water on the floor. Understanding these failure points helps you diagnose with confidence and prevents unnecessary part replacements.
Safety First: Preparing for a DIY Repair
Before you touch any electrical components, unplug the unit and switch off the circuit breaker. If your dishwasher is hard-wired, shut off the dedicated breaker to avoid electric shock. Wear gloves and safety glasses, and keep a towel or shallow tray handy to catch any residual water. Read the model-specific manual for disassembly instructions and torque specs. Work in a well-lit area, and avoid working on hot components to prevent burns. If you’re unsure about any step, pause and consult the manufacturer’s guidance or a professional.
Diagnostic Checklist: Leaks, Drainage, and Filtration
Begin with a visual audit: inspect door seals for cracks, the tub gasket for wear, and the entry hoses for bulges or leaks. Remove the lower spray arm and check for mineral buildup on the filter and sump—clean or replace as needed. Run a short diagnostic cycle to observe drainage; listen for the pump and note how long until water stops draining. A quick test with a dry floor after a cycle helps identify slow leaks. If you see water in the bottom of the tub, focus on the drain path and valve assembly. Document any error codes or flashing lights to guide further troubleshooting.
Cleaning and Replacing Filters and Spray Arms
Filters and spray arms are your dishwasher’s first line of defense for clean dishes. Remove the bottom filter and screen, rinse under warm running water, and scrub away any debris. Inspect the spray arms for clogged holes; use a pin or thin bristle to clear obstructions. After cleaning, reinstall components securely to restore proper water flow. Mineral deposits from hard water can trap tiny particles; consider a descaling routine once every few months if you have hard water. Keep replacement parts on hand if you notice wear, cracks, or reduced spray velocity.
Replacing Door Latch or Control Components
Door latches and electronic interlocks control whether the dishwasher runs when the door is shut. If the door doesn’t latch fully or the control panel shows inconsistent codes, test the interlock with a multimeter or refer to the service manual for resistance ranges. Replace a faulty latch or control board only after confirming with the manufacturer’s troubleshooting table. Reassembly should involve careful alignment of the door and seals to avoid future leaks. Always power down and discharge capacitors as directed by the manual before handling electronics.
When to Call a Pro and Maintenance Tips
If you encounter persistent leaks, continuous standing water after cycles, or recurring error codes that do not resolve with basic cleaning and tightening, it’s time to contact a professional. A licensed technician can diagnose electrical faults or cooling issues that DIY steps cannot safely address. Even if you repair at home, implement a regular maintenance routine: clean the filter monthly, descale every 3–6 months depending on water hardness, and replace worn gaskets preemptively. A proactive approach reduces the likelihood of costly, repeated repairs.
Tools & Materials
- Phillips head screwdriver (size #2)(Used for filter housing and access panels)
- Flathead screwdriver(Helpful for prying clips or flat hose clamps)
- Nut driver set (various sizes)(Loosens hose clamps and mounting screws)
- Torx driver set (T20/T25)(Some models use Torx fasteners)
- Multimeter(For testing door interlock and control components)
- Replacement filters and seals(Stock up on common sizes for your model)
- Replacement spray arms(Have on hand if no spray pattern after cleaning)
- Towels, absorbent mat, and small bucket(Contain spills and catch drips)
- Gloves and safety glasses(Protect hands and eyes during disassembly)
- Flashlight or headlamp(Improve visibility in tight corners)
Steps
Estimated time: 60-90 minutes
- 1
Power down and prep
Unplug the dishwasher at the wall, then switch off the dedicated circuit breaker if needed. Shut off the water supply to prevent leaks during access. Clear the area, pull out the lower rack, and lay towels to catch any drips. This protects you and preserves components for inspection.
Tip: Label wires or fasteners with painter's tape to ease reassembly. - 2
Access interior and locate components
Remove the lower spray arm and filter assembly to expose the sump and interior walls. Take a quick photo before removing parts to guide reassembly. Inspect gaskets and seals around the door opening for wear.
Tip: Work slowly to avoid dropping screws into hidden cavities. - 3
Inspect and clean the filter and sump
Rinse the main filter and sump screen under warm water with a soft brush. Look for trapped debris, mineral buildup, or fabric fibers. A clean filter improves drainage and spray coverage.
Tip: For stubborn mineral deposits, soak filters in a vinegar solution for 10–15 minutes before scrubbing. - 4
Check the drain hose and air gap
Trace the drain hose from the sink connection to the dishwasher sump. Look for kinks, cracks, or clogs. If you can access an air gap, ensure it’s clear of debris. Clear any blockage with a flexible brush or pipe cleaner.
Tip: Never use a metal object that could scratch the hose; use a plastic brush instead. - 5
Inspect spray arms for blockages
Rotate the spray arms and check the holes for mineral buildup. Use a pin or thin wire to clear clogged orifices. Reinstall spray arms securely to maintain proper spray patterns.
Tip: Run water through the arms while reassembling to confirm free-flow. - 6
Test the door latch/interlock
With panels reassembled, test the door latch by closing the door firmly and attempting to start a cycle. If the control panel shows errors, test the interlock with a multimeter per the service manual.
Tip: If you suspect a faulty interlock, avoid running a full cycle until confirmed to prevent damage. - 7
Run a test cycle and verify
Reassemble all parts, restore water and power, and run a short diagnostic cycle. Check for leaks, listen for abnormal noises, and inspect for improved drainage. If leaks persist, revisit seals and hose connections.
Tip: Document cycle results to compare against future repairs.
FAQ
What are the most common problems with KitchenAid dishwashers?
Common issues include poor drainage, clogged filters, worn door gaskets, faulty interlocks, and blocked spray arms. Start by inspecting the filter, drain hose, and door seal before moving to more complex components.
Typical KitchenAid dishwasher problems are drainage, filter clogs, and door seal wear. Start with the filter and drain hose before checking the door latch.
Can I fix a leak without hiring a pro?
Many leaks originate from door gaskets, hose clamps, or the sump area and can be fixed by tightening clamps or replacing gaskets. If you detect a recurring leak near the pump or door interlock, consider professional service.
Yes, many leaks come from door gaskets or hoses and can be fixed at home, but persistent leaks may require an expert.
Is it safe to repair while the unit is plugged in?
No. Always unplug the unit and switch off the circuit, and if possible, shut off the water supply before starting any repair work to avoid electric shock or water damage.
Never work on the dishwasher while it’s plugged in. Unplug it and shut off the water first.
How much do KitchenAid dishwasher parts cost?
Part costs vary by model and part type. Typical repairs focus on filters, gaskets, and spray arms, with prices depending on whether you use OEM parts or compatible alternatives.
Part costs depend on model and part type; common fixes involve filters, gaskets, and spray arms.
How long does a typical repair take?
A straightforward diagnostic and replacement of a worn component can take about 1–2 hours, longer if you’re learning the model or replacing multiple parts.
Most repairs take about one to two hours, depending on parts and model familiarity.
When should I replace the dishwasher instead of repairing?
If the unit shows repeated failures after multiple repairs, is outside warranty with costly parts, or has major electrical or structural issues, replacement may be more cost-effective.
If failures persist after several fixes or the costs near replacement value, consider replacing the unit.
Watch Video
Key Takeaways
- Identify root cause before replacing parts.
- Prioritize safety and model-specific guidance.
- Clean filters and spray arms to restore performance.
- Test cycles to verify successful repairs.
- Know when to seek professional help.