GE Stove Repair: A Practical Home Guide
Learn safe, step-by-step GE stove repair techniques to diagnose ignition, burner, and temperature issues. Practical tips, safety checks, and when to call a pro for reliable kitchen performance.

Learn how to safely diagnose and fix common GE stove issues, from non-ignition burners to uneven heating. This guide walks homeowners through quick inspections, routine maintenance, and when to call a professional. You’ll need basic tools, model-specific guidance, and clear safety steps to avoid electric and gas hazards while restoring reliable cooking performance.
Why GE stove repair matters
For many households, a GE stove is a central kitchen workhorse. Proper repair not only restores cooking performance but also preserves safety and energy efficiency. According to Home Repair Guide, routine diagnostics of ignition systems, burner alignment, and electrical connections can prevent costly failures and extend the appliance’s life. The Home Repair Guide team found that most stove-related calls fall into three categories: ignition problems, uneven heating, and control panel faults. By understanding these categories, homeowners can quickly triage issues and decide whether to attempt a repair or hire a pro. This article focuses on common GE stove failures, with practical steps, safety reminders, and model-agnostic guidance you can apply across most GE gas and electric ranges.
Common GE stove problems and quick checks
GE stoves present several recurring failures. Ignition problems include burners that click but don’t ignite, or a continuous low flame. Temperature irregularities show up as hot spots, scorching, or preheating delays. Oven not heating or inconsistent bake is another frequent complaint. Quick checks can separate fuel delivery issues from sensor or wiring faults: confirm the power is off when inspecting, inspect the burner ports for clogging, and listen for a clean ignition click. If your model uses spark ignition, ensure the electrode is clean and properly positioned. For electric coils, test the coil resistance with a multimeter. If you notice gas smell or hissing, stop immediately and ventilate. The Home Repair Guide analysis shows simple blockages and loose connections account for many faults, making a careful inspection worth your time.
Safety first: turning off power and gas, and when to stop
Before you touch any GE stove internals, shut off power at the circuit breaker or unplug the unit. For gas stoves, also close the gas supply valve and allow any residual gas to dissipate. Use a portable gas detector if you have concerns about leaks. Do not attempt repairs if you smell gas, hear a persistent hissing, or see damaged gas lines. If you’re unsure, contact a licensed technician. Following these safety steps dramatically reduces the risk of fire, electrical shock, or gas exposure during GE stove repair. Maintain a dry work area and keep children and pets away from the kitchen while you work.
Tools and parts you may need
- Non-contact voltage tester (required) to confirm power is off at each component.
- Multimeter (required) for continuity and resistance checks on igniters and switches.
- Screwdriver set (required) with Phillips and flat-head bits compatible with your GE model.
- Nut drivers or socket wrenches (required) for burner and panel screws.
- Pliers and a small adjustable wrench (required) for gas supply fittings.
- Replacement GE igniter (required) or burner assembly matched to your model.
- Wire brush or sandpaper (required) for cleaning corroded electrodes.
- Thermal paste or anti-seize compound (optional) for some connections.
- Safety gear: gloves and safety glasses (required).
- Shop rag and small container for screws (required)
Notes: Always verify model compatibility before purchasing replacement igniters or modules. Check the model number inside the oven or on the back label.
Diagnosing ignition problems
Ignition issues are common and often straightforward to diagnose. Start by listening for a crisp clicking sound when you turn the knob; if there is no click, the igniter or electronic control may be faulty. If you hear a click but no flame, inspect the igniter electrode for dirt, residue, or misalignment; clean gently with a soft brush and verify the gap is correct per your model’s manual. For gas stoves, ensure the burner cap is properly seated; a misaligned cap blocks gas flow and prevents ignition. If the igniter glows but the burner doesn’t light, test the igniter continuity with a multimeter. Replace the igniter if resistance readings are out of spec. Always ventilate and disconnect power during testing.
Fixing burner issues and temperature problems
Uneven heating and weak flames can stem from clogged ports or bent burner heads. Remove the grate and cap, then clear clogged holes with a thin wire; avoid using sharp metal tools that can deform the burner. For electric coils, ensure they sit flat and have good contact with the terminal block. If a bake or broil setting dials don’t respond, the oven sensor or control board may need replacement. After replacements, reassemble and perform a bake test at a known temperature, checking for even heat distribution across racks. If the flame remains irregular, inspect the manifold gas tube for kinks or leaks. Do not attempt to bend metal fittings excessively; this can create leaks.
Electric stove vs gas stove: model considerations
GE electric stoves use coil or smooth-top elements and may rely on an electronic control board. Gas stoves rely on a gas valve and an ignition system. The repair approach differs: electric coils mainly require checking resistance and terminal connections, while gas stoves may require valve and regulator inspection and gas line safety checks. Some GE models combine computerized controls with dual fuels; in these cases, always consult the manual for model-specific wire colors, screw terminals, and safety precautions. When in doubt, consult model-specific diagrams, which significantly reduce miswiring or misadjustment.
When to replace parts vs replace the stove
Before committing to major repairs, compare part costs and expected lifespan to a model replacement. If an ignition module, burner, or control board is expensive relative to a new stove, or if you repeatedly encounter the same faults after multiple repairs, replacement is often the wiser choice. Also consider energy efficiency improvements; newer GE stoves may deliver better performance with lower running costs. Keep receipts and note model numbers for warranty coverage. For rental properties, weigh downtime and guest disruption against maintenance costs.
Maintenance to prevent future failures
Regular cleaning of burners, ports, and igniters reduces the probability of clogs and misfires. Create a simple maintenance schedule: weekly quick cleans, monthly thorough checks, and annual professional inspections for gas lines and regulators. Use a protective cover on smooth-top stoves to avoid scratches and ensure even heat across surfaces. Store tools in a designated area to avoid accidental contact with sensitive electronic components. By incorporating routine checks, you can extend the life of your GE stove and keep cooking operations smooth throughout the year.
Verifying repair success and safe testing
After completing GE stove repairs, reassemble all covers and safely restore power and gas supply. Perform a step-by-step test: light the burner, check flame stability, test different oven modes, and run a 25- to 30-minute bake at target temperature to assess heat consistency. Monitor for unusual noises, smells, or flames. If anything seems off, shut down power and gas immediately and recheck connections or call a professional. Document any parts replaced and maintenance tasks performed for future reference and warranty protection. A successful repair should restore consistent flame, reliable ignition, and stable oven temperature.
Tools & Materials
- Non-contact voltage tester(Confirm power is off at each component before touching wires.)
- Multimeter(Check igniter resistance and circuit continuity.)
- Screwdriver set (Phillips and flat-head)(Access panels and burner screws.)
- Nut drivers or socket wrenches(Remove burner brackets and panel nuts.)
- Pliers and small adjustable wrench(Gas fittings and clamps.)
- Replacement GE igniter or burner assembly(Model-compatible part must match GE stove model.)
- Wire brush or sandpaper(Clean electrode and connectors gently.)
- Thermal paste/anti-seize (optional)(For certain terminal connections.)
- Safety gear (gloves, safety glasses)(Protect hands and eyes during repair.)
- Shop rag and small parts tray(Organize removed screws and parts.)
- Model-specific repair manual (optional)(Guidance for wiring colors and terminals.)
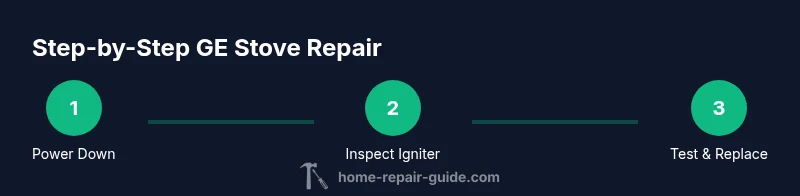
Steps
Estimated time: 60-120 minutes
- 1
Power down and isolate
Shut off power at the circuit breaker or unplug. If you have a gas stove, close the gas valve and allow any residual gas to clear. This step prevents electric shock and gas exposure during inspection.
Tip: Double-check that the control panel is unresponsive before touching any components. - 2
Access ignition components
Remove the grate and burner cap to expose the igniter and electrodes. For wall ovens or integrated units, consult the manual for panel removal steps. Keep track of screws in a labeled tray.
Tip: Take a quick photo before disassembly to guide reassembly. - 3
Test and clean the igniter
Inspect the igniter for dirt and alignment. Clean gently with a soft brush; ensure the gap to the burner is within specification. Use a multimeter to test continuity if you suspect a fault.
Tip: Avoid applying excessive pressure on the ceramic igniter. - 4
Check gas supply safety valve
For gas models, confirm the gas shutoff valve is fully open and there are no kinks in the supply line. If you detect gas odor, stop and ventilate, then call a pro.
Tip: Never test for leaks with a flame; use a soapy water solution. - 5
Replace faulty parts
Install the replacement igniter or burner assembly that matches your GE model. Recheck connections and ensure terminals are secure and dry.
Tip: Only use parts designed for your exact GE stove model. - 6
Reassemble and test
Reassemble panels, restore power and gas, and perform ignition and bake tests. Observe flame quality and oven temperature stability across cycles.
Tip: Start with a short test bake to confirm basic operation. - 7
Decide on professional help if needed
If ignition remains intermittent or gas leaks are suspected, stop DIY repairs and contact a licensed technician. Some failures require specialized tools and safety oversight.
Tip: Document symptoms and steps taken for the technician.
FAQ
What GE stove models are covered by these repairs?
The guidance covers common GE gas and electric stoves. Always refer to your model’s manual for wiring diagrams and part compatibility.
This guidance applies to GE gas and electric stoves; check your model’s manual for exact wiring and parts.
How do I know if the igniter is bad?
Signs include a missing ignition click, a dim glowing igniter, or no flame when gas is supplied. Use a multimeter to check continuity if you have basic electrical tools.
If you don’t hear a click or the igniter glows faintly yet won’t ignite, the igniter may be bad.
Can I repair a GE stove myself or should I hire a pro?
Simple ignition or cleaning tasks can be done by confident homeowners with proper safety. Complex gas line issues or control-board failures are best handled by a licensed technician.
For complex gas line or control-board problems, it’s safer to call a licensed technician.
Is it safe to test gas connections by myself?
Gas tests should be done cautiously. Use soap solution to check for leaks and never use an open flame to test leaks. If you smell gas, evacuate and call authorities.
Testing gas lines is risky—use soap solution to check for leaks and call a pro if you suspect a leak.
How long does a GE stove repair usually take?
A straightforward ignition or burner repair can take about 60-120 minutes, depending on access to components and model complexity. More involved fixes may require longer.
Most fixes run 1 to 2 hours, but it can take longer for complicated models.
Are GE stove parts expensive?
Part costs vary by model and component. Replacement igniters or control boards are common purchases; compare repair costs to the price of a new stove.
Parts costs depend on the exact component and model; weigh repair vs replacement costs.
Watch Video
Key Takeaways
- Identify ignition, temperature, or control faults early.
- Prioritize safety: power off, gas closed, dry workspace.
- Use model-matched parts and follow the manual.
- Differentiate gas vs electric repair approaches for accuracy.
- Document repairs for future maintenance and warranty