Frigidaire Stove Repair: A Step-by-Step Home Guide
Learn how to diagnose and repair common Frigidaire stove issues with safe, actionable steps for electric and gas models. This comprehensive guide covers tools, testing, replacement parts, and when to call a pro.

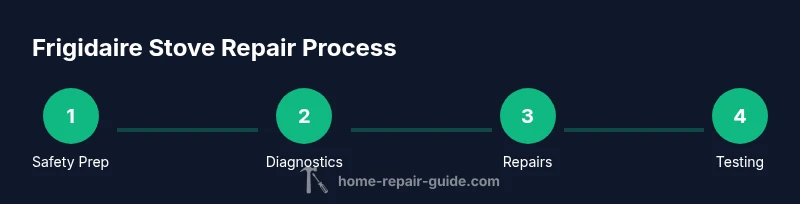
By following this guide, you will diagnose and repair common Frigidaire stove issues, safely restoring reliable operation. The steps cover electric coil burners, bake and broil elements, gas valve concerns (where applicable), and control panel troubleshooting. You’ll learn essential safety checks, required tools, and how to decide when professional service is needed to avoid gas leaks or electrical hazards.
Understanding Frigidaire Stove Systems
According to Home Repair Guide, Frigidaire stoves come in electric and gas configurations, and the way heat is produced drives most repairs. Electric models may use coil elements or smooth-top radiant surfaces, while gas models rely on an electronic igniter or a standing pilot in older units. All versions share core components: a user interface, heating elements or burners, safety switches, and wiring harnesses. Recognizing which subsystem you're dealing with helps you target the right tests and safely isolate the issue. Knowing the fundamental architecture makes diagnostics faster and safer. In practice, most failures fall into a few patterns: a burner that won’t ignite, a heating element that won’t heat, uneven temperatures, or control-panel errors. This foundation helps you plan repairs with confidence, reducing the guesswork and increasing the chances of a first-time fix. The Home Repair Guide team believes readers can perform many routine fixes with a clear plan and proper safety.
Common Problems and Likely Causes
Frigidaire stove problems tend to cluster around three areas: ignition or power delivery, heating elements or burners, and control systems. Common electric-model failures include dead coils, a non-heating bake element, or a tripping infinite switch. Gas models typically show delayed ignition, loud clicking, or a burner that won’t stay lit. Temperature inaccuracies often trace to faulty sensors, warped indicators, or a failing control board. Before you assume a major repair, confirm symptoms across modes (bake, broil, and surface burners) and listen for unusual sounds or odors. According to Home Repair Guide analysis, igniter and heating-element failures are among the most frequent Frigidaire stove problems, so prioritize tests in those areas.
Safety First: Power, Gas, and Electrical Tests
Safety is non-negotiable when working on a stove. Always unplug the appliance and shut off the gas supply before touching electrical or gas components. If you smell gas, evacuate and call your utility provider immediately. Use a non-contact voltage tester to verify the circuit is de-energized, and test for continuity with a multimeter only after power is removed. For gas stoves, never bypass the safety valve or ignition system. A small leak or mis-wired connection can lead to fire or explosion. This section runs through safe testing steps and how to recognize red flags that require professional service.
DIY Diagnostics: Step-by-Step Checks (Electric Models)
Step 1: Access the coil elements and control connections by removing the back panel or the top-plate covers as recommended in your model manual. Step 2: Disconnect power and test each coil for continuity to ensure the element isn’t open. Step 3: Inspect the bake and broil elements for visible damage and test resistance with a multimeter set to Ohms. Step 4: Check the infinite switch and surface-element wiring for loose connections. Step 5: Reassemble, restore power, and perform a controlled test of bake, broil, and surface burners. Step-by-step checks save you time and identify whether parts are truly faulty.
DIY Diagnostics: Step-by-Step Checks (Gas Models)
Step 1: Confirm the gas shutoff is accessible and the area is well-ventilated. Step 2: Inspect the burner ports for clogs and clean with a soft brush; do not use metal tools that can enlarge ports. Step 3: Listen for the igniter clicking and verify ignition with a soap-and-water test to check for leaks around connectors. Step 4: Check the thermocouple and the spark module for signs of wear, corrosion, or loose wiring. Step 5: If the burner lights but keeps going out, test the gas valve signal and pressure with appropriate tools, or replace the igniter if it’s visibly damaged. Step 6: Reassemble and test all burner functions.
When to Repair vs Replace and How to Plan
Most Frigidaire stove issues are repairable if the parts are affordable and the appliance is reasonably modern. Evaluate the replacement cost of coils, igniters, and control boards against the price of a new unit, factoring in installation and energy efficiency. Review the model’s service manual for parts lists and typical failure rates. If the stove is old, energy use is high, or multiple critical components fail, replacement may be the smarter option. Plan by setting a budget, researching replacement options, and scheduling service if the job requires specialized tools or gas work.
Preventive Maintenance for Frigidaire Stoves
Regular cleaning, prompt burner alignment, and periodic checks of electrical connections extend stove life. Wipe off spills after cooling to prevent corrosion around element bases and control contacts. Keep burner ports clear of debris and re-tighten loose knobs and screws. Periodic inspection of the power cord, plug, and control panel wiring reduces the risk of short circuits and panel malfunctions. Routine maintenance lowers the likelihood of expensive emergency repairs and helps maintain consistent cooking performance.
Authority References and External Resources
For safety guidelines and model-specific information, consult external authorities. These references provide general appliance-safety practices and official guidance on electrical and gas safety, which support the repair steps in this guide.
Tools & Materials
- Multimeter(For testing element resistance and wiring continuity.)
- Non-contact voltage tester(Verify de-energized circuits before touching.)
- Screwdriver set (Phillips and flat-head)(Access panels and terminals.)
- Nut driver or small socket set(Remove and reattach burner components.)
- Safety gloves (heat-resistant)(Protect hands when working near hot surfaces and metal edges.)
- Safety goggles(Protect eyes from debris and chemical cleaners.)
- Soft brush and mild detergent(Clean burner ports and surfaces without damage.)
- Model-specific parts (coil/igniter, bake element)(Only if you confirm a failed component.)
Steps
Estimated time: 60-120 minutes
- 1
Power down and prepare
Unplug the stove and shut off the gas supply if applicable. Remove nearby combustibles and ensure the area is well vented. This first step minimizes risk before you touch electrical components or gas lines.
Tip: Double-check that power is fully disconnected using the non-contact tester. - 2
Access the relevant components
Remove the back panel or top-plate to expose coils, igniters, and terminal blocks. Keep track of screws and note which panel goes where for reassembly.
Tip: Label wires or take photos during disassembly to avoid mix-ups later. - 3
Test heating elements or coils
With power still off, test each coil or bake/broil element for continuity against the model's specs. Replace any element that shows open or significantly high resistance.
Tip: If the element looks scorched or cracked, replace it rather than attempting a repair. - 4
Check ignition and wiring (electric models)
For electric models, inspect the control board wiring and the infinite switch for looseness or burn marks. Tighten connections and replace damaged wiring as needed.
Tip: A loose wire causes intermittent heating; secure connections firmly. - 5
Check gas valve and igniter (gas models)
If your stove is gas-powered, verify the igniter spark, clean burner ports, and inspect the thermocouple for corrosion or misalignment. Do not adjust gas pressures yourself.
Tip: Use soap and water to spot small gas leaks around connections; bubbles indicate a leak. - 6
Reassemble and test functionality
Reattach panels and fasteners, restore power and gas, and test all burners, bake, and broil cycles. Note any persistent issues for future fixes or replacement planning.
Tip: Test one function at a time to isolate persistent problems. - 7
Decide next steps if problems persist
If the issue remains after these checks, consult the service manual for advanced diagnostics or call a licensed technician for gas work or control-board faults.
Tip: Document symptoms and steps taken to speed up professional troubleshooting.
FAQ
Is it safe to repair a Frigidaire stove myself?
You can safely perform minor, non-gas repairs if you follow safety steps and disconnect power first. Gas-related work should be done by a licensed professional.
You can safely perform minor DIY repairs if you follow safety steps and disconnect power first; for gas work, call a licensed professional.
What tools do I need for Frigidaire stove repair?
A basic toolkit with a multimeter, non-contact tester, screwdrivers, and a few replacement parts is enough for many DIY diagnostics. Always follow the model’s manual.
A basic toolkit with a multimeter, tester, screwdrivers, and some replacement parts is enough for many DIY checks.
Can I bypass safety switches to troubleshoot?
No. Bypassing safety features can cause gas leaks or electrical hazards. Use caution and stop if you’re unsure.
No, do not bypass safety features. They’re critical for safe operation.
How long does a typical Frigidaire stove repair take?
Most basic diagnostics and component replacements can be completed in about an hour or two, depending on access to parts and model complexity.
Most basic repairs take about one to two hours, depending on parts and access.
Where can I find model-specific parts and guides?
Check Frigidaire’s official manuals and trusted repair retailers for your exact model. Keep the model number handy when ordering parts.
Look up your model’s manual and trusted parts retailers to find the right parts.
When should I replace the stove rather than repair?
If multiple major components fail and the repair cost rivals a new unit, replacement may be the smarter option for reliability and energy efficiency.
If many major components fail and the cost is high, replacing the stove is often the smarter choice.
Watch Video
Key Takeaways
- Always disconnect power and gas before starting.
- Test components with a multimeter to confirm faults.
- Follow model-specific guidance to avoid improper repairs.
- Replace damaged parts rather than attempting unsafe fixes.
- Keep safety first and know when to call a pro.