Dishwasher KitchenAid Repair: A Practical Step-by-Step Guide
A practical, safety-focused guide to diagnosing and repairing KitchenAid dishwashers. Learn common failures, essential parts, and a step-by-step process homeowners can follow for durable, safe KitchenAid dishwasher repair.

In most cases, KitchenAid dishwasher repairs start with verifying power and door latch, then checking the float switch, water inlet, and spray arms. According to Home Repair Guide, if a component is faulty, replace it and test with a short cycle. Always unplug the unit, wear safety gear, and consult the model’s manual for part numbers.
Understanding the dishwasher KitchenAid repair landscape
Dishwasher KitchenAid repair is best approached by understanding the common failure modes seen in many households. In practice, homeowners report drainage problems, leaks, and cycles that stall or fail to complete. KitchenAid dishwashers share several core design features: a built-in float switch to prevent overfilling, a removable filter to catch debris, and a water inlet valve that controls filling. When symptoms appear — standing water after a cycle, poor cleaning results, or unusual noises — it’s a sign to inspect a specific subsystem. According to Home Repair Guide analysis, most routine issues involve clog buildup in filters or hoses, worn door seals, or failed switches rather than dramatic electrical faults. This means that many repairs can be achieved using common tools and standard parts, without needing a full appliance replacement. The key is to build a fault tree that starts with symptoms and traces outward to probable causes, listing each component you’ll test in order.
Safety and planning before you start
Before you touch any appliance, safety is the first priority. Unplug the dishwasher or shut off the circuit at the breaker, then turn off the water supply to avoid leaks. Remove the lower rack to access the sump area, filters, and inlet valve. Gather your tools and spare parts in advance, and ensure you have a clear workspace free of standing water. Read the model’s manual for part numbers and torque specs. This prep work reduces the risk of electric shock, damaged components, and accidental sprays of hot water. Home Repair Guide recommends setting a timer and labeling screws as you disassemble to ease reassembly and avoid misplacing small parts.
Diagnostic checklist: electrical, mechanical, and water supply
A thorough diagnosis covers three subsystems: electrical control and wiring, mechanical components (latch, door seal, float switch, impeller), and the water supply path (inlet valve and hose). Start by inspecting the door latch for wear or misalignment; a loose latch can prevent a cycle from starting. Use a multimeter to verify the control board and wiring continuity if you have access to the service documentation. Next, test the float switch by gently lifting the float with the unit off; it should trigger the low-water condition. If not, replace the switch or recalibrate the mechanism. Finally, inspect the water inlet valve assembly and supply line for kinks or blockages. A faulty inlet valve can cause under-filling or over-filling, leading to performance loss. Document your findings with photos to reference during reassembly.
Replacing common parts: filters, float switch, inlet valve, and door latch
Replacements are a normal part of kitchen appliance maintenance. If the filter is clogged beyond cleaning, replace the mesh filter and clean the surrounding gasket. The float switch, often mounted on a small circuit, may require a direct replacement if the switch body is cracked or the magnet is loose. The inlet valve is typically accessed under the kitchen sink area near the supply line; replace it if you observe mineral buildup or a failed solenoid. If the door latch is damaged or misaligned, install a new latch and reseat the striker. Use manufacturer-specified parts for your KitchenAid model. Always confirm the fit with a quick fit test before reassembly; this ensures you won’t strip screws or misalign panels.
Testing cycles, troubleshooting, and validating repairs
After replacing parts, carefully reassemble the unit and restore power. Run a short wash cycle with the door closed to verify there are no leaks and that water is driving through the spray arms correctly. Observe the fill rate and look for consistent cycle timing. If the unit fails to fill, recheck the inlet valve and float switch wiring. If leaks persist around the door or gaskets, reseat the door seal and re-tighten mounting screws in a diagonal pattern to even pressure. For persistent issues, run diagnostics per the manual and record any error codes; these codes are invaluable when seeking parts or professional help.
Maintenance to prevent future failures
Preventive maintenance saves money and extends the life of a KitchenAid dishwasher. Clean the filter and spray arms monthly to prevent clogging, and inspect door seals for cracks. Use a mild cleaner to remove mineral deposits from the inlet valve and hoses. Periodically test the float switch to ensure accurate water level sensing. Keep the water supply lines free from kinks and ensure the drain hose has proper slope. For renters, document wear and tear with photos when moving out to avoid disputes about appliance condition and security deposits.
Model-specific considerations and when to call a professional
KitchenAid dishwashers span several generations with different internal layouts, control boards, and safety interlocks. If you are unsure of part compatibility, or if the error codes point to electronics beyond basic troubleshooting, professional service is advised. Some issues, such as a leaking tub seal or a failed circulation pump, require professional service and may involve sealed components that need factory-grade tools. In these cases, schedule a service call or refer to the official KitchenAid service portal for model-specific guidance. The Home Repair Guide team recommends attempting only the steps that align with your model’s manual and seeking help for complex repairs.
Tools & Materials
- Screwdrivers (Phillips #2 and flathead)(Remove panels and access screws)
- Nut driver set (1/4 inch)(Mounting hardware on panels and valves)
- Multimeter (digital)(Test wiring and switches)
- Pliers and needle-nose(Grip hoses, remove clamps)
- Replacement parts kit (KitchenAid-specific)(Float switch, water inlet valve, door latch as needed)
- Replacement water inlet valve(Only if diagnosed faulty)
- Float switch(Only if diagnosed faulty)
- Door latch(Only if door latch is worn)
- Mask/eye protection(Safety first)
- Work gloves(Protection while handling sharp edges)
- Towels or absorbent rags(Clean spills and dry surfaces)
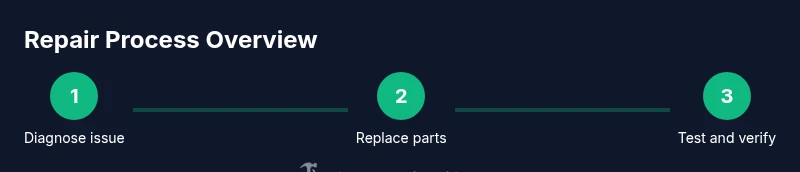
Steps
Estimated time: 60-90 minutes
- 1
Disconnect power and access the interior
Unplug the unit or switch off the circuit at the breaker. Remove the lower rack to access the sump, filters, and controls. This prevents electrical shock and makes inspection safer.
Tip: Take a quick photo of screw locations before removing panels. - 2
Inspect the door latch and gasket
Check for wear, cracks, or misalignment in the latch and door gasket. A faulty latch can keep the door from latching properly and halt a cycle.
Tip: Gently test the latch with the door partially open to assess engagement. - 3
Test the float switch assembly
Lift the float to simulate a full tub; the switch should trigger and halt filling. If it does not respond, replace the switch or clean the float mechanism.
Tip: Make sure the float moves freely and isn’t stuck on mineral buildup. - 4
Check the water inlet valve and supply line
Inspect hoses for kinks or mineral buildup. Use a multimeter to verify valve continuity if you suspect a failed solenoid.
Tip: Shut off water supply before disconnecting any hoses. - 5
Replace faulty parts and reassemble
Install the compatible replacement parts and reseat all gaskets and seals. Tighten mounting screws diagonally to ensure even pressure.
Tip: Verify part numbers against your KitchenAid model to ensure proper fit. - 6
Reassemble and run a test cycle
Reattach the panels, restore power, and run a short cycle with no dishes to confirm there are no leaks and all functions operate normally.
Tip: Listen for unusual sounds and watch for leaks during the test run.
FAQ
Do I need to unplug the dishwasher before starting the repair?
Yes. Disconnect power to avoid electric shock and to allow safe inspection of components. If you cannot access the plug, switch off the corresponding breaker.
Yes, unplug or switch off the circuit to safely begin repairs.
What are common signs of a faulty float switch?
Warnings include the dishwasher not filling correctly, overfilling, or water pooling in the base after a cycle. If observed, test the switch and replace if necessary.
If it won’t fill or overfills, the float switch may be failing.
Where can I buy KitchenAid replacement parts?
Use the official KitchenAid parts site or authorized retailers. Always verify compatibility by model number before purchasing.
Buy from official KitchenAid sources to ensure correct fit.
Is it safe to fix a leak myself?
Small leaks from door seals or hoses can often be addressed with reseating seals or replacing worn gaskets. See instructions for your model, and call a pro for persistent or large leaks.
Minor leaks can be DIY, but bigger leaks may need a pro.
How long does a typical KitchenAid dishwasher repair take?
Most repairs take 60-120 minutes, depending on fault complexity and parts availability. Plan for additional time if you need to order parts.
Most repairs take about an hour or two.
When should I call a professional?
If you encounter complex electronics, sealed components, or persistent leaks beyond basic troubleshooting, scheduling a professional service is advised.
Call a pro for complex electronics or persistent leaks.
Watch Video
Key Takeaways
- Identify root cause before replacing parts.
- Always unplug and drain water before starting.
- Use manufacturer parts and consult the model manual.
- Test thoroughly after repairs to confirm success.