Why Troubleshooting Often Fails and How to Fix It
Explore why does troubleshooting never work and learn a proven, methodical approach to diagnosing and fixing common home problems quickly, safely, and with fewer repeats.

Most troubleshooting fails when you skip a systematic check: you jump to conclusions, ignore symptoms, or assume the problem is isolated. Start with the simplest causes, verify basics (power, connections, resets), and document every step. If symptoms persist, escalate with a structured diagnostic flow and a clear remediation plan. This approach reduces wasted time and repeated issues.
Why does troubleshooting never work? A practical reality check
Why does troubleshooting never work? The short answer is that many failures occur because problem framing is unclear, causes are misidentified, or essential basics are skipped. The phrase why does troubleshooting never work captures a common mindset: seeking a quick fix rather than a verifiable chain of causes. In Home Repair Guide's experience, disciplined, methodical thinking reduces wasted time and costly mistakes. The root of the problem is rarely a single symptom; it’s usually a system of interactions that requires careful framing. Begin by distinguishing symptoms (what you observe) from causes (what is likely producing those symptoms). For homeowners and renters, the temptation to jump to dramatic fixes is strong, but the cost of that approach is high. The first step is to acknowledge uncertainty and commit to a test-and-learn mindset. Writing down observed symptoms and the order they occur creates a map you can revisit when new information appears. That map becomes the backbone of a reliable troubleshooting process.
Common traps that derail troubleshooting
A major reason why troubleshooting doesn’t work is the array of cognitive traps that beginners and seasoned DIYers alike fall into. Confirmation bias makes you cling to familiar explanations even when the data disagrees. Scope creep invites you to chase multiple problems at once, diluting effort and muddying outcomes. Overgeneralizing from a single symptom leads to wrong fixes. And finally, skipping the basics—power checks, connections, resets—sets you up for repeated failure. To counter these traps, write a simple diagnostic hypothesis at the start and require at least two independent tests before committing to a fix. Budget time for revisiting your assumptions if new symptoms appear.
Building a reliable troubleshooting framework
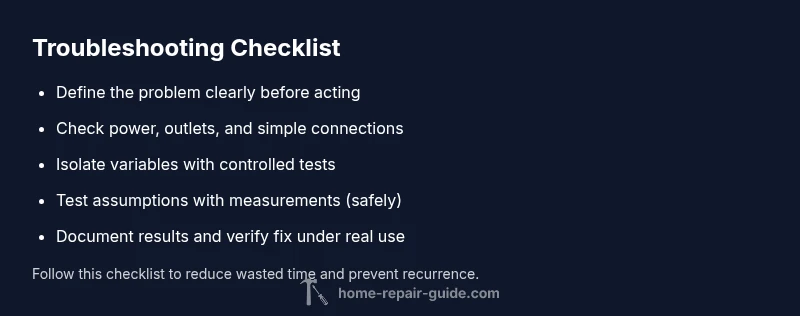
A dependable framework starts with a clear problem statement and ends with a verified fix and prevention plan. Start by listing observed symptoms, when they occur, and the devices or areas affected. Next, create a short list of possible causes ranked by likelihood. Then design minimal, safe tests to distinguish between causes. Record results and refine your hypothesis after each test. A robust framework emphasizes safety, documentation, and reproducibility. Home Repair Guide emphasizes using checklists, which reduces mental load and keeps you focused on verifiable steps rather than guesses. With a solid framework, you’ll spend less time wandering and more time solving problems.
Diagnostic flow you can follow in minutes
This section outlines a practical diagnostic flow you can apply to most household issues. Start with the simplest checks, then progressively tackle more complex ones. If a diagnosis remains uncertain, pause, reframe the problem, and consider professional help when safety risk or competencies exceed your comfort level. The flow is designed to be repeatable, so you can reuse it across different rooms and devices without reinventing the wheel.
Step-by-step example: a stubborn leaky faucet
Consider a common household issue: a stubborn leaky faucet. Start by noting when the drip occurs and the rate of flow. Check the aerator screen for clogging, inspect the faucet handle for leaks, and verify that the supply lines are fully shut off before disassembly. Replace worn washers or cartridges as needed, then reassemble and test for leaks under both steady and fluctuating water pressure. Finally, monitor for 24 hours to confirm stability. This concrete example demonstrates applying a methodical approach rather than guessing.
Safety and when to call a professional
Safety comes first. If you identify exposed wiring, gas lines, or suspect a damaged appliance, stop immediately and seek professional help. Do not attempt repairs beyond your training, even if you think you know the cause. In many cases, a timely call to a licensed technician prevents dangerous situations and prevents further damage. For most homeowners, a practical rule is: if uncertainty lingers after basic checks, escalate sooner rather than later.
Maintenance habits to prevent future failures
Prevention beats repair. Create a simple maintenance routine: quarterly inspections of outlets and cords, monthly testing of basic operations, and annual professional checkups for critical systems. Keep a home troubleshooting log to capture what worked and what didn’t, then review it before starting a new task. This habit reduces recurring issues and makes troubleshooting faster over time. Home Repair Guide recommends pairing preventive maintenance with a documented troubleshooting process for the best results.
Steps
Estimated time: 30-60 minutes
- 1
Define the problem clearly
Record symptoms, time, and affected areas. Note any patterns like time of day or after energy use. This creates a testable hypothesis.
Tip: Write it down and keep it visible. - 2
Check basics first
Verify power, outlets, switches, and fuses. Reset breakers and verify there is power at the device.
Tip: If there’s no power, the issue is upstream. - 3
Isolate the variable
Unplug other devices on the same circuit, then re-test the symptom with minimal load to see if it persists.
Tip: This helps identify shared-circuit issues. - 4
Test assumptions with measurements
Use a multimeter or tester to verify voltage and continuity where safe. Document readings.
Tip: Never test live wires with bare hands. - 5
Implement a safe fix and monitor
Apply the fix, re-test, and monitor for recurrence over 24-48 hours. Update your notes.
Tip: If uncertainty remains, stop and seek professional help.
Diagnosis: A circuit keeps tripping after turning on a device
Possible Causes
- highOverloaded circuit or drawing too much current
- mediumLoose outlet or plug connection
- lowFaulty device or damaged cord
Fixes
- easyReduce load by unplugging nonessential devices and resetting the breaker
- easyInspect outlets and plug connections for looseness; tighten or replace if needed
- mediumTest the suspected device on a different circuit; replace cords or device if faulty
- hardConsult an electrician for persistent tripping
FAQ
What is the first step in troubleshooting effectively?
Begin by defining the observed symptoms and avoiding initial guesses. Write down what you see and when it occurs to create a testable starting point.
Start by noting what you observe and avoiding guesses; write it down to map the problem.
Why do fixes sometimes fail to prevent recurrence?
Recurrences usually happen when the root cause isn’t resolved or when testing doesn’t cover all operating conditions. Addressing root causes and validating with multiple tests reduces repeats.
Root causes and comprehensive testing prevent the issue from coming back.
When should I call a professional?
If safety is at risk, if you lack the proper tools, or if the repair involves electrical, gas, or structural work, professional help is the safest option.
If it’s unsafe or beyond your training, call a pro.
How can I prevent problems after a repair?
Keep simple maintenance logs, test under varied conditions, and schedule regular inspections to catch issues early before they escalate.
Keep notes, test thoroughly, and schedule regular checks.
What basic tools should I have for troubleshooting?
A basic tester or multimeter, a flashlight, insulated gloves, and a few screwdrivers are enough to start many DIY checks.
A tester, flashlight, and insulated gloves cover most quick checks.
Watch Video
Key Takeaways
- Define the problem before you fix it.
- Start with checks that are easy and safe.
- Follow a documented diagnostic flow.
- Know when to escalate to a professional.