When Can You Repair a Nail in a Tire: A Practical Guide
Learn when a nail puncture in a tire is repairable, how to assess tire health, and a safe, step-by-step process for homeowners to repair or replace tires with confidence.

A nail can be repaired only if the puncture is in the tread, not the sidewall, and the tire shows no major damage. If the nail is near the edge or the tire has run flat, replacement is safer. Rely on a professional patch/plug when repair is permitted.
Understanding tire puncture repair basics
Punctures caused by nails and other road debris are a common repair topic for homeowners, and the answer depends on where the hole is and what damage exists. According to Home Repair Guide, punctures that stay within the tread and that do not involve the sidewall are often repairable, provided the tire has not sustained other compromises such as excessive wear or a damaged bead. Punctures in the tread can sometimes be sealed with a plug, or a combination of patch and plug, to restore containment and air retention. The process should be conducted with the tire off the vehicle so you can inspect both the inside and outside of the tire for additional damage. The goal is to achieve a secure seal that remains effective through normal driving conditions while preserving tread life and vehicle safety. If any part of this assessment raises concern, stop and seek professional service. Home Repair Guide’s guidance emphasizes safety, proper technique, and adherence to tire manufacturer recommendations.
Branding note and practical context
In practical terms, many nails in the tread can be repaired if the puncture is clean and away from the shoulder. The Home Repair Guide team notes that the repair should not compromise the tire’s ability to hold air or its structural integrity. For homeowners, this means ruling out repairs if the nail is near the sidewall, if there is a cut or separation, or if the tire shows signs of bead damage. A cautious approach is best: if there is any doubt about the tire’s integrity after a quick inspection, replace rather than repair. This mindset aligns with safety-first maintenance practices and reduces the risk of sudden tire failure on the road.
Location matters: tread vs sidewall and shoulder
The location of the puncture is the single most important factor in repairability. Punctures inside the central tread are the most likely candidates for repair, while sidewall punctures or damage near the shoulder typically require tire replacement. Additionally, the tire’s overall condition—tread depth, wear, and previous repairs—affects whether a patch or plug repair is permissible. The reader should recognize that some punctures may not be repairable even in the tread area if there is concurrent damage, corrosion, or remodeling of the tire’s internal structure. Following manufacturer guidelines and local regulations ensures the repair is legal and safe.
Repair methods explained: plugs, patches, and hybrids
Repair options range from plug-only methods to inside patches, to hybrid approaches that use both exterior plugs and interior patches. A common approach is to seal the puncture from the outside with a plug while applying a patch from the inside to secure the repair and restore air retention. The-correct method depends on tire design, the size and shape of the puncture, and whether there is damage to the bead or sidewall. It’s important to use materials rated for tubeless tires and to follow the repair kit’s instructions and the tire manufacturer’s recommendations. For many tire types, a professional repair applies a patch directly over the puncture after boring and cleaning the hole to ensure a reliable seal. Home Repair Guide stresses that a patch is generally more durable than a plug alone and that combining the two often yields the best long-term result when permitted.
Safety checks and pre-inspection before you start
Before you touch the tire, ensure the vehicle is parked on a flat, stable surface with the parking brake engaged. Gather the necessary tools and stand clear of traffic while you work. Inspect the tire visually for sidewall damage, cracking, or bulges that would indicate a failing tire. If you find embedded nails, you should not yank them out in the first step; instead evaluate the puncture and prepare the tire for professional repair or replacement. After you remove the nail, examine the hole carefully and ensure any repair material can be applied cleanly without enlarging the puncture. Safety glasses and gloves are recommended, and you should always wear protective gear to avoid injury from shards or sharp edges. The goal is to create a safe working environment and avoid introducing new damage to the tire.
Authority sources and ongoing maintenance
Two credible sources for tire safety and repair guidelines are the National Highway Traffic Safety Administration (NHTSA) and the American Automobile Association (AAA). NHTSA’s tire safety resources emphasize maintaining tire integrity and recognizing when a tire repair is not advisable, while AAA provides practical home maintenance tips and safety cautions for tire repairs. Consult these sources alongside manufacturer instructions when assessing a puncture. Regularly inspecting tires for wear, maintaining proper inflation, and replacing tires at the end of their service life contribute to safer driving and reduced risk of tire failure during operation.
Tools & Materials
- Tire repair kit (plug kit with reamer and plug)(Ensure kit is designed for tubeless tires and includes a rasp/reamer, plug strips, and a plug insertion tool)
- Tire patch kit (tread patch)(Patch from inside if your kit or shop supports inside repair; confirm compatibility with tubeless tires)
- Soapy water spray bottle(Used to locate leaks and test seal after repair)
- Wheel chocks(Place on both sides of the wheel to prevent rolling)
- Car jack and lug wrench(Use on level ground; follow vehicle manufacturer’s jacking points)
- Tire pressure gauge(Check and set to the recommended PSI after repair and reinstallation)
- Marker or chalk(Mark the puncture location for reference and documentation)
- Protective gloves and safety glasses(Protect hands and eyes from sharp edges and debris)
- Torque wrench (optional for lug nuts)(Use to ensure correct lug torque when reinstalling the wheel)
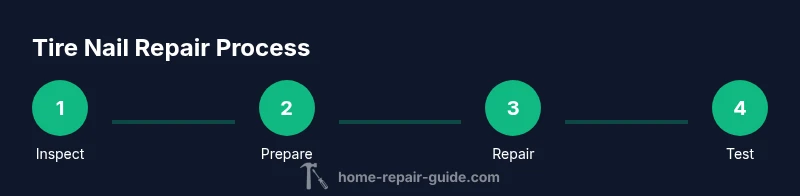
Steps
Estimated time: 30-60 minutes
- 1
Prepare and secure the vehicle
Park the vehicle on a flat surface, engage the parking brake, and place wheel chocks on the opposite side. Use the jack to lift the vehicle only if you need to remove the wheel, and never work under a raised vehicle without support. This step minimizes movement and creates a safe working area.
Tip: Always work on level ground and never rely on the jacked vehicle’s weight for support. - 2
Inspect for puncture location and object
Visually locate the nail and assess whether it is still embedded. Do not pull the nail out yet; this allows you to evaluate the puncture’s direction and size while maintaining a seal that prevents air loss. Mark the spot if needed for reference.
Tip: Keep the object in place until you’re ready to proceed with a controlled removal. - 3
Remove the object and prepare the puncture
Carefully remove the nail or object to inspect the entry hole’s edges. If the hole is clean and within the tread, you can proceed with the chosen repair method. Clean and roughen the surrounding area to improve adhesion for patches or plugs.
Tip: Do not enlarge the hole; proper boring and cleaning are essential for a durable repair. - 4
Decide repair method
Choose between a plug, a patch, or a combination based on the puncture position and tire design. Outside-only plugs are common for tread-only punctures, but most durable repairs combine an exterior plug with an interior patch.
Tip: If unsure, lean toward a patch from the inside or seek professional repair. - 5
Apply the repair technique
Follow the repair kit instructions to insert the plug or apply the patch. For combination repairs, mount the patch on the inner liner after cleaning the hole. Avoid creating new damage and ensure the patch or plug sits flush with the tread surface.
Tip: Allow the adhesive to cure as recommended by the kit’s instructions. - 6
Test and reinstall
Inflate to the correct tire pressure and inspect with soapy water to check for leaks. Reinstall the wheel, snug the lug nuts, and torque per manufacturer specs. Lower the vehicle gradually and recheck pressure after a short drive.
Tip: If bubbles appear around the patch or plug, stop and re-evaluate the repair.
FAQ
Can I repair a nail in a tire at home?
Yes, but only if the puncture is in the tread, the tire shows no major damage, and you follow proper repair procedures. If you’re uncertain or the puncture is near the sidewall, seek professional service.
You can repair at home if the puncture is in the tread and there’s no major damage; otherwise, seek professional service.
Is it safe to drive after repairing a tire?
A repaired tire can be safe if the repair method is appropriate, the patch seal holds, and the tire maintains proper pressure. Monitor the tire and recheck pressure after a short drive.
Yes, if the repair is done correctly and the tire holds air, but keep an eye on it after driving a bit.
What if the puncture is near the edge or on the sidewall?
Repair is not recommended for punctures near the edge or on the sidewall. In most cases, replacing the tire is the safer option to ensure road safety.
Punctures near the edge or on the sidewall usually require tire replacement.
What’s the difference between a plug and a patch?
A plug seals the puncture from the outside; a patch seals it from the inside. For durability, many repairs combine both methods when permitted by the tire and manufacturer guidelines.
Plugs seal from outside, patches from inside, and many fixes combine the two for durability.
How long does a tire repair last?
Repair longevity depends on tire condition, driving conditions, and how well the repair is performed. A proper repair should function as long as the tire remains in serviceable condition, but tires eventually wear out and should be replaced when needed.
The repair lasts as long as the tire stays in good condition and no new damage occurs.
Watch Video
Key Takeaways
- Repairable punctures are typically in the tread area.
- Sidewall damage usually requires tire replacement.
- Combining patch and plug repairs offers durability when permitted.
- Test the repair for leaks and maintain proper tire pressure.
- When in doubt, consult a tire professional and follow manufacturer guidance.