Repair Driveways: A Practical Step-by-Step Guide
A comprehensive, practical guide to repairing driveways, covering asphalt and concrete repairs, crack sealing, pothole patching, resurfacing, sealing, and maintenance for long-lasting results.

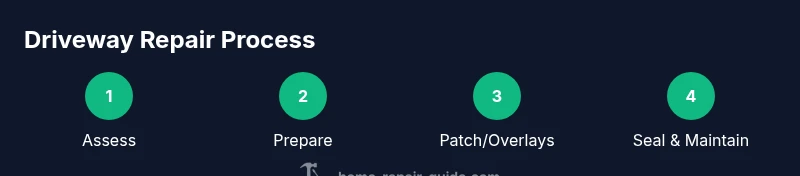
By following a proven, step-by-step approach, homeowners can repair driveways effectively without full replacement. This guide helps you assess damage, choose the right path (asphalt vs concrete), and perform crack sealing, pothole patching, resurfacing, and sealing, plus ongoing maintenance to extend life. You’ll learn prep steps, essential tools, and practical timelines for durable results.
Assessing damage and choosing your repair path
Not all driveway damage requires the same fix. Start by distinguishing common failure modes: small, hairline cracks; wider cracks that may indicate substrate movement; potholes; and damaged slabs. Asphalt driveways typically respond well to crack sealing and patching, while concrete driveways often benefit from epoxy or cement-based repairs for cracks and spalled areas. Consider drainage, subgrade stability, and climate effects; a driveway with poor drainage or frost heave may need a resurfacing rather than a simple patch. Home Repair Guide recommends evaluating the overall condition and long-term goals, as choosing the right repair path now can save time and money later. In many cases, staged repairs—crack sealing first, then patching, and finally sealing—offer the best balance of cost and durability. If you’re unsure, start with a professional assessment to determine whether you’re facing a surface issue or a structural concern.
Surface preparation and safety
Proper preparation is the foundation of a durable repair. Begin by clearing the driveway area of vehicles, debris, and vegetation that could trap moisture under patches. Sweep thoroughly, then remove loose concrete or asphalt fragments with a scraper or chisel. For cracks, widen the opening slightly to remove old filler and debris. Weather matters: avoid repairs in freezing temperatures or when rain is forecast within 24 hours. Always wear PPE—gloves, eye protection, respirator when sanding, and sturdy footwear. If you need to pressure-wash, let the surface dry completely before applying repair products. A dry, clean surface ensures better adhesion and longer-lasting results. Home Repair Guide emphasizes patience here; rushing surface prep invites premature failure and additional visits to repair.
Crack sealing techniques
Crack sealing is a first line of defense against water intrusion and freeze-thaw damage. Clean cracks thoroughly, remove dust, and use a backer rod to fill large gaps so the sealant can adhere properly. Choose the appropriate filler: polyurethane sealants for active cracks that move, latex-based compounds for minor cracks, or hot-applied rubberized asphalt for wider fissures. Apply the filler level with the crack surface, slightly overfilling to allow for settling and compaction. Cure times vary by product and weather, so follow the manufacturer’s directions. For long-term performance, seal cracks when surfaces are dry and temperatures are comfortably warm, ensuring a clean, dust-free seal that stretches with minor movement.
Patching large potholes and broken slabs
Potholes and broken slabs require more substantial repairs. Remove loose material and clean the area around the pothole. For asphalt, place cold patch material in layers, compacting each layer with a tamper or heavy tool to minimize air voids. For concrete, you may need a concrete patch mix and a bonding agent; form a compact, level surface using a straightedge. In both cases, the repair must be flush with the surrounding surface to prevent tripping hazards. After initial set, avoid heavy traffic until the patch has adequately cured. This approach restores stability and improves load-bearing capacity, extending the driveway’s life.
Resurfacing and overlay options
When damage is widespread, resurfacing can be more economical than full replacement. Asphalt overlays add a new wearing surface over the old asphalt, while concrete overlays can provide a long-lasting finish on a damaged concrete slab. Both require proper surface preparation, including cleaning, drying, and, for overlays, a bonding agent to improve adhesion. Consider climate, underlying substrate condition, and anticipated traffic loads. Overlays are an effective way to restore an even, uniform surface; however, they do not fix severe substrate movement. Home Repair Guide notes that in some cases, partial replacement of severely degraded sections is preferable before applying a new overlay.
Sealing and maintenance to extend life
Sealants protect repair work from moisture and UV exposure, extending life. Choose a sealant compatible with your surface material and climate. For asphalt, use coal-tar-free asphalt sealers or innovative polymer-modified sealers; for concrete, use penetrating sealers or acrylic-based coatings. Clean the surface first, apply evenly, and avoid application in direct sun or wind that can cause rapid curing. Schedule sealing every 2–4 years, contingent on wear, traffic, and weather. Regular maintenance—clearing weeds, managing drainage, and addressing new cracks promptly—will maximize longevity and keep your driveway looking good.
DIY limits and when to call a pro
Many minor repairs are suitable for DIY enthusiasts, but larger cracks, extensive potholes, or signs of structural movement warrant professional assessment. If moisture is seeping beneath the surface, there are abrupt slope changes, or patch failures recur within a season, it’s time to consult a pro. A licensed contractor can perform a structural evaluation, ensure proper subgrade stabilization, and select materials that meet local performance standards. Budget for more complex repairs by requesting multiple quotes and checking credentials. A cautious approach reduces risk and ensures lasting results.
Cost considerations and budgeting
Repair decisions should be guided by long-term value rather than upfront savings. Costs vary with material selection, extent of damage, and local labor rates; however, you can influence outcomes through proper planning and timely maintenance. Create a repair plan that prioritizes safety, drainage improvements, and material compatibility. While you shouldn’t rely on a single contractor’s estimate, obtaining several quotes helps you gauge expectations and avoid overpaying. Maintain records of all work and warranties for future reference and potential resale considerations.
Maintenance schedule and long-term care
A proactive maintenance plan is your best defense against frequent repairs. Establish a routine: clean the driveway, check for cracks after seasonal changes, address small cracks early, and reseal on a recommended interval. Maintain proper drainage to prevent water pooling, which accelerates wear. Consider seasonal inspections and a lightweight preventive maintenance patching routine to catch issues before they become major problems. Home Repair Guide advises homeowners to view driveway maintenance as part of a broader home maintenance plan to protect value and safety.
Tools & Materials
- Personal protective equipment (gloves, safety glasses, sturdy boots)(PPE is essential for handling sealants and cutting tools)
- Broom and stiff-bristled brush(Used to clean dirt and debris from cracks and patches)
- Shop vacuum or leaf blower(Helpful for thorough cleaning of fine dust)
- Chisel or scraper(Remove loose material and widen cracks as needed)
- Hammer and pry bar(Assist in break-out of severely damaged areas)
- Trowel or putty knife(Spread patch material evenly)
- Concrete patch or asphalt cold patch material(Choose based on surface type (concrete or asphalt))
- Backer rod (for cracks)(Used to fill large gaps and improve sealant performance)
- Partner product: crack filler or polyurethane sealant(Select based on crack width and movement)
- Bonding agent (for concrete overlays)(Improves adhesion for overlays)
- Sealant applicator or caulking gun(For precise sealant application)
- Water and mist sprayer(Maintains moisture control during curing when required)
- Level and straightedge(Ensure patches are flush with surrounding surface)
- Tamper or plate compactor(Compact patches to remove air voids)
Steps
Estimated time: 4-8 hours (plus curing times per material guidance)
- 1
Clear the area and protect surroundings
Move vehicles and obstructions away from the work zone. Sweep or vacuum the surface to remove loose material and debris. This creates a clean baseline for patching and prevents debris from getting trapped in new material.
Tip: Working in a well-ventilated area and using a dust mask helps reduce inhalation of particulates. - 2
Identify and mark cracks/potholes
Walk the driveway and mark all cracks and potholes. Measure crack width and depth where possible to choose the right filler and patch method. Document areas to revisit after initial cure if needed.
Tip: Take photos for reference and to compare progress over time. - 3
Clean and dry the repair zones
Use a stiff brush and a shop vac to remove dust, dirt, and vegetation from cracks and patches. Allow the surface to dry completely; moisture will compromise adhesion and cure time.
Tip: If rain is expected, reschedule to a dry window to ensure proper curing. - 4
Apply crack filler or sealant
For narrow cracks, fill with latex or polyurethane sealant, slightly overfilling to account for settling. Use a backer rod for wider cracks to prevent three-sided adhesion and improve movement accommodation.
Tip: Press sealant into the crack using a putty knife and smooth the surface after application. - 5
Patch potholes or damaged slabs
Pour cold patch material in layers, compacting each layer with a tamper or plate compactor. Build up to the surrounding surface height and ensure edges are compacted to reduce edge loss.
Tip: Overfill slightly to allow for final leveling once material settles. - 6
Level and blend the patch
Use a straightedge or trowel to bring the patched area flush with the adjacent surface. Remove any high spots and ensure a smooth transition to prevent water catchment.
Tip: Cross-check the surface with a level to avoid sagging in the repair area. - 7
Cure and protect the repair
Follow the product’s curing recommendations; most patches require a protective period before opening to traffic. Avoid heavy loads and traffic until fully cured to prevent displacement.
Tip: If possible, shield the area from direct sun during curing to prevent rapid drying. - 8
Seal the driveway and plan maintenance
Apply a compatible sealant after patches have cured to guard against moisture and UV damage. Establish a maintenance schedule, including regular inspections and resealing every few years based on climate and wear.
Tip: Keep records of repairs and sealant dates for future reference.
FAQ
What is the best material for repairing cracks in a driveway?
Crack filler choices depend on crack movement. Use polyurethane or silicone-based sealants for active cracks that move, and latex or epoxy formulations for non-moving cracks. For wide cracks, consider backer rods and setting them with suitable sealant.
For cracks that move, use flexible polyurethane sealants; for static cracks, latex or epoxy fillers work well.
Can I repair my driveway myself, or should I hire a pro?
Small cracks and light patches are often DIY-friendly with the right materials and safety gear. More extensive damage, deep movement, or major potholes may require professional assessment to ensure structural integrity and proper drainage.
DIY is fine for small cracks; call a pro for large or moving damage.
How long does driveway repair last?
Durability depends on material choice, climate, and maintenance. Regular sealing and timely patches can extend the life, but severe substrate movement or ongoing water issues may require more extensive work.
Durability varies; proper maintenance significantly extends life.
When should I resurfacer instead of patching?
If damage covers a large area or the existing surface is structurally compromised, resurfacing with an overlay often provides a longer-lasting solution than patching individual spots.
Large areas or structural issues? resurfacing may be the better option.
Is sealing necessary after repair?
Sealing after repairs helps protect against moisture and UV damage, slowing wear and extending the life of the surface. Follow the manufacturer’s guidance for cure times and frequency.
Yes, sealing helps protect repaired surfaces.
What maintenance schedule should I follow for a driveway?
Inspect annually or after heavy weather for cracks or holes. Patch early, clean regularly, and reseal per material recommendations to keep the driveway in good condition.
Inspect, patch early, and reseal as recommended.
Watch Video
Key Takeaways
- Assess damage to choose the right repair path
- Prioritize thorough cleaning and dry surfaces before patching
- Follow product instructions for curing and sealing
- Seal and maintain regularly to extend driveway life