How to Turn Off Repair Mode: Step-by-Step Guide
Learn how to safely turn off repair mode on common home devices with a clear, step-by-step approach, safety tips, and verification checks to restore normal operation.

To turn off repair mode, locate the device’s service or maintenance menu and select the option to exit repair mode, then perform a full reboot. If no on-screen option exists, try a factory reset or power cycle following the manufacturer’s steps. Always consult the manual or Home Repair Guide for device-specific instructions.
What is repair mode and why it appears
If you’ve landed here asking how to turn off repair mode, you’re not alone. Repair mode is a restricted operational state that devices enter to allow technicians to diagnose issues without normal user access. It can be triggered by fault codes, safety interlocks, failed self-tests, firmware updates, or manual activation for maintenance. The purpose is to isolate the system so repairs can be performed without risking unsafe operation. Understanding why repair mode exists helps you exit it correctly without causing additional problems. While the exact steps vary by make and model, the underlying goal remains: restore normal functionality with a safe, documented sequence. Home Repair Guide has found that most devices return to normal operation after following the manufacturer’s exit procedure, rather than after random button presses. In many cases, you’ll see a restoration icon, a dedicated Exit repair mode, or a simple reboot prompts. Always start by locating the official manual or support page for your specific model, and treat repair mode as a diagnostic state rather than a permanent setting.
Safety precautions before turning off repair mode
Before you begin, disconnect power and ensure the area is dry and safe. If your device stores energy in capacitors, allow them to discharge or consult the manual for a safe wait time. Wear minimal jewelry and avoid standing on wet surfaces. Never bypass safety interlocks or operate a device with exposed wiring. If any part of the process feels unsafe, pause and seek professional help. Home Repair Guide emphasizes safety first, because repair modes can unlock diagnostic paths that involve live components. Following proper safety steps reduces the risk of electric shock or damage to internal circuits.
General pathways to exit repair mode
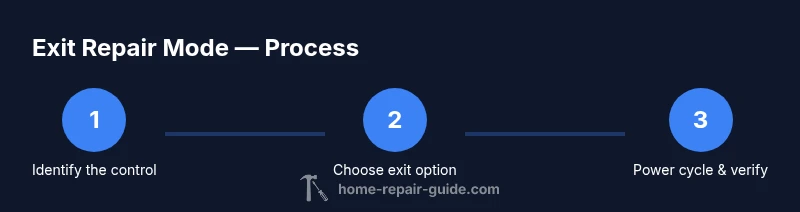
Most devices provide a path to exit repair mode either through the on-screen service menu or a hardware sequence. Look for options labeled Exit repair mode, Normal operation, or Exit service mode in the maintenance or diagnostics section. If the menu is inaccessible, a power cycle or reset sequence may be required. Document any codes displayed during exit attempts, as they can help you verify success or diagnose why exit failed.
Device-specific sequences (examples) — generic guidance
Exit sequences vary by model, but the typical patterns are similar. Start by opening the service or maintenance menu, then choose an option to exit repair mode or return to normal operation. If there is no on-screen option, a hardware approach may be documented: disconnect power, wait a short period, reconnect, and power on. Always follow the exact steps listed in your device manual and do not improvise button combinations unless the manual explicitly instructs them.
Troubleshooting exit failures
If exit attempts fail, check that you followed the official steps for your model. Look for error codes or LED patterns that appear during the process and compare them to the manual. If the device remains in repair mode, ensure there was no ongoing firmware update or partial power loss during exit. When in doubt, pause and seek guidance from a professional or the manufacturer’s support resources.
Aftercare: verifying normal operation
After exiting repair mode, verify normal operation by running a basic test cycle or startup sequence recommended by the manual. Confirm all indicator lights have returned to their standard state and that any previously disabled features function again. If problems persist, recheck settings, perform a safe restart, and consult the manufacturer or Home Repair Guide for further troubleshooting tips.
When to call a professional
If exit attempts fail or you notice unusual behavior after leaving repair mode, contact a qualified technician. Repair mode indicators may mask underlying hardware faults that require specialized diagnostic tools. The Home Repair Guide team recommends professional evaluation when safety concerns arise or when you lack model-specific exit instructions.
Tools & Materials
- Owner's manual / device manual(Check the exact exit sequence for your model)
- Power source disconnected(Unplug or disconnect power before starting)
- Flat-head screwdriver(For access panels if needed (follow safety))
- Phillips screwdriver(Optional if cover screws are present)
- Multimeter (optional)(Use only if trained and required by the manual)
- Notebook and pen(Record codes or steps)
- Clean, dry workspace(Keep area safe and free of liquids)
Steps
Estimated time: 15-20 minutes
- 1
Identify repair mode controls
Open the device interface and locate the service or maintenance menu. If no on-screen option exists, proceed to hardware-based exit steps only if documented in the manual.
Tip: If you’re unsure where the option is, consult the manual or Home Repair Guide. - 2
Power down safely
Disconnect power from the device and wait for any stored energy to dissipate. This reduces the risk of shocks or damage during the exit process.
Tip: Always assume capacitors may hold a charge and handle with care. - 3
Select exit option
In the service menu, choose the option that exits repair mode or returns the device to normal operation. Confirm the selection if prompted by the interface.
Tip: If the option is not clearly labeled, refer to the manual; do not improvise. - 4
Power cycle the device
Reconnect power and perform a full power cycle to ensure the system resets and completes the transition out of repair mode.
Tip: Avoid partial power resets; a full cycle reduces the chance of lingering diagnostics. - 5
Verify normal operation
Run a basic startup test or diagnostic routine per the manual and observe indicators for standard operation.
Tip: Document any errors displayed during startup for troubleshooting. - 6
Record results
Note the exit path used, codes observed, and the device status after reboot for future reference.
Tip: Keeping a log helps if you need to contact support later.
FAQ
What is repair mode
Repair mode is a service state used by technicians to diagnose issues without normal user access. Exiting it should return the device to normal operation.
Repair mode is a service state used for diagnostics; exiting it returns the device to normal operation.
Is it safe to turn off repair mode myself
Yes, when you follow the manufacturer’s documented exit path and safety steps. If unsure, contact a technician.
Yes, if you follow the documented steps; otherwise, contact a technician.
What if exit fails
If exit attempts fail, stop and consult the manual or manufacturer support to avoid damaging the device.
If exit fails, consult the manual or support to prevent damage.
Can factory reset help exit repair mode
A factory reset may exit repair mode on some devices but can erase user settings. Only use if the manual allows it.
A factory reset might exit repair mode on some devices, but it can erase data, so follow the manual.
When should I call a professional
If you are uncomfortable or the device remains stuck after the steps, a qualified technician should assess it.
If you’re unsure or it stays stuck, call a professional.
What should I check after exiting repair mode
Ensure normal startup, verify features work, and monitor for any recurring error codes during initial operation.
Check startup, test features, and watch for errors during early use.
Is repair mode the same across devices
No, exit methods vary by model. Always follow the model-specific manual or official support resources.
Exit methods differ by model; use the model manual or support resources.
Watch Video
Key Takeaways
- Exit repair mode only after verifying normal operation.
- Power cycle after exiting repair mode to ensure a full reset.
- Use the official manual or Home Repair Guide for model-specific steps.