How to Fix Repair Loop on Windows 10: Step-by-Step Guide
Learn to fix the Windows 10 repair loop with a safe guide from Home Repair Guide. This article covers causes, diagnostics, and practical fixes you can perform to restore stability without data loss.

Goal: stop the Windows 10 repair loop by safely diagnosing startup issues, repairing system files, and restoring stability. Before you begin, back up your data and ensure your device is plugged in. According to Home Repair Guide, this guide walks you through a clear, step-by-step approach with practical checks and safe fixes.
Understanding the Repair Loop on Windows 10
A repair loop is when Windows restarts or loads a recovery environment repeatedly instead of completing the boot. This behavior is typically caused by corrupted system files, incomplete updates, driver conflicts, disk errors, or a damaged Windows component store. According to Home Repair Guide, repair loops commonly stem from failed updates or corrupted boot configuration data (BCD). If you see the 'Preparing Automatic Repair' screen, or Windows keeps showing the 'diagnosing your PC' message, you're likely dealing with a loop. The good news is most loops can be fixed without a full reinstall, using a series of safe checks and repairs. Start by ensuring your data is backed up, then move through a structured sequence of diagnostics and repairs. The goal is to restore a healthy boot path while preserving your files wherever possible.
This block expands on the common causes of repair loops, including corrupted system files after failed updates, misconfigured boot records, disk errors, and driver conflicts. It also clarifies what not to do — avoid rushing into a full reinstall before exhausting safer, reversible options. Home Repair Guide emphasizes planning, data protection, and incremental fixes to maximize your chance of a successful repair without losing personal data.
For readers, this section helps you identify symptoms that indicate a loop: endless reboot cycles, the 'Please wait' screen that never finishes, or repeated boot to recovery. It also notes that some hardware issues can mimic software loops, such as failing hard drives or dying SSDs. In those cases, hardware checks become essential, and you may need to substitute or repair components after backing up data.
Tools & Materials
- External backup drive(At least 256 GB; use for full data backup before changes)
- Windows installation USB drive(Prepare via Media Creation Tool; used for recovery/repair options)
- Stable power supply / UPS(Keep PC powered during troubleshooting to avoid corruption)
- Screwdriver set (Phillips & Torx)(Optional for accessing internal components if needed)
- Internet-enabled device(For downloading updates or recovery tools if needed)
Steps
Estimated time: 60-180 minutes
- 1
Back up your data
Before touching system files, create a full backup of personal data to an external drive. Verify that you can access and restore at least a few sample files to confirm backup integrity. This protects you against accidental data loss if the repair process goes wrong.
Tip: Test restore of a file from the backup to confirm it's usable. - 2
Boot to Windows Recovery Environment
Power on the PC and access the Windows Recovery Environment via Shift + Restart or by booting from the installation USB and selecting Repair your computer. This environment provides tools for system repair without loading Windows.
Tip: If you can't access recovery, ensure the USB drive is set as the first boot device in BIOS. - 3
Run System File Checker (SFC)
In the Recovery Command Prompt, run sfc /scannow to scan and repair corrupted system files. If SFC finds issues but cannot fix all, proceed to DISM for further repair.
Tip: Do not interrupt the scan; it can take up to 15-30 minutes depending on your drive speed. - 4
Run DISM to repair the Windows image
Execute DISM /Online /Cleanup-Image /RestoreHealth to repair the Windows image. This step fixes component store corruption that SFC cannot handle alone.
Tip: Ensure you have a working internet connection; DISM may download repair files. - 5
Check the disk for errors
Run chkdsk /f /r C: to identify and fix disk errors that could cause boot problems. You may need to restart to complete the check.
Tip: If CHKDSK reports bad sectors, consider replacing the drive or recovering data to a new disk. - 6
Try Startup Repair or Reset this PC
From the Recovery Environment, use Startup Repair to fix boot issues or choose Reset this PC to reinstall Windows while preserving files (if available).
Tip: If you choose Reset this PC, select the option to keep your files when possible; this minimizes data loss.
FAQ
What is a repair loop in Windows 10?
A repair loop occurs when Windows repeatedly restarts into recovery mode instead of booting normally. It is usually caused by corrupted system files, update issues, or boot configuration problems. Most loops can be fixed with guided repairs rather than a full reinstall.
A Windows 10 repair loop is when the system keeps going into recovery mode instead of loading. It’s usually repairable with safe fixes, not a full reinstall.
Can I fix the repair loop without reinstalling Windows?
Yes. Start with backups, then run SFC and DISM to repair files, use Startup Repair, and consider a Reset This PC if needed. A repair install (in-place upgrade) can preserve files in many cases.
Yes. Start with backups, run SFC and DISM, use Startup Repair, and consider a Reset or repair install if needed.
What if SFC and DISM fail to fix the issue?
If standard repair tools fail, check disk health with CHKDSK, examine boot records (BCD), and use more advanced recovery options from the Windows Recovery Environment. In rare cases, a clean install may be necessary.
If SFC and DISM don’t fix it, check disk health and boot records, then try advanced recovery or a clean install as a last resort.
Is it safe to run CHKDSK on the C drive during a repair?
Yes, CHKDSK is a standard tool for detecting and repairing disk errors. Run it from the Recovery Environment. Ensure you’ve backed up data first, as repairs can affect files on the drive.
Yes. Run CHKDSK from Recovery Environment after backing up your data.
When should I consider a clean install?
If all repair attempts fail and Windows remains unstable, a clean install or a repair install (in-place upgrade) may be the best long-term solution. Back up data and prepare installation media beforehand.
If repairs fail, you might need a clean or repair install. Back up first.
Do I need internet during recovery?
Internet access is helpful for downloading repair components during DISM or when Windows Recovery Environment performs online repairs. Some steps work offline, but online fixes can improve success.
Internet helps for online repair components, but some steps work offline.
Watch Video
Key Takeaways
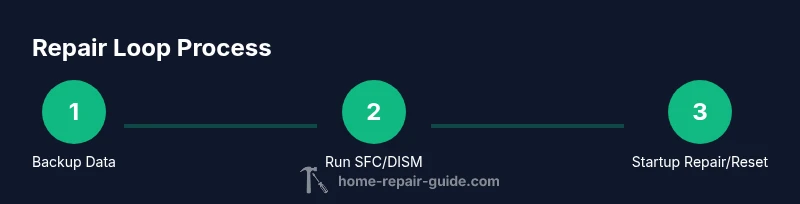
- Back up data before starting repairs
- Run SFC and DISM to repair system files
- Use Startup Repair or Reset This PC before reinstall
- Prevent loops with proactive maintenance and updates