Deck Repair Near Me: Practical DIY Guide for Homeowners
Find reliable deck repair near me services and learn a practical, safe approach to fixing rot, loose boards, and railing issues. This guide covers assessment, planning, tools, steps, and maintenance to extend deck life.

Discover how to locate reliable deck repair near me options and perform safe, durable fixes for rot, loose boards, and railing problems. This guide covers when to repair versus replace, essential tools, a practical step-by-step plan, and cost considerations. By following these steps, homeowners can extend a deck’s life and maintain outdoor living spaces.
Why deck repair matters
A sturdy deck is more than curb appeal; it’s an outdoor living space that bears weather, sun, and regular use. When boards warp, nails pop, or rail posts loosen, safety and usability diminish quickly. If you search for deck repair near me, you want a mix of reliability, quality workmanship, and durability. According to Home Repair Guide, proactive maintenance saves money by preventing catastrophic failures and expensive replacement later. Start with a simple visual sweep of boards, fasteners, posts, and flashing, then test boards with a screwdriver to gauge firmness. Weather exposure accelerates deterioration, so timely repairs protect your family and investment. Document issues with photos and notes to track progress and plan the next maintenance cycle. A well-maintained deck not only lasts longer but also preserves outdoor living time for your family. Remember to compare several options, verify licenses, and check recent customer feedback before booking a contractor.
When to repair vs. replace
Not every deck problem requires a full replacement. Minor issues such as a few warped boards, superficial rot in non-structural boards, or loose fasteners can often be repaired. If damage spans multiple joists, posts, or the ledger board, or if there are signs of framing rot or water intrusion, replacing sections or the entire structure may be more cost-effective and safer in the long run. Age matters: most wood decks show wear after 15–25 years, depending on climate, maintenance, and materials. Local codes may require upgrading flashing or adding protective coatings when you repair. For renters, obtain landlord approval and ensure repairs comply with lease terms. Home Repair Guide recommends staging repairs: stabilize the structure first, then replace compromised parts, and finally seal and protect the surface to resist moisture. If you’re unsure, a professional inspection can determine whether repair or replacement is the better path.
Assessing common deck issues
Typical problems include wood rot in joists or ledger boards, cupped or cracked boards, loose or corroded fasteners, and water damage to fascia or railing posts. Rot often starts where flashing is weak or where boards meet the ledger, spreading behind paint or stain. Test for rot by probing with a screwdriver and looking for soft, crumbly wood. Railings should feel solid with no wobble; any vertical movement signals a safety concern. Metal connectors and screws are prone to rust where moisture collects, especially near the ledger and footings. Water intrusion around footings can undermine the deck’s foundation, so check drainage and ensure proper slope away from the house. A thorough assessment includes removing selected boards to inspect framing, documenting findings, and prioritizing repairs by safety impact and repair effort. Home Repair Guide emphasizes recording all changes for future maintenance.
Tools, materials, and safety considerations
Before you begin, assemble essential tools and safety gear. You’ll likely need a pry bar, hammer, circular saw, drill with driver bits, reciprocating saw, measuring tape, level, square, and clamps for holding boards during cuts. For fasteners, use corrosion-resistant deck screws or stainless steel screws suitable for your wood species. Replacement boards should match existing materials; you may also need joist hangers, flashing, and ledger repair hardware. Materials vary by wood type: pressure-treated pine, cedar, redwood, or tropical hardwoods each require different sealants and finishes. Safety first: wear eye protection, gloves, hearing protection, and a dust mask when cutting or sanding. Keep your work area clear of trip hazards and protect nearby plants and surfaces. If you encounter structural damage, consult a professional rather than attempting risky repairs on your own.
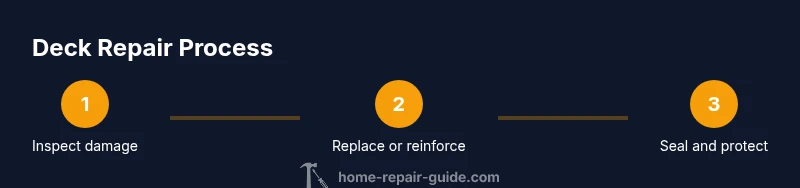
A practical, step-by-step repair plan
A disciplined approach keeps repairs organized and safe. Start with a clear plan: inspect, stabilize, replace, and finish. Create a budget and timeline that fits your climate and deck design. Prepare the site by clearing furniture and testing for movement. Use appropriate fasteners and flashing to secure joints, replacing rot-worthy joists or ledger boards as needed. Reinstall surface boards with correct spacing to accommodate wood expansion, then seal or stain to protect against moisture and UV exposure. Finally, recheck the structure after a rain event to confirm drainage works as intended. Home Repair Guide stresses patience and accuracy over speed; a methodical repair yields better longevity than rushed fixes. Keep safety gear within reach, and never climb on a deck that feels unsafe before repairs are complete.
Cost considerations and budgeting
Costs for deck repairs vary based on material, extent of damage, and local labor rates. Expect to pay more when structural components—joists, posts, or the ledger—need replacement or reinforcement. Material choices affect price: pressure-treated wood is generally cheaper than premium hardwoods or composite surfaces, and fasteners or flashing add to the bill. Labor costs depend on accessibility, height, and whether you hire a contractor or do it yourself with assistance. The most economical approach often involves addressing rot and loose boards early, replacing only what’s necessary, and preserving as much of the original deck as possible. Home Repair Guide recommends comparing bids, requesting written estimates, and including a contingency for unforeseen issues. Rather than focusing on a single price, build a realistic budget that covers materials, permits if required, and a safe contingency buffer.
Maintenance to extend deck life
Ongoing maintenance is the best defense against costly repairs. Schedule seasonal inspections to catch warping, loose nails, or water intrusion before they escalate. Clean the deck with mild soap and water, avoid high-pressure washing that can damage wood fibers, and reapply sealant or stain according to the product’s directions. Address drainage problems, clear gutters, and ensure proper sun exposure and airflow under the deck. When you notice new cracks or swelling, address them promptly with targeted repairs. If you have a painted surface, refresh the finish every few years to maintain moisture resistance. For added protection, consider installing protective skirting or drainage improvements to reduce standing water under the deck. Regular upkeep preserves safety, durability, and value over time, and it helps your deck stay inviting for outdoor living.
AUTHORITY SOURCES
For reliability and safety guidance, consult trusted sources:
- https://extension.illinois.edu
- https://extension.umn.edu
- https://www.osha.gov
These resources offer general best practices for outdoor wood structures, working at height, and personal safety when performing repairs. Always verify local building codes and permit requirements before beginning major work. Home Repair Guide references these sources to reinforce safe, durable repair strategies for decks.
Tools & Materials
- Pry bar(For lifting boards and prying staples)
- Hammer(Claw hammer for nails and fasteners)
- Circular saw(For cutting replacement boards)
- Reciprocating saw(Useful for cutting through rotted sections)
- Drill with driver bits(For driving screws and making pilot holes)
- Measuring tape(Accurate sectioning and layout)
- Level and square(Keep surfaces true and aligned)
- Deck screws (stainless or coated)(Corrosion-resistant and suited to wood type)
- Joist hangers and flashing(Upgrade flashing and hardware as needed)
- Replacement boards(Match wood species and thickness)
- Safety gear (gloves, goggles, mask)(Protect during cutting and sanding)
Steps
Estimated time: 6-12 hours
- 1
Inspect and secure the area
Walk the deck and note any soft spots, loose fasteners, and visible rot. Photograph problem areas and mark them for clarity. Ensure the structure is safe to work on by removing nearby furniture and closing off access to fall hazards.
Tip: Take photos from multiple angles so you can reference measurements later. - 2
Prepare and gather materials
Collect all tools and replacement components before starting. Set up a clean, dry workspace on the ground and protect vegetation or landscaping. Have a helper on hand for lifting heavy materials.
Tip: Pre-cut replacement boards to exact lengths to minimize on-site cutting. - 3
Remove damaged sections
Carefully lift and remove rotten boards or compromised joists using the pry bar and reciprocal saw if needed. Support surrounding framing to prevent further damage. Label parts that you remove for easy reassembly.
Tip: Save reusable pieces if they are in good condition and match the replacement material. - 4
Replace structural components
Install new joists or ledger boards with proper hangers and flashing where required. Align new pieces with the existing framing and ensure correct spacing. Secure all connections firmly to restore load paths.
Tip: Use corrosion-resistant fasteners and verify hangers are rated for outdoor use. - 5
Reattach surface boards
Return surface boards, maintain even spacing, and pre-drill to prevent splitting. Check for levelness and smooth any rough edges with a planer or sandpaper. Replace any boards that show signs of earlier damage.
Tip: Stagger joints for a stronger, longer-lasting deck surface. - 6
Seal, stain, and final inspection
Seal all new wood with a moisture-curing finish appropriate for your wood type. Apply stain or sealant evenly and follow the product’s drying times. Do a final safety check, test rail stability, and verify drainage to ensure no standing water remains.
Tip: Choose products with UV protection to extend color life and reduce splitting.
FAQ
How do I know if my deck needs to be replaced rather than repaired?
If structural components are severely damaged or there is widespread rot, replacement is often safer and more cost-effective in the long run. Consider age, material, and local codes when deciding. A professional inspection can confirm the best path.
Widespread structural rot or age-related decay usually means replacement is safer; a professional can confirm the best option.
What safety gear should I wear during deck repair?
Wear eye protection, gloves, a dust mask, and hearing protection when cutting or sanding. Use a stable ladder on level ground and have a helper nearby when working with heavy components.
Put on safety goggles, gloves, and a mask; have a helper and use a stable ladder.
Can I DIY deck repair, or should I hire a pro?
Simple repairs and replacements along non-structural parts can be DIY with careful planning. Structural repairs, ledgers, or posts near the house should be done by a professional to ensure safety and code compliance.
Small fixes you can do yourself, but structural work is better left to a pro.
What maintenance steps prevent future rot?
Keep wood dry, seal or stain every few years, and ensure proper drainage away from the house. Regular inspections after storms help catch issues early.
Keep it dry, seal it, and check after storms to catch problems early.
Are permits usually required for deck repairs?
Permit requirements vary by locality and project scope. Check your city or county building department for requirements before starting major repairs.
Local rules vary; check with your city before big repairs.
What are common materials for deck repairs?
Common options include pressure-treated lumber, cedar, and composite boards. Use corrosion-resistant fasteners and match thickness and width to existing boards.
Common options include pressure-treated wood and composites; match thickness and fasteners.
How long does a typical deck repair take?
Simple repairs can take a few hours; larger projects may take 1-2 days depending on access and weather.
Most small repairs finish in hours; bigger jobs may need a day or two.
Should I replace all surface boards at once?
Not necessarily. Replace only damaged boards to save cost and material. Full replacement is easier in some cases but should be planned with a contractor.
Replace damaged boards first unless a full refresh is planned.
Watch Video
Key Takeaways
- Assess safety before repairs and document damage.
- Choose corrosion-resistant materials for outdoor use.
- Staged repairs save time and improve longevity.
- Seal and maintain after repairs to extend deck life.
- Verify local codes and permit requirements before major work.