Do You Need to Tape Drywall Repair? A Practical Guide
Explore when drywall tape is necessary, how to choose paper or mesh tape, and a clear, step-by-step method to patch and finish drywall repairs that look seamless and last.

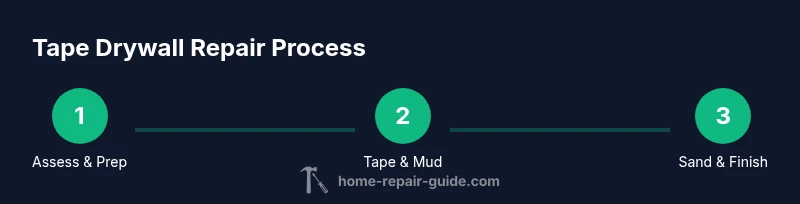
Do you need to tape drywall repair? According to Home Repair Guide, taping is usually required for holes larger than a pencil, exposed seams, and edge splits to prevent cracking. This quick answer outlines when to tape, what materials you need, and a clear, 6-step approach to a durable, paint-ready finish.
Do you need to tape drywall repair? A practical first question
Do you need to tape drywall repair? In most residential scenarios, yes, especially when a patch involves holes larger than a standard nail hole or when joints and seams are exposed. Tape provides a stable base that resists future cracking as the wall flexes with temperature and humidity changes. This quick reality is echoed by the Home Repair Guide team, which emphasizes that proper taping reduces telegraphed seams and helps the mud layer hold its shape over time. For repairs that only involve small cosmetic marks, tape is often optional, but choosing tape now can prevent future crack propagation and save time down the line. In this guide, you’ll learn how to decide when to tape, what materials to use, and a reliable step-by-step method to finish so the repaired area blends with the surrounding wall. The goal is a durable patch that accepts paint evenly and remains sturdy for years.
In doing drywall work, the question is not just if you tape but how you tape. The right approach minimizes texture mismatch and produces a seamless result that stands up to everyday wear and tear. Homeowners and renters who follow a consistent tape-and-mud process typically achieve better long-term durability than those who skip tape on larger repairs.
Tools & Materials
- Joint compound (all-purpose mud)(Pre-mixed or powder, mix to a smooth butter-like consistency)
- Paper drywall tape(Widens covered seam, embed firmly)
- Mesh drywall tape (alternative)(Fiberglass reinforced; easier for irregular patches)
- Drywall knife (6–8 inch)(For embedding tape and applying mud)
- Mud pan(Useful for neat mud loading)
- Sanding block or pole sander(Fine-grit sandpaper 120-220 grit)
- Drop cloths(Protect floors and furniture)
- Dust mask/respirator(Protect from fine dust)
- Safety goggles(Eye protection during sanding)
- Utility knife(Score wall material cleanly)
Steps
Estimated time: Total active time: 2-4 hours; plus 24 hours drying time between coats
- 1
Assess the damage and plan
Carefully inspect the hole or crack to determine size and whether any underlying material needs removal. If the surface is loose, chip away only what’s necessary to provide a clean edge for the repair. This planning stage prevents overworking the area and helps you choose the right tape type.
Tip: Mark dimensions and note whether the patch sits near a corner or between studs for edge support. - 2
Prepare the area and materials
Clear the work zone, lay drop cloths, and assemble mud, tape, and tools. Put on safety gear before starting. Having everything within reach reduces interruptions and helps you maintain consistent mud coverage.
Tip: Use a dedicated mud pan and keep extra cloths handy for wipe-downs. - 3
Apply tape over the repair
Cut an appropriate length of tape and position it over the damaged area. Press it from the center outward to avoid air bubbles, using a straight edge to smooth the surface as you embed the tape into a thin coat of mud.
Tip: If using mesh tape, gently press to activate the fibers before mud application. - 4
First coat of joint compound
Apply a thin coat of mud over the tape, extending 2–3 inches beyond the repair. Use long, smooth strokes to avoid ridges. Allow this coat to dry thoroughly before proceeding to the next step.
Tip: Keep the coat thin; thicker coats are prone to cracking as they dry. - 5
Second coat and feather
Spread a wider second coat to blend the seam into the surrounding wall. Feather the edges outward so the repair tapers into the wall texture. Let it dry, then lightly sand for a smooth transition.
Tip: A long, steady stroke creates an even surfaced patch. - 6
Final coat, sand, and finish
Apply a final thin coat if needed to perfect the surface. After full drying, sand with a fine grit, wipe away dust, prime, and paint to match the room. This last step makes the repair visually disappear.
Tip: Damp-sand to minimize dust and avoid dulling the finish.
FAQ
Do you need to tape drywall repair?
In most cases, tape is recommended for holes larger than a pencil, damaged seams, and where panels meet. It helps prevent cracking and creates a stable base for mud and finish.
Tape is usually recommended for larger holes and damaged seams to prevent cracking.
What is the difference between paper and mesh drywall tape?
Paper tape is classic and works well with traditional mud; mesh tape is fiberglass reinforced and can be easier to apply in corners or uneven patches. Both require mud to secure and hide joints.
Paper is traditional; mesh is fiberglass-reinforced and can be easier for irregular patches.
Can you skip taping for small holes?
Very small nail pops or pinholes may be repaired with quick mud layers without tape, but taping is often safer for cracks or seams and yields a longer-lasting repair.
Small holes might not need tape, but tape is safer for cracks or seams.
How long does mud take to dry between coats?
Drying times depend on temperature and humidity. Plan for at least several hours between coats, and overnight if conditions are cool or damp.
Mud drying can take several hours; plan for overnight if needed.
What should I do if tape wrinkles or beads?
If tape wrinkles, remove and reapply, pressing firmly with a straightedge to smooth. Irregular patches will telegraph through paint.
If tape wrinkles, reseat it with a straightedge to smooth it out.
Are there alternatives to taping?
For very small patches, you can sometimes skim with mud alone, but tape generally provides a stronger, longer-lasting repair, especially on seams or textured walls.
For small patches you might skip tape, but tape is usually better for durability.
Watch Video
Key Takeaways
- Tape improves crack resistance on repairs.
- Choose tape type based on seam condition and patch size.
- Plan drying times between coats to prevent finish issues.
- Feather edges to minimize visible patches.