Gas Dryer Repair: A Homeowner's Step-by-Step Guide
Learn safe, practical gas dryer repair techniques for common faults, from ignition issues to vent blockages. This step-by-step guide from Home Repair Guide covers diagnosis, essential tools, maintenance, and safety, helping homeowners fix issues and avoid costly service calls.

By the end of this guide, you’ll be able to diagnose and safely repair common gas dryer issues at home, from ignition problems to vent blockages. You’ll learn essential safety steps, required tools, and a proven process that helps you avoid unnecessary service calls. This Home Repair Guide tutorial emphasizes practical, non-destructive fixes you can perform with confidence.
Why Gas Dryer Repair Matters
Gas dryers offer reliable heat and fast drying times, but failures can disrupt daily life and create safety risks if not handled correctly. According to Home Repair Guide, understanding how a gas-powered appliance functions helps homeowners prioritize safety and efficiency. The most important reasons to repair rather than replace are energy savings, reduced downtime, and extending the life of your appliance. This section outlines why timely, correct fixes matter for homeowners and renters alike, and how a well-maintained gas dryer contributes to a safer, more comfortable home environment. In addition, investing a little time now to diagnose issues can prevent bigger problems later, such as brittle venting or gas leaks that require professional intervention. Remember: safe handling and following model-specific instructions are essential. Home Repair Guide’s analysis shows that many common problems stem from clogged vents, faulty igniters, and worn sensors, which are often inexpensive to address when caught early.
Safety First When Working on Gas Dryers
Safety around gas appliances is non-negotiable. Before you touch any components, shut off the gas supply at the appliance shut-off valve and disconnect the dryer from electrical power. Ventilate the area well to avoid accumulating exhaust gases, and never operate a dryer if you smell gas or hear hissing sounds. Use a non-contact voltage tester to confirm the outlet is de-energized before opening access panels. Keep a detector nearby and have emergency numbers handy. As always, if you’re ever unsure, pause the work and contact a licensed professional. This approach minimizes risk and aligns with best practices from Home Repair Guide and safety-focused resources.
Common Gas Dryer Problems and Symptoms
Gas dryers can fail for a variety of reasons, and recognizing symptoms early helps you act quickly. Typical issues include a unit that won’t ignite or heat, odd odors, or a loud rumbling sound during operation. A weak or flickering flame may indicate a dirty flame sensor or a clogged burner, while persistent vent restrictions reduce drying efficiency and increase cycle times. Pay attention to error codes on the control panel and any gas smell; both are signals to stop and investigate further. By identifying the symptom accurately, you narrow down the likely causes—ranging from ignition components to vent system blockages—and avoid unnecessary disassembly.
Diagnostic Approach: Start with the Basics
A structured diagnostic approach saves time and reduces the risk of damage. Start with simple checks: ensure the outlet provides power, the circuit breaker is intact, and the gas shut-off valve is fully open. Inspect the venting path for obstructions, lint, or crushed ducts, and confirm the drum turns freely. Next, verify basic safety devices such as the high-limit thermostat and the flame sensor, since failures here can stop ignition or heat. Keep a log of symptoms, test results, and any noises or smells; this helps you communicate clearly with a professional if needed. This systematic method is recommended by Home Repair Guide for reliable results.
Tools and Safety Gear You'll Need
Before you dive into tasks that touch gas or electricity, assemble the proper tools and safety gear. A well-prepared toolbox reduces frustration and increases safety. Essentials include a gas shut-off wrench, a set of screwdrivers (flathead and Phillips), nut drivers, adjustable wrench, pliers, a multimeter, a non-contact voltage tester, and a gas leak detector or combustible gas detector. Add a flashlight, a vacuum with a narrow nozzle for vent detritus, and safety glasses plus gloves. Replacement parts such as igniters, flame sensors, thermostats, or gas valve coils should only be used if you’ve confirmed they match your model. This section emphasizes preparedness and safety, which are critical for any gas appliance repair.
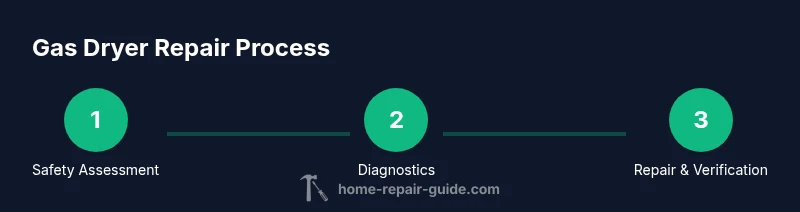
Step-by-Step Repair Process (Overview)
This section provides an overview of the repair process and is followed by a detailed, step-by-step guide. Start with safety: shut off gas and power, then verify the absence of gas before opening access panels. Identify the affected system: ignition, flame sensor, thermostat, or vent. Use the diagnostic results to decide whether you can safely replace a component or if the issue requires a professional service. Stay mindful of your model’s wiring diagrams and part numbers, and document every action to help future maintenance or warranty work. The overview is designed to help you decide if the problem is user-serviceable or requires a licensed technician.
Testing and Verifying Safety After Repair
After completing repairs, reassemble components securely and restore power and gas connections. Recheck the vent path for any obstructions and ensure there are no gas odors before a test run. Run the dryer on a short cycle to observe ignition, flame stability, and heat output. If you detect any gas smell, unusual noise, or weak heat, immediately power down and consult a professional. Confirm that safety devices, such as the flame sensor and thermostat, operate within typical parameters. This verification phase is essential to ensure you’ve achieved a safe, functional repair.
Maintenance to Prevent Gas Dryer Issues
Regular maintenance keeps a gas dryer running efficiently and safely. Clean the lint screen after every use, inspect and clear the vent duct periodically, and check for kinks or crushed sections in the exhaust path. Schedule a professional inspection every 1-2 years to assess gas connections, seals, and ignition components. Use high-efficiency settings where appropriate to reduce wear, and keep the area around the dryer free of flammable materials. Ongoing maintenance reduces the likelihood of sudden breakdowns and helps extend the appliance’s life.
When to Call a Licensed Technician
There are situations where professional help is the safest option. If you detect a gas smell that persists after turning off the valve, experience any gas ignition failure, suspect a faulty gas valve, or cannot locate the root cause from basic diagnostics, contact a licensed technician immediately. A professional can safely handle gas line work, perform leak testing, and verify vent integrity beyond what a typical homeowner should attempt. Trust your instincts—safety comes first when working with gas appliances.
Common Mistakes to Avoid
Avoid air-frying through guesses or skipping safety steps. Do not operate the appliance with missing panels or exposed wiring, and never try to bypass safety devices to force ignition. Misdiagnosing vent restrictions or igniter failures can lead to a longer-term problem or a recurrent hazard. Always verify model-specific instructions, use genuine parts, and keep a detailed repair log. A cautious, measured approach minimizes risk and yields the most reliable results.
Authority Sources
- https://www.energy.gov/eere/buildings/articles/energy-star-appliance-dryer
- https://www.osha.gov/sites/default/files/publications/OSHA3753.pdf
- https://www.cpsc.gov/safety-guides/home-appliances
Tools & Materials
- Gas shut-off wrench(Isolate the gas supply at the appliance shut-off valve before any work.)
- Flathead screwdriver(Access panels and fasteners.)
- Phillips screwdriver(Consistent with typical dryer hardware.)
- Nut drivers set(Helpful for various fasteners on burners and panels.)
- Adjustable wrench(Useful for gas lines and fittings.)
- Multimeter(Test electrical components and igniter circuits.)
- Non-contact voltage tester(Confirm power is off before touching wires.)
- Combustible gas detector / leak detector(Check for leaks around connections and valves.)
- Safety gear (gloves, safety glasses)(Protect hands and eyes during repair.)
- Vacuum with narrow nozzle(Clean lint and debris from vents and burner area.)
- Replacement parts (igniter, flame sensor, thermostat, or gas valve coil)(Model-specific—verify part numbers against your unit.)
Steps
Estimated time: 60-120 minutes
- 1
Shut off gas and power
Locate the gas shut-off valve on the dryer or nearby gas line and turn to the off position. Unplug the dryer from the wall outlet to ensure there is no electrical power. This dual isolation prevents sparks and gas leaks while you work.
Tip: Double-check that both gas and electrical sources are completely isolated before proceeding. - 2
Check for gas odors and air flow
With the appliance still isolated, sniff near the exhaust and around the valve for any gas odor. If you detect gas, evacuate and call emergency services. Do not attempt to test ignition while a gas odor is present.
Tip: If safe to proceed, use a gas detector to confirm absence of leaks before re-entering the area. - 3
Inspect vent and lint path
Visually inspect the vent and exhaust duct for blockages, kinks, or crushed sections. A restricted vent reduces airflow, causing overheating and poor drying performance. Clear any debris with a soft brush and safe vacuums.
Tip: Never use a metal rod to poke into ducts—this can damage the vent and create hazards. - 4
Access ignition and burner area
Remove access panels to reach the ignition assembly and burner. Confirm there is no fuel source or open flame exposure during this step. Use the flashlight to inspect for obvious damage or wear.
Tip: Keep flammable materials away and handle parts gently to avoid additional damage. - 5
Test ignition components
With power off, use a multimeter to check the igniter resistance and flame sensor circuit. Replace a worn igniter or a faulty flame sensor if readings are outside the manufacturer’s spec. Reconnect only after confirming safe electrical readings.
Tip: Always refer to your model’s service manual for exact resistance values. - 6
Inspect gas valve and burner assembly
Look for signs of wear or debris on valve coils or the burner. If you observe burnt connections or corrosion, replacement parts may be necessary. Do not force connections or bypass safety devices.
Tip: Corrosion or scorch marks indicate a component that should be replaced rather than reused. - 7
Replace faulty components
If you identified a defective igniter, flame sensor, thermostat, or valve coil, install the correct replacement part per the model’s manual. Secure all screws and connections firmly, then recheck clearances.
Tip: Use genuine parts recommended for your model; mismatched parts can cause unsafe operation. - 8
Reassemble and reconnect gas and power
Carefully reassemble panels, reconnect the gas line, then power the unit back on. Do not force connections; ensure there are no leaks and the area is dry before testing.
Tip: Perform a brief visual inspection for any loose wires or gas lines before powering up. - 9
Run a test cycle
Run a short dry cycle to verify ignition, flame stability, and heating. Listen for ignition spark and confirm the burner stays on for the entire cycle. If issues persist, shut down and re-evaluate or call a pro.
Tip: Monitor for unusual smells or smoke during the test; stop immediately if detected. - 10
Verify vent and safety systems post-run
After testing, inspect the vent again and confirm no gas odors. Check that the dryer's safety devices function properly, including the high-limit thermostat and flame sensor. Document the repair for future reference.
Tip: Keep a record of part numbers and service steps for warranty coverage. - 11
Final safety check and secure restoration
Ensure all access panels are secured, the area is clean, and the gas valve remains off until you’re ready for normal use. Re-check for any leaks after several minutes of operation, and only use the dryer if it passes all safety checks.
Tip: If you’re unsure at any point, pause the repair and seek professional help. - 12
Plan future maintenance
Schedule routine vent cleaning, lint trap checks, and annual professional inspections to keep the gas dryer safe and efficient. A proactive maintenance plan minimizes emergency repairs and extends appliance life.
Tip: Set reminders for yearly inspections and vent cleaning in a home maintenance calendar.
FAQ
Is it safe to attempt gas dryer repair myself?
Gas appliances carry risks of leaks and fire. If you smell gas or cannot identify the root cause from basic diagnostics, do not proceed—call a licensed technician. For straightforward tasks like cleaning vents or replacing a non-gas component, proceed with caution and follow safety guidelines.
DIY can be safe for simple vent cleaning or non-gas parts, but never ignore gas smells; call a pro immediately.
What are the most common gas dryer problems?
Ignition failures, clogged vents, faulty flame sensors, and malfunctioning thermostats are among the most frequent issues. Correctly diagnosing which part is at fault reduces guesswork and prevents unnecessary replacements.
Most issues involve ignition, venting, sensors, or thermostats. Accurate diagnosis saves time and money.
Do I need special tools to repair a gas dryer?
Basic hand tools, a multimeter, a gas detector, and safety gear cover many repairs. Specific model parts may require a model-specific tool or a professional welder if gas connections are involved.
You’ll use common tools and a gas detector; some repairs may need a pro.
When should I replace a gas dryer vs calling a pro?
If ignition, gas valve, or burner coil shows signs of significant wear, or you’re unsure about a persistent leak, it’s safer to call a licensed technician. Serious gas line concerns demand professional handling.
If gas issues persist or you’re unsure, call a licensed technician.
Can a clogged vent cause a gas dryer to stop heating?
Yes. A blocked vent can reduce airflow, causing longer drying times and reduced heat. Regular vent cleaning improves efficiency and safety.
A blocked vent can prevent proper heating; clean it regularly.
What maintenance helps prevent gas dryer failures?
Regular vent inspection, lint filter cleaning, and annual professional checks on gas connections help prevent failures. Keeping a maintenance schedule reduces unexpected downtime.
Keep vents clean and schedule annual checks.
Watch Video
Key Takeaways
- Identify safety priorities before any repair.
- Vent cleanliness and safe gas handling are critical.
- Use model-specific parts and verify with manuals.
- Test cycles confirm successful ignition and heating.
- Regular maintenance prevents costly breakdowns.