GE Dryer Repair Guide: Step-by-Step Home Fix
Learn how to diagnose and safely repair GE dryers with practical, step-by-step instructions. This Home Repair Guide tutorial covers common issues, safety checks, essential tools, and when to contact a pro for reliable results.

If you’re tackling dryer repair ge, the goal is a safe, accurate diagnosis and a repair plan you can complete with common tools. This quick answer outlines safety steps, what to test, and when to replace parts. You’ll unplug the unit, inspect belts and fuses, verify door switches, and decide whether a DIY fix is feasible or if a professional is needed.
Understanding GE Dryers: How They Work
For homeowners facing dryer repair ge, understanding the basic layout of a GE clothes dryer helps you trace faults quickly. GE dryers use a drum driven by a belt, heated air circulated by a blower, and sensors or a control board to govern cycles. Heating can be electric coils or a gas burner, depending on the model. A failed drum belt, a blown thermal fuse, a faulty door switch, or a worn roller can all stop heating, tumbling, or sensing moisture. This section lays the groundwork so you can map symptoms to likely culprits without guessing. According to Home Repair Guide, recognizing whether your dryer is electric or gas will determine which safety checks and parts you can safely test. Keep safety paramount and avoid opening energized components. The more you know about the common GE dryer architecture, the smoother your diagnosis will be and the quicker you’ll reach a durable, long-lasting fix.
Common GE Dryer Issues and Symptoms
GE dryers present a few telltale symptoms that point to specific components. If the unit runs but does not heat, the heating element (electric models), gas valve, or thermal fuse may be at fault. If the drum doesn’t rotate, the belt, idler pulley, or motor could be worn or stuck. If clothes come out damp or unevenly dried, vent restrictions or moisture sensor issues are often to blame. Noisy operation can indicate worn drum rollers or a failing support bearing. When you begin dryer repair ge, start with a visual check for obvious damage, listen for unusual sounds, and note any odor, such as a burnt smell, which can signal electrical issues. A structured approach helps prevent unnecessary part replacements and keeps you focused on the root cause.
The Essential Tools and Safety Gear
Before you dive into any repair, assemble the right tools and PPE. You’ll need a basic hand tool set (Phillips and flathead screwdrivers, nut drivers, and possibly a Torx set), a multimeter for electrical checks, a replacement drive belt, and safety gear like insulated gloves and safety glasses. A vacuum or lint brush is handy for cleaning the vent and blower housing. Keep a labeled tray for screws and fasteners to avoid mix-ups. For any task that involves accessing live electrical components, ensure the dryer is unplugged and, if applicable, the house circuit is powered down. Good lighting and a clean, organized workspace reduce mistakes and speed up repairs. Remember, proper tools save time and protect you from injury during dryer repair ge.
Practical Diagnostic Checklist for GE Dryers
A practical diagnostic checklist keeps you focused on testing the right components. Start with safety: unplug the unit, inspect the vent for blockages, and confirm that the lint trap is clean. Check whether the drum tumbles freely by hand with the belt removed; a stuck drum often points to worn rollers or a seized idler pulley. Use your multimeter to test the thermal fuse for continuity and verify the heating element or gas burner (for gas models) are functioning. Inspect the door switch and switch plunger for proper operation, as a faulty switch can prevent cycles from starting. Finally, confirm the control board or timer is sending the correct signals to energize the heating element and motor. This methodical approach reduces guesswork and improves the odds of a successful dryer repair ge.
Step-By-Step Overview: What to Expect in a GE Dryer Repair
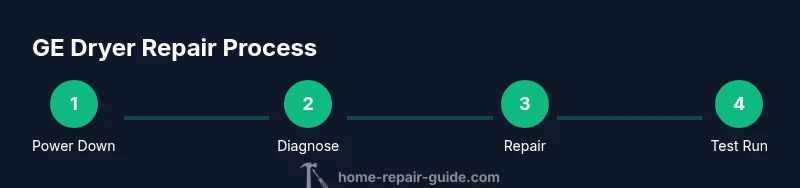
The following overview explains the typical sequence of actions you’ll perform during a GE dryer repair without diving into model-specific wiring diagrams. Expect to safely power down the machine, access the internal components (rear or front panel depending on model), test essential parts (belt, fuse, heating element, motor, and door switch), replace worn parts if needed, and reassemble for a test run. If your tests reveal a failed component that is not easily sourced or replaced, prepare to plan for a professional service visit. This section reinforces how the pieces fit together so you can decide whether a DIY fix is realistic for your situation.
Maintenance and Safe Operating Practices After Repair
Even after a successful repair, a short maintenance routine helps extend the life of your GE dryer. Clean the lint trap after every use and inspect the venting path for blockages, ensuring a clear path to the outdoors. Periodically check the belt tension and listen for unusual noises indicating worn bearings or rollers. Schedule a brief inspection every few months, especially if your dryer is older or heavily used. Keep a small inventory of common replacement parts (belt, thermal fuse, door switch) so you can respond quickly to minor failures. Finally, document the repair steps and any part changes for future reference. Regular maintenance reduces the likelihood of unexpected breakdowns and keeps your laundry routine running smoothly.
Tools & Materials
- Flathead screwdriver(Assorted sizes; for general panels)
- Phillips screwdriver(For most screws on panels)
- Nut driver set(Metric/standard sizes)
- Torx bit set(Some GE models use Torx screws)
- Multimeter(Check continuity and resistance)
- Replacement drive belt(Flat belt; verify length and width)
- Thermal fuse (replacement)(Use only if testing shows failure)
- Replacement heating element (if electric model)(Only if open circuit is detected)
- Replacement door switch(For a sticky or non-responsive door switch)
- Work gloves(Heat and sharp edges protection)
- Vacuum or lint brush(Clean lint and dust from ducts and blower housing)
Steps
Estimated time: 30-45 minutes
- 1
Unplug and prepare
Disconnect the dryer from the power source and move it to a clear area. Verify there are no energy sources feeding the machine. This prevents electric shock and accidental startup during inspection.
Tip: Take a photo of any wire connections before disconnecting harnesses. - 2
Access the belt and drum area
Remove the dryer’s access panel (rear or front, depending on model) to reach the belt and drum. Carefully inspect for visible wear and clear vent paths of lint buildup that can affect performance.
Tip: Label screws in a tray so you can reassemble quickly. - 3
Inspect the drive belt and idlers
Check the belt for cracks, fraying, or glazing. If the belt is worn, replace it and test tension after reassembly. A broken belt will stop the drum from turning.
Tip: Do not stretch the belt during installation; align grooves with pulleys. - 4
Test the thermal fuse and heating path
With the dryer unplugged, test the thermal fuse for continuity. If it’s open, replace it. For electric models, inspect the heating element for breaks or short circuits.
Tip: Handle heating elements with care; they stay hot when the unit is on. - 5
Check door switch and control signals
Inspect the door switch for correct operation and verify that the control board is sending power to the heater and motor. Loose connectors can mimic more serious failures.
Tip: Gently wiggle connectors to identify loose contacts. - 6
Reassemble and run a test cycle
Reinstall all panels, reconnect power, and run a short test cycle to confirm normal heating and tumbling. Observe for unusual noises or smells.
Tip: Run a short cycle first to verify basic operation before a full load test.
FAQ
Is it safe to repair a GE dryer myself?
DIY repairs can be safe for simple tasks when the unit is unplugged and you follow proper procedures. Reserve more complex electrical or gas-related work for a professional.
DIY repairs can be safe if you unplug the dryer and follow proper steps; otherwise call a pro for complex work.
Why isn't my GE dryer heating even though it runs?
No heat usually points to the heating element or thermal fuse (electric) or gas valve assembly (gas models). Inspect these parts and test with a multimeter, while also checking the vent for blockages.
If it runs but doesn't heat, check the heating element or fuse and the vent for blockages.
What if the drum won’t turn?
A worn belt, a seized idler pulley, or a failing motor are common causes. Inspect belt tension and pulley movement, and listen for motor noises during a test run.
If the drum won’t turn, inspect the belt and motor condition and test the motor for proper operation.
How do I know when to replace instead of repair?
If multiple major components fail or the repair cost approaches the price of a new unit, replacement may be more economical. Consider age, repair history, and energy efficiency.
If many parts fail or repair costs grow, replacement might be more economical.
Do I need special tools for GE dryer repair?
Most repairs require common hand tools and a multimeter. Some models may use Torx screws or specific belt sizes, so check your model’s manual or service sheet.
Usually you’ll need basic tools and a multimeter; some models use specific screws.
Where can I find genuine GE parts?
Genuine GE parts are available through GE’s official parts portal or authorized retailers. Verify the model number before ordering to ensure compatibility.
Check GE’s official parts portal or authorized sellers for compatibility with your model.
Watch Video
Key Takeaways
- Unplug and prioritize safety before any repair
- Identify heat, rotation, or airflow issues as first clues
- Test components with proper tools before replacing parts
- Know when to seek professional help for complex failures
- Maintain your GE dryer to prevent future breakdowns