Screen Window Repair: Step-by-Step Guide for Homeowners
Discover how to repair a screen window with beginner-friendly steps, from mesh selection to re-installing the frame. This Home Repair Guide tutorial covers tools, safety, and long-term care for durable screens.

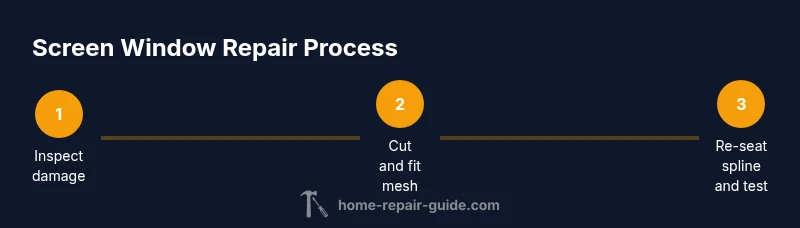
Goal: repair a screen window by fixing tears, replacing the spline, and reseating the frame. This guide covers damage assessment, mesh selection (fiberglass or aluminum), and practical steps to patch, spline, and test for a durable seal. You’ll learn when to DIY and when to hire a pro.
Why screen window repair matters
Screen window repair is essential for keeping insects and debris out while preserving airflow and natural light. Damaged screens can worsen drafts, invite pests, and diminish visibility through the glass. Addressing small tears, loose frames, and worn splines early saves money and extends the life of your windows. According to Home Repair Guide, a proactive approach to screen maintenance reduces frustration and keeps your home comfortable through seasonal changes. By fixing a tear or reseating a loose frame, you prevent larger problems, such as corrosion on metal frames or deterioration of the frame corners. In practice, a well-maintained screen supports energy efficiency by minimizing air leaks around the window and helps you enjoy fresh air without unwanted guests at the screen opening.
This section starts with recognizing common damage patterns—tears along the bottom edge, holes caused by pets, bent corners from slammed windows—and explains how simple fixes can restore function without a full window replacement. With the right tools and materials, most breaches can be repaired in under an hour, even for beginners. The goal is a taut, secure screen that fits snugly in its frame and lasts through several seasons.
Common screen types and materials
Window screens come in several materials and constructions, and choosing the right combination matters for durability and appearance. Fiberglass mesh is affordable, easy to handle, and resistant to rust, making it a popular choice for most households. Aluminum mesh is stiffer and more durable in areas with high wind exposure, but it can dent more easily if the frame is forced. The frame itself may be wood, aluminum, or vinyl; each requires different care when installing or replacing the mesh. The spline—the thin rubber or plastic strip that holds the mesh in the groove—comes in various diameters and materials. It’s crucial to match the spline with your frame groove to avoid loose edges or sagging.
When repairing screens, it’s important to consider climate, exposure to sunlight, and household pets. In sunny, coastal, or humid environments, fiberglass may resist corrosion better than metal screens, while aluminum screens fare well where pets are present due to their durability. For doors with frequent use, choose a heavier mesh to reduce wear. Your choice affects cleaning routines, visibility, and how often you’ll need to re-screen a panel. In short, the right mesh and frame combination provides long-lasting performance with minimal maintenance.
Measuring, selecting materials, and safety considerations
Accurate measurement is the foundation of a successful screen repair. Start by measuring the width and height of the screened opening, adding a small overlap on each side for a secure fit. Before purchasing mesh, determine the frame groove size and spline diameter by inspecting the existing spline channel or consulting the frame manufacturer’s guidance. Even small errors in measurement or spline choice can lead to sagging edges or gaps that invite pests. Safety considerations include wearing eye protection when cutting mesh and gloves to avoid sharp edges. If the frame appears bent or corroded, plan for selective frame repair or replacement rather than forcing a poor fit, which can compromise the entire panel.
Choosing materials that match the original screen ensures a visually consistent repair. If you’re unsure about the best mesh for your climate, a local home improvement store can provide recommendations based on exposure, humidity, and typical pests. The goal is a repair that not only looks good but also provides a durable seal against the elements. With careful measurement and the right materials, you’ll achieve a professional-looking result that lasts for years.
Common repair techniques: patching tears and re-spline
Repair techniques can vary depending on the severity of the damage. For small tears, you can patch from the backside using a bit of clear tape or a patch kit designed for window screens. For larger holes, patching with a resilient mesh is best. Replacing the spline is the most critical step if the mesh is loose or the frame has shifted. Carefully remove the old spline from the groove, clean debris from the channel, and insert the new spline with a spline roller to ensure a tight seal. If the frame is warped, use gentle readjustment to align corners before re-screening. The overarching principle is to keep the mesh taut without over-stretching, which can distort the frame or widen the gaps around the edges.
Always work in a well-lit area and maintain clean edges to reduce snags during installation. After seating the new spline, gently press along the edges to ensure the mesh is fully secured. Patch repair is fastest for minor damage, while replacing the spline provides the most durable long-term solution. In all cases, verify the panel is taut and has even tension before reinstalling.
Install and reseat the screen in the frame
With the mesh cut to size and the spline prepared, lay the mesh over the frame and align it with the groove. Use the spline roller to press the new spline into the groove, starting at a corner and working along the frame edges. Ensure the mesh remains taut as you go to prevent sagging or wrinkles. Trim any excess mesh with a utility knife held at a shallow angle to avoid nicking the frame. Reinstall the completed panel into the window frame, making sure the corners align with the frame channels. Test by pressing gently on the mesh and ensuring it stays tight when the window opens and closes. If pockets of slack appear near corners, re-seat the spline in those areas and re-tighten.
The final test should show a seam-free edge that holds up under routine use, resisting detachment during wind gusts or pet interactions. A securely re-screened panel contributes to energy efficiency by reducing air infiltration and keeps debris from entering the living space.
Maintenance and long-term care to extend life
Regular maintenance prolongs the life of screen windows. Clean panels with a soft brush and mild soap, avoiding harsh chemicals that can degrade the mesh. Inspect frames and corners periodically for signs of rust, bending, or worn spline, especially after seasonal transitions. When frames show signs of wear, address them early with straightening or replacement to prevent larger structural failures. Store spare mesh and spline in a dry, accessible location for quick repairs. By integrating a simple maintenance routine—inspect, clean, and replace worn parts—you’ll maintain screen integrity and preserve the look of your home for years to come.
Tools & Materials
- Replacement screen mesh (fiberglass or aluminum)(Choose mesh type based on climate and exposure; measure opening before purchase)
- Spline and spline roller(Select spline diameter to match frame groove)
- Screen frame tool or pliers (optional for corners)(Useful if frame corners are bent or misaligned)
- Utility knife or scissors(Keep blades sharp; trim mesh with care)
- Tape measure(Accurate measurements prevent waste and poor fit)
- Soft brush or cloth with mild soap(For frame cleaning before re-screening)
- Safety gear (goggles and gloves)(Protect eyes from mesh edges and hands from sharp corners)
Steps
Estimated time: 60-90 minutes
- 1
Remove the damaged screen
Carefully lift away the sash or panel and detach the old spline from the groove. Do not tear the frame; use a utility knife to relieve the spline without scratching the frame. Inspect the mesh for large tears to determine patch vs. replacement.
Tip: Take a quick photo of the frame before disassembly to recall the spline placement. - 2
Clean the frame and prepare the groove
Remove all old mesh fragments and clean the groove with a soft brush. Check for bent corners and small rust spots; address them before re-screening. A clean groove ensures a snug, long-lasting spline seal.
Tip: If corners are bent, gently straighten with pliers—avoid force that could crack the frame. - 3
Measure opening and cut replacement mesh
Measure width and height; add 1–2 cm of overlap on all sides to accommodate frame depth. Cut the mesh slightly larger than the opening to allow for trimming after seating the spline.
Tip: Cut a slightly larger piece first, then trim precisely after the spline is seated. - 4
Lay mesh over frame and insert spline
Position the mesh evenly and press into the groove with a spline roller, starting at a corner and progressing along the edges. Keep tension so the mesh remains taut without overstretching.
Tip: Work slowly and keep the mesh flat to avoid wrinkles that can snag during finale trimming. - 5
Trim excess mesh and reseat
Trim the mesh flush with the frame edge using a sharp knife, keeping blade at a shallow angle. Re-check the tension and adjust as needed to prevent sagging near corners.
Tip: Only trim after you confirm the spline sits evenly; trimming too early can cause loosening. - 6
Reinstall panel and test
Insert the repaired panel back into the window frame. Open and close the window several times to confirm a snug, secure fit and taut mesh with no gaps. If you hear rubbing or see edge gaps, reseat spline in those areas.
Tip: Test in a light breeze to simulate real conditions and catch subtle edge gaps. - 7
Final inspection and routine care
Inspect for any sagging sections, re-tighten corners, and wipe frames to remove residue. Schedule regular checks at least twice a year to catch wear early and extend the life of the screen.
Tip: Document maintenance reminders in a home repair log for quick reference.
FAQ
What is the best mesh material for exterior window screens?
For exterior use, fiberglass mesh is common due to affordability and corrosion resistance, while aluminum offers extra durability in windy areas. Consider climate and pests when choosing.
Fiberglass is common and affordable for exterior screens, while aluminum lasts longer in windy areas. Pick based on climate and pests.
When should I replace the spline?
Replace the spline if it is cracked, brittle, or loose. A worn spline fails to hold the mesh securely and will cause edge sagging.
Replace a cracked or loose spline to keep the mesh tight and prevent sagging.
Can I reuse a bent frame for a repair?
A slightly bent frame can sometimes be corrected, but significant bends or corrosion usually require frame replacement for a proper seal and long-term durability.
Minor bends can be straightened; major bends mean you should replace the frame.
How long does screen window repair take?
Typical repairs take between 45 and 90 minutes depending on damage size and frame condition. Complex frames or replacements may take longer.
Most repairs take under 2 hours, depending on damage.
Is it safe to repair screens indoors?
Repairing screens indoors is fine if you can manage dust and debris. For outdoor screens, work in a sheltered area to avoid weather-related complications.
Yes, indoors is fine if you keep things tidy; outdoors can be better in windy weather.
How can I maintain screens to prevent future damage?
Regular cleaning, periodic inspection for tears, and timely spline replacement extend screen life. Store spare mesh and spline for quick future repairs.
Clean screens regularly, check for tears, and replace spline as needed to extend life.
Watch Video
Key Takeaways
- Inspect and measure accurately before buying materials.
- Choose mesh and spline to suit climate and frame type.
- Keep the mesh taut but not overstretched for durability.
- Test the repaired panel in real use to ensure a secure seal.