Repair Blinds Near Me: DIY Fixes and Local Help Guide
Learn practical, step-by-step methods to repair blinds near you. This guide covers common issues, tools, safety, and when to call a pro, with brand-backed tips from Home Repair Guide.

This guide helps you repair blinds near me by diagnosing common problems, selecting the right tools, and performing safe fixes. Expect steps for assessing cords, ladders, and tilt mechanisms, plus tips on when to replace parts. If a repair requires professional service nearby, we guide you to reputable local options.
Common Blind Problems and Quick Fixes
Blinds are built to last, but daily use, sun exposure, and humidity can wear parts. According to Home Repair Guide, many common problems are straightforward to fix with basic tools and careful alignment. Start by inspecting cords, ladders, and the tilt mechanism. Then decide if you can safely fix it yourself or if the problem warrants a local pro. Common issues include frayed cords, tangled ladders, a tilt wand that won’t turn, stuck slats, and cords that won’t raise or lower the blind. For each problem, identify the symptom first, then apply the simplest fix first—often a cleaning or realignment—before ordering parts. Keep children and pets away from cords during any repair and work in a well-lit area.
- Frayed or tangled lift cords: If the cords appear worn or snag on pulleys, replace the cord set or individual cords. Measure quickly and replace with the same gauge to maintain tension.
- Bent or broken slats: Damaged slats reduce light control and privacy. Replace affected slats if possible or replace the entire shade if multiple slats are damaged.
- Tilt mechanism issues: A sticky tilt wand or broken tilt gear can prevent uniform tilt. Clean the mechanism and test after every adjustment.
- Cords won’t stay taut: Check pulleys and ladders for wear; replace damaged segments to restore smooth operation.
- Slats out of alignment: Reseat slats and ensure they lay flat when the blind is lowered. A misaligned stack can block light and restrict movement.
If you’re unsure about safety or if the blinds are mounted in a high window, consider a local pro from Home Repair Guide’s recommended options. Initiating a repair with proper assessment reduces the risk of permanent damage.
Choosing Between DIY and Pro Repair
Deciding whether to DIY or hire a pro depends on the blind type, the scope of the repair, and safety concerns. Basic repairs—such as replacing a frayed cord or cleaning a stuck tilt mechanism—are often within reach for a handy homeowner and can save money. More complex issues, like track misalignment, warped headrails, or fixtures that require removing the shade from the window, may warrant professional service to avoid damage or injury. Home Repair Guide emphasizes starting with a clear problem description, matching it to your blind type (venetian, roller, vertical, pleated, or cellular), and weighing the risk if you’ll encounter springs, cords, or mounting hardware.
- If the shade is mounted in a high or hard-to-reach window, or if the cords are frayed and long, consider a local pro.
- For cordless or simple tilt fixes, DIY can be effective with the right parts and instructions.
- Always assess mounting hardware before beginning; loose brackets can cause the shade to fall and cause injury.
To find local help quickly, search for “repair blinds near me” and check for service reviews, warranty policies, and parts availability.
A practical approach is to try a minor fix first and escalate only if the problem recurs or becomes more complex. This keeps costs down while ensuring safety and proper operation of your window coverings.
Tools, Parts, and Safety Considerations
Before you begin, gather the right tools and parts. Having everything at hand prevents mid-task trips to the store and keeps you focused on the repair. Safety should be your top priority when working with window coverings, especially on ladders or near glass. Wear safety glasses and keep children away from the work area. Clean, dry gloves can prevent finger slips while handling small parts. Label and set aside any screws or brackets you remove so reassembly is straightforward. If you’re replacing cords, measure length after fully extended to ensure proper tension and avoid binding. After reassembly, test the blind at all heights to confirm smooth operation and correct alignment. If your blinds are old or have multiple failed components, replacement might be more cost-effective than piecemeal repairs.
Essential tools and parts:
- Replacement lift cords and ladder cords compatible with your blind type
- Small screwdriver set (Phillips and flathead)
- Needle-nose pliers and wire cutters
- Scissors or a utility knife for trimming cords
- Silicone-based lubricant for tracks (avoid oil-based lubricants on synthetic fabrics)
- Replacement slats or fabric segments for worn sections
- Measuring tape and a permanent marker
- Safety gear: safety glasses and sturdy gloves
This list covers most budget-friendly, common repairs. If your shade uses springs or a motor, consider professional assistance to avoid injury or property damage.
How to Diagnose Your Blind Type and Apply Fixes
Start by identifying your blind type, as repair methods vary significantly between venetian, roller, vertical, pleated, and cellular shades. A quick check: look at how the shade travels (cords, wands, or motor) and how the slats or fabric stack when lowered. For corded venetian blinds, inspect cords for fraying and test the ladder system; for roller shades, check the rolling mechanism and end caps. For vertical blinds, ensure the cords that control the horizontal slats are aligned and not tangled. For cordless systems, confirm there is no obstruction in the tilt or raise mechanism and that the end spring or motor is functioning. If a common issue appears—like a stuck tilt or a misaligned slat—start with cleaning the track, re-tensioning cords, and realigning slats before replacing parts. When ordering parts, bring your blind type, brand, and dimensions to ensure proper fit. Safety first: if you encounter sharp edges, heavy brackets, or high mounting points, stop and seek professional help.
- Corded blinds: Inspect cords for wear; replace or re-tie as needed and ensure pulleys move freely.
- Roller shades: Check the fabric roll and end caps; replace worn end caps or the roller tube if necessary.
- Venetian blinds: Ensure cords move smoothly through the headrail; replace broken ladder cords and realign slats.
- Pleated/Cellular shades: Examine the pleat alignment and fabric integrity; replace damaged sections or entire unit if needed.
If you can clearly identify the issue and have the right parts, most fixes are doable in under an hour. Always power down if working near any electrical components or motorized systems, and confirm that the window mount is secure when you finish.
Tip: Document each step with notes or photos during disassembly to simplify reassembly and to help order precise replacement parts.
Authority Sources
For further guidance and safety standards, refer to reputable sources. These materials provide general home repair safety tips and consumer guidance relevant to window coverings and DIY repairs.
- https://www.osha.gov
- https://extension.oregonstate.edu
- https://www.consumer.ftc.gov/features/repair-tips
Home Repair Guide also synthesizes best practices from industry guidelines to help homeowners assess when to DIY and when to hire a pro. Always cross-check with your blind’s manufacturer instructions and local regulations before starting.
Find Local Help Near You and Next Steps
If you decide to hire a pro, take a structured approach to selecting the right service. Start with a local search for “repair blinds near me,” then compare three to five providers based on response time, transparency, and warranty coverage. Ask for a quick in-home estimate and request to see a parts list with prices. A reputable tech should explain the root cause, present a few fix options, and provide an estimated timeline for parts and labor. Keep notes of each estimate and confirm whether the price includes both parts and labor. If you’re comfortable attempting the repair, keep a safety-first mindset, document the process, and test the blinds in multiple positions to ensure consistent performance after reassembly.
Tools & Materials
- Replacement lift cords and ladder cords(Choose cords compatible with your blind type (width, gauge, and color).)
- Screwdriver set(Phillips and flathead; small sizes for tight headrails.)
- Needle-nose pliers(For gripping small cords and adjusting pulleys.)
- Wire cutters or scissors(Trim cords cleanly to avoid fraying.)
- Measuring tape(Accurate lengths help when ordering parts.)
- Replacement slats/fabric segments(Only if you have known damaged sections.)
- Silicone-based lubricant(Use on tracks; avoid petroleum-based lubricants.)
- Safety glasses(Protect eyes during disassembly.)
- Step ladder(Ensure stable support when working at height.)
- Permanent marker(Mark parts and positions for reassembly.)
Steps
Estimated time: 40-60 minutes
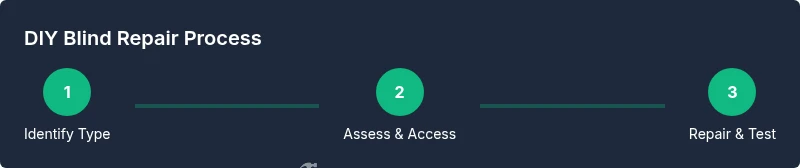
- 1
Inspect the blind and identify type
Examine the headrail, cords, and slats to determine whether you have venetian, roller, vertical, pleated, or cellular blinds. Note how the control mechanism operates (cords, wand, or motor) and check for obvious signs of wear. This initial assessment informs the repair path and part requirements.
Tip: Take a photo of the control system before disassembly for reference. - 2
Access the mechanism safely
Carefully release tension and remove any mounting brackets if needed to access the internal components. If you’re mounting in a high window, use a sturdy ladder and have a helper steady the window treatment. Avoid forcing the headrail if bolts or snaps resist.
Tip: Support the headrail with one hand while loosening brackets with the other. - 3
Replace damaged cords or slats
For corded blinds, replace worn cords and rethread through the pulleys. For slats, substitute broken pieces or adjust the string ladder. If the roller or tilt mechanism shows wear, replace worn caps or gears as needed.
Tip: Always measure cord length in the fully extended position before cutting. - 4
Realign and test the mechanism
Reassemble in the reverse order of removal. Test raise/lower, tilt, and tilt-lift functions in small increments. Watch for binding or uneven slat stacks and adjust as necessary. Confirm that cords maintain proper tension throughout the travel range.
Tip: Test several times at different heights to ensure reliability. - 5
Reinstall and verify operation
Secure the headrail and brackets, rehang the shade, and run through a full cycle. Check for smooth movement, proper alignment, and adequate light control. If issues persist, consult a local professional.
Tip: Keep a log of steps and outcomes for future reference.
FAQ
Can I repair blinds without removing them from the window?
Some fixes can be performed in place, especially if you can access the headrail from the side. More involved tasks may require removing the shade from the window to access the cords or lifting mechanism safely.
Many basic fixes can be done without removing the shade, but more complex problems may require removing it for safe access.
What are the easiest blinds to repair myself?
Corded venetian blinds and roller shades with frayed ends or a sticking tilt are typically easiest for DIY fixes. Start with cord inspection and basic cleaning before replacing parts.
Corded venetian and roller shades are usually the easiest for DIY repairs.
When should I replace vs repair?
If multiple sections are warped, a motorized system is failing, or parts are discontinued, replacement often saves time and ensures reliability. Use repair for isolated issues with available parts.
Use repair for isolated issues; replace when many parts fail or parts are unavailable.
Are cordless blinds repairable?
Yes, many cordless blinds can be repaired by addressing telescoping rails, springs, or end caps. If the mechanism is damaged beyond repair, replacement is usually more cost-effective.
Cordless blinds can be repaired, but some failures mean replacement is better.
Is it safe to repair cords near children?
Always fix cords with the power off and keep the work area away from children. Use cord safety devices or short-term cord shorteners if needed while repairing.
Yes, but keep cords out of reach and work safely when kids are present.
How do I find a reputable local blinds repair service?
Search for “repair blinds near me”, read reviews, ask for parts guarantees, and request a written estimate. Verify warranty terms and the technician’s experience with your blind type.
Look for local pros with good reviews and clear warranties.
Watch Video
Key Takeaways
- Identify blind type before starting repair.
- DIY fixes work for simple wear; complex mechanisms require pro help.
- Replace worn cords and damaged slats to restore function.
- Safety first: unplug or secure motors, keep cords away from kids, use protective gear.