How to Remove a Pocket Door for Repair: Step-by-Step Guide
A comprehensive, step-by-step guide to safely remove a pocket door for repair. Learn safety, tools, removal steps, inspection tips, and reinstallation considerations from Home Repair Guide.

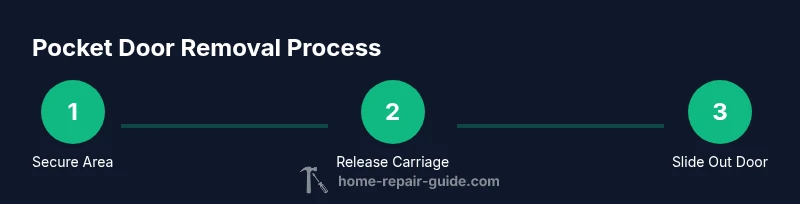
To remove a pocket door for repair, safely detach the door from its track and slide it out of the pocket. Start by securing the door, releasing the rollers, and disconnecting any carriage screws. Then lift the panel clear of the track and set it aside. This prepares you for track inspection, wheel replacement, or frame repairs.
Understanding Pocket Doors and When to Remove
Pocket doors are space-saving doors that glide into a wall cavity rather than swinging open. They rely on a top-mounted track, roller carriages, anti-jump blocks, and a door panel that slides into a built-in wall pocket. Removing a pocket door is typically necessary when the track is misaligned, rollers are worn, the pocket is damaged, or the door won’t travel smoothly. According to Home Repair Guide, most removal scenarios start with a safe assessment of clearance, followed by gradual disengagement of the door from the track. A careful approach minimizes wall damage and avoids dropping the panel into the pocket, which can complicate repairs.
Understanding the layout helps you plan the sequence: confirm wall framing behind the pocket, locate the mounting screws or brackets that hold the carriage, and recognize whether the door is a single panel or a bi-fold design. Some systems feature quick-release pins, while others rely on retaining screws that secure the carriage to the door. Visual inspection of the track for bends, dents, or rust can anticipate what to repair after removal. This upfront awareness sets you up for a smoother repair workflow and reduces the risk of incidental damage to the wall or door.
The Home Repair Guide team emphasizes that a deliberate plan and correct safety measures matter as much as the mechanical steps. You’ll gain confidence by mapping the removal to the specific hardware in your setup, and you’ll be better prepared to reinstall or replace components after repairs are complete.
Safety First: Prepare Your Workspace and Tools
Before touching any hardware, clear the area around the doorway. Remove furniture or obstructions, and lay down a drop cloth to catch screws or small parts. Turn off nearby electrical outlets if the wall cavity contains wiring, and wear safety glasses and work gloves to protect against sharp edges and flying debris. Having a helper is advised for heavy panels, especially when you’re lifting or maneuvering the door clear of the pocket. A bright work light helps you see inside the pocket and identify screws or brackets you’ll need to loosen.
Prepare your notes or a label system to keep track of screws, brackets, and roller components as you remove them. If you’re unsure about any wiring or damage behind the pocket wall, pause and consult a professional. The goal is to minimize risk of drywall damage, keep track of hardware, and maintain control of the door as it moves.
Tools and Hardware Essentials for Pocket Door Removal
A successful removal relies on selecting the right tools and understanding the hardware. Gather a drill/driver with appropriate bits, screwdrivers (flat and Phillips), adjustable pliers, a utility knife, a level, a tape measure, a small pry bar, and a flashlight. A step ladder or stable stool ensures you can access the top track safely. Don’t forget safety gear: safety glasses and gloves protect from sharp edges and splinters. If the door is heavy, a second person can help; otherwise support the panel with a sturdy helper to maintain control as you free it from the track.
Keep small parts in labeled containers or a magnetic tray. Photograph or jot down the order of screws and brackets as you remove them to simplify reassembly. Labeling is especially useful if your door uses a mix of screws and carriage bolts that differ in size or length. The right toolkit streamlines the removal and reduces the risk of missing fasteners during reinstall.
Step-by-Step Overview of the Removal Process
Removal generally follows a logical sequence: secure the door and bed it against movement, release the track fasteners that hold the carriage to the door, and carefully disengage the roller from the track. Once the rollers are free, tilt the door slightly and slide it toward the pocket opening to clear the edge of the pocket. If the pocket has a flange or mounting bracket, loosen those fasteners to free the door’s entry path. Finally, with the door supported, lift it outward and set it on a padded surface to prevent impact with walls or trim.
This overview helps you anticipate when to pause for a measurement check or to confirm you’ve freed all fasteners. It also clarifies which components you will inspect after removal—track integrity, roller wear, and potential wall pocket damage. Remember to keep your hands clear of the door’s edges and to work slowly to avoid pinch points.
Accessing the Pocket and Removing the Door
With the door secured, access the pocket by locating the track’s attachment points at the top of the doorway. Remove any visible screws or brackets that anchor the carriage to the door. If your system uses spring or anti-jump features, release those parts carefully to avoid sudden door movement. Once the carriage is free, slowly tilt the door toward the room and maneuver it along the track’s length until the rollers clear the track and the door can be slid free from the pocket.
Take care not to drop the door into the pocket; doing so can bend the track or damage the wall. If the pocket is tight, slightly angle the door to reduce friction as you slide it out. Label screws and brackets as you remove them so you can reinstall the same parts in their original positions. A helper at this stage can prevent the door from twisting or dropping unexpectedly.
After Removal: Inspection and Repair Planning
Once the door is out, inspect the track for rust, bends, or misalignment. Check the rollers for wear, and evaluate the carriage wheels for smooth operation. Measure the door’s thickness and width to ensure replacements match the original dimensions. If the wall pocket is damaged, assess whether repair requires patching, re-anchoring the track, or replacing the pocket framing. Planning at this stage saves time during reinstall and helps you select compatible replacement parts.
Document findings with photos and notes. If you plan to replace brackets or the track, verify that the new components match the original mounting pattern. Consider whether you need to trim or adjust the jambs or to add shims to correct door alignment after reinstallation. This planning phase makes the repair more predictable and helps you budget for any necessary parts.
Reinstallation Considerations and Maintenance
Before reinstalling, clean the track and pocket area of dust and debris. Reattach the track brackets, ensuring they are square and level, then reinstall the carriage and rollers on the door. Slide the door back into the pocket and test the travel by gently moving it along the track. If the door binds, adjust the track height or roller alignment until it moves smoothly. After a successful reinstall, check that the door closes fully and latches without rubbing, and consider lubricating the track with a silicone-based lubricant for quieter operation.
Record any changes you made to the hardware or pocket, and note maintenance steps for future upkeep. Ongoing maintenance saves energy, reduces wear, and extends the life of the pocket-door system. The Home Repair Guide team recommends performing a quick maintenance check at least once a year to catch wear before it affects performance.
Tools & Materials
- Drill/Driver with bits(PH2 and flat-head bits; 1/4 in standard chuck)
- Phillips and flathead screwdrivers(Assorted sizes for different fasteners)
- Pliers (needle-nose)(For grip and small parts)
- Utility knife(Cut caulk or sealant if present)
- Tape measure(Verify dimensions for replacement parts)
- Level(Check track square during reinstall)
- Safety glasses(Protect eyes from debris)
- Work gloves(Protect hands during heavy lifting)
- Flashlight / headlamp(Illuminate pocket and track)
- Step ladder(Access top track safely)
- Magnetic tray or small containers(Keep screws organized)
- Dust mask (optional)(If cutting drywall near pocket)
- Helper (person)(Assist with heavy door)
Steps
Estimated time: 60-90 minutes
- 1
Prepare the workspace
Clear area, protect floors, and plan a safe path to move the door. Identify electrical hazards and ensure the room is well-lit. Have a helper ready if the door is heavy.
Tip: Set down a drop cloth and label all fasteners as you remove them. - 2
Secure the door and align it
Brace the door to prevent it from swinging or dropping. Use clamps or a helper to hold it in place while you inspect fasteners.
Tip: Do not force the door; secured handling reduces risk of wall damage. - 3
Release the carriage screws
Locate and loosen the screws or pins that attach the carriage to the door. If the track has a stop bolt, back it out slowly to avoid sudden movement.
Tip: Take a photo of the carriage before removal for reference. - 4
Detach rollers from the track
Carefully lift and tilt the door to disengage the rollers from the top track. Keep the door level to prevent binding or dropping into the pocket.
Tip: Keep your hands away from the door edges during disengagement. - 5
Remove the door from the pocket
With the rollers free, gently guide the door toward the room and slide it out of the pocket opening. Support the panel to prevent impact with walls.
Tip: If the pocket feels tight, adjust angle slightly to reduce friction. - 6
Inspect hardware for wear
Assess the track, rollers, and brackets for rust, bends, or wear. Measure gaps and ensure replacement parts match the original dimensions.
Tip: Document wear with photos for easy reference later. - 7
Plan for reinstall or repair
Decide whether you’ll replace worn components or repair the track. Prepare the exact parts and components before starting reinstallation.
Tip: Test-fit before attaching screws to ensure proper alignment. - 8
Safety check and clean-up
Inspect the area for loose screws, clear debris, and ensure safe pathways. Reinstall or repair with a planned sequence and verified alignment.
Tip: Store hardware in labeled containers to avoid mix-ups.
FAQ
Why would I remove a pocket door for repair?
Removal is typically needed to access the track, rollers, or pocket framing for inspection or replacement. It also allows you to clean debris that can hinder smooth operation.
You remove the pocket door to access the track and rollers for inspection or replacement, and to clean debris that slows operation.
Do I need to remove molding to take out the pocket door?
Often you can remove the door without removing decorative molding, but in some installations, a trim piece must be gently pried away to free the pocket opening. Work slowly to avoid damage.
Usually you can avoid removing molding, but some setups require a light pry to free the pocket opening. Be careful with the trim.
Is it safe to remove a pocket door by myself?
Yes, with proper safety precautions, a second helper, and the right tools. Do not attempt if the door is unusually heavy or if you’re unsure about wiring behind the wall pocket.
Yes, with caution and the right tools, and if the door is too heavy, get someone to help or hire a pro.
What tools are essential for pocket door removal?
Essential tools include a drill/driver, screwdrivers, pliers, a level, a tape measure, safety glasses, gloves, and a flashlight. A step ladder is helpful for top-track access.
You’ll need a drill, screwdrivers, pliers, level, tape measure, safety gear, and a good light.
How do I reinstall after repair?
Reinstall by reversing removal steps: fit the door into the pocket, reattach the rollers to the track, level the door, and tighten fasteners. Then test operation and adjust for smooth travel.
Put the door back in the pocket, secure the rollers, level it, then test and adjust as needed.
Can pocket doors be repaired without removing them?
Some minor fixes can be done without complete removal, such as track lubrication or minor alignment tweaks. For major repairs, removal is usually required to access the pocket and hardware.
Minor fixes may be done without full removal, but major repairs usually require removing the door.
Watch Video
Key Takeaways
- Plan your removal with safety in mind.
- Label hardware to simplify reinstall.
- Inspect track and rollers for wear after removal.
- Test and align the door carefully during reinstall.